I recently switched to all LED lights on my 2014 Ford F250 Super Duty using lights from SuperBrightLEDs.com. It was a fairly straightforward process except for the turn signals. I kept getting weird voltage outputs using my volt meter and random hyper-flashing problems that I couldn’t narrow down to any particular cause at the onset but eventually I was able remedy the turn signal hyper flash issues using four 50 watt LED resistors. Specifically, I used these 6 Ohm, 50 watt resistors: https://www.superbrightleds.com/moreinfo/flashers-load-resistors/led-light-load-resistor-kit-led-turn-signal-hyper-flash-warning-fix/190/831/
I started with the driver’s rear turn light. The two wires I needed to tap into were the GRAY/BROWN (positive turn) and BLACK/WHITE (ground) wires. Once I added the resistor to the driver’s side rear turn light my continuous hyper-flash stopped. I mounted the resistor away from any wires onto the frame of the truck (back of the taillight housing). This helped draw heat from the resistor.

Next was the passenger’s rear turn light. The two wires I needed to tap into were the VIOLET/ORANGE (positive turn) and BLACK/WHITE (ground) wires. Oddly enough, I never had any hyper-flash on the passenger side of the truck but to keep the install consistent, and according to installation instructions which states that an LED resistor should be added to every LED flash bulb, I decided to install the resistor anyway. Once again, I mounted the resistor to the metal frame of the truck away from wires.
These resistors were the easiest to install. Following the instructions, I then moved to install resistors on the driver and passenger front turn signals.
Now, before I go into the next section let me add some tips on headlight access in the 2014 F250 Super Duty. The Ford manual states that the grille must be removed first followed by the headlight assembly to access the three bulbs (headlight, turn/park, and side marker) for maintenance. That is not possible on my Super Duty due to my Ranch Hand grille guard (it’s also absurd and a failure on Ford’s part, in my opinion). I narrowed down access to the front bulbs to three options from hardest (for me) to easiest:
- Remove the grille, any accessories blocking the grille, and headlight assembly according to Ford. This would be the most difficult as I would also have to remove a 159lb grille guard and all supporting equipment just to change the bulbs.
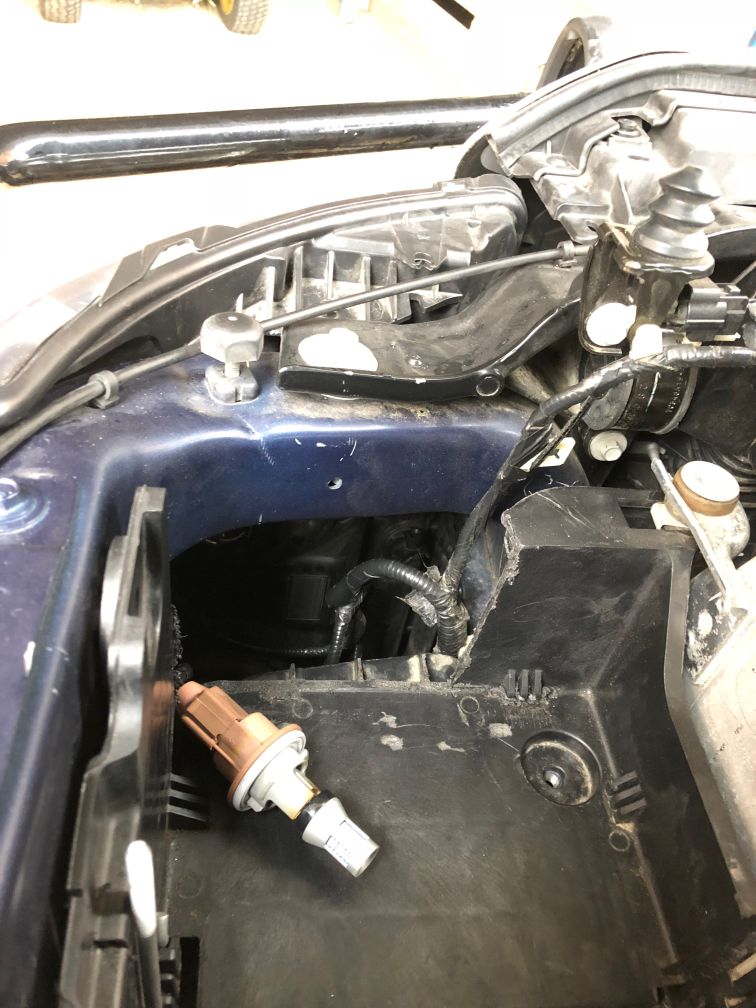
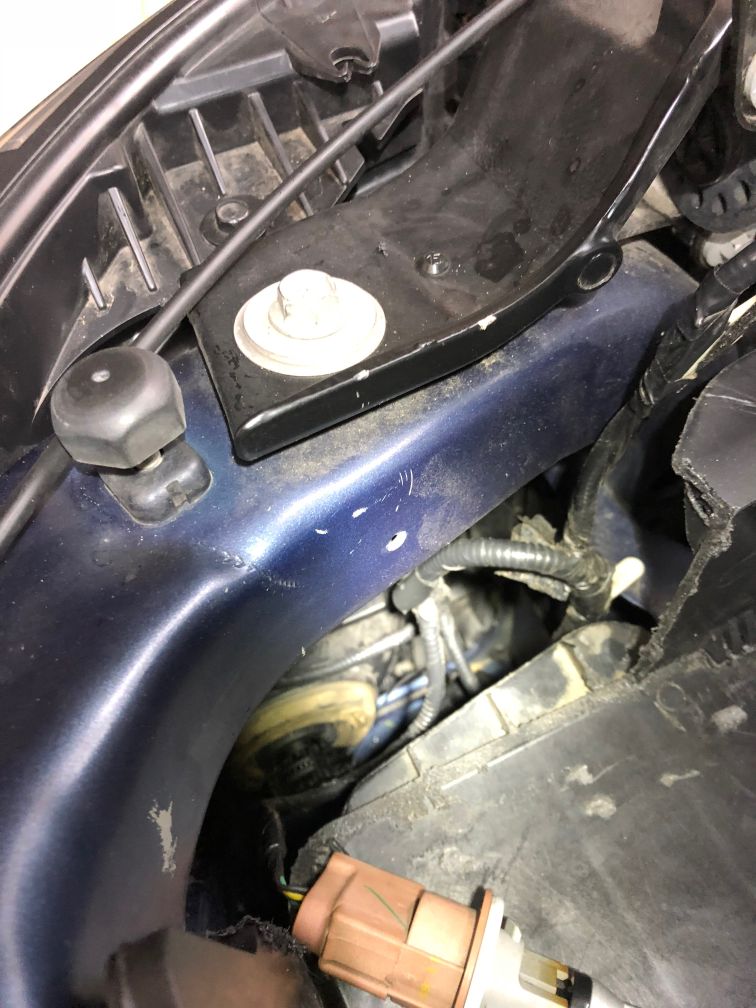
- Remove the driver’s side wheel well protector, turn the front wheels to the far right, and access the driver’s side headlight assembly from the bottom. On the passenger side remove the air filter, air box, and air intake shroud. This was the easiest and required no modification of the vehicle.
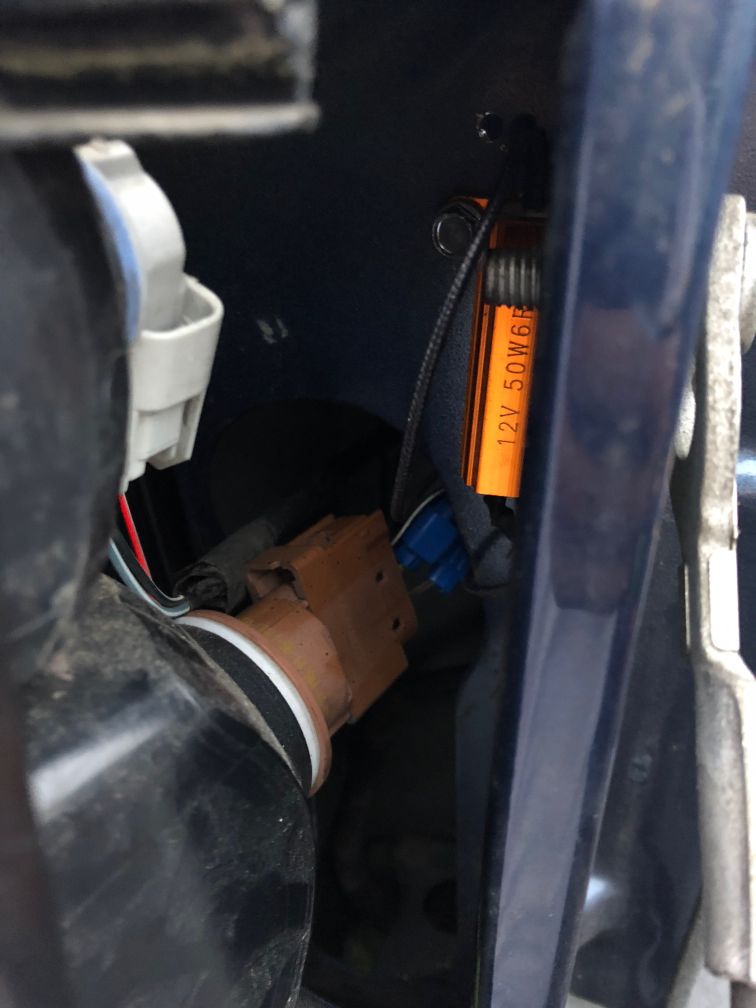
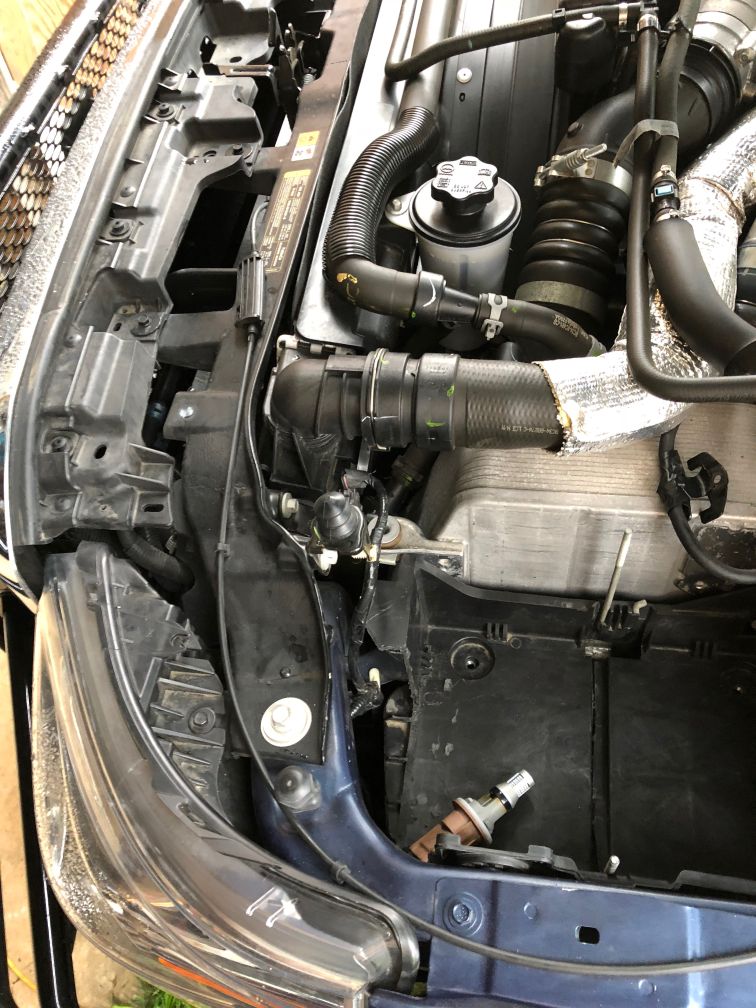
- Cut a section of the driver’s side battery box to easily reach all three driver’s side headlamp bulbs (do not split or cut the box in half as there is a vacuum box assembly below the battery box). On the passenger side remove the air filter, air box, and air intake shroud. After option 2, this is now my easiest option and now allows me to access the driver side and passenger side bulbs by only needing to remove one battery and air intake moving forward. Pics below.
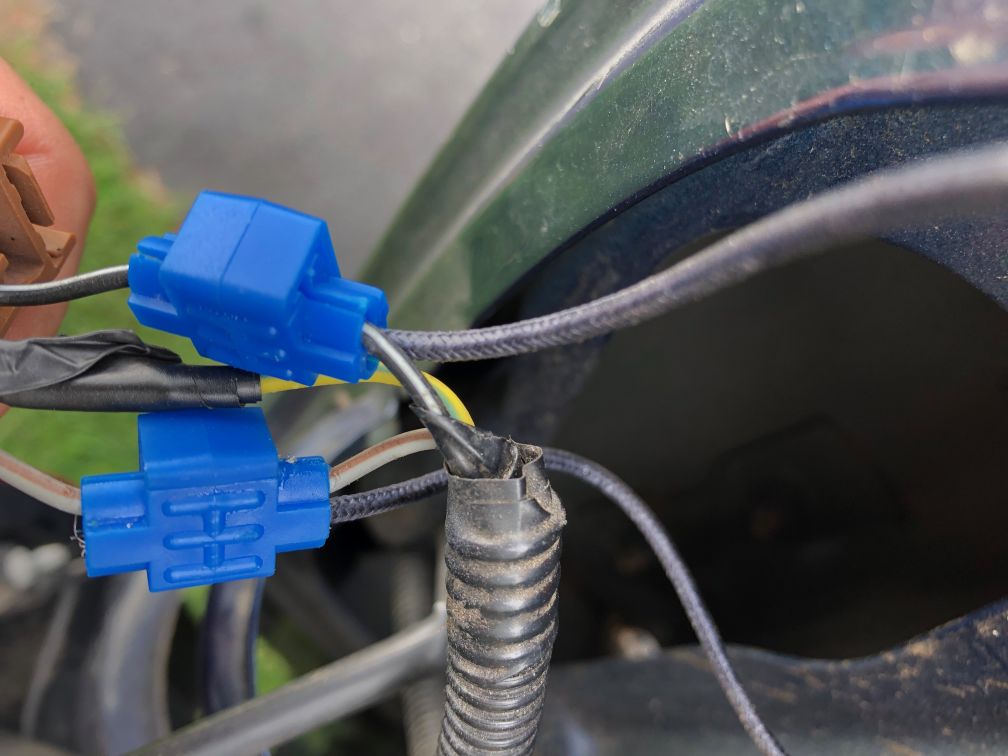
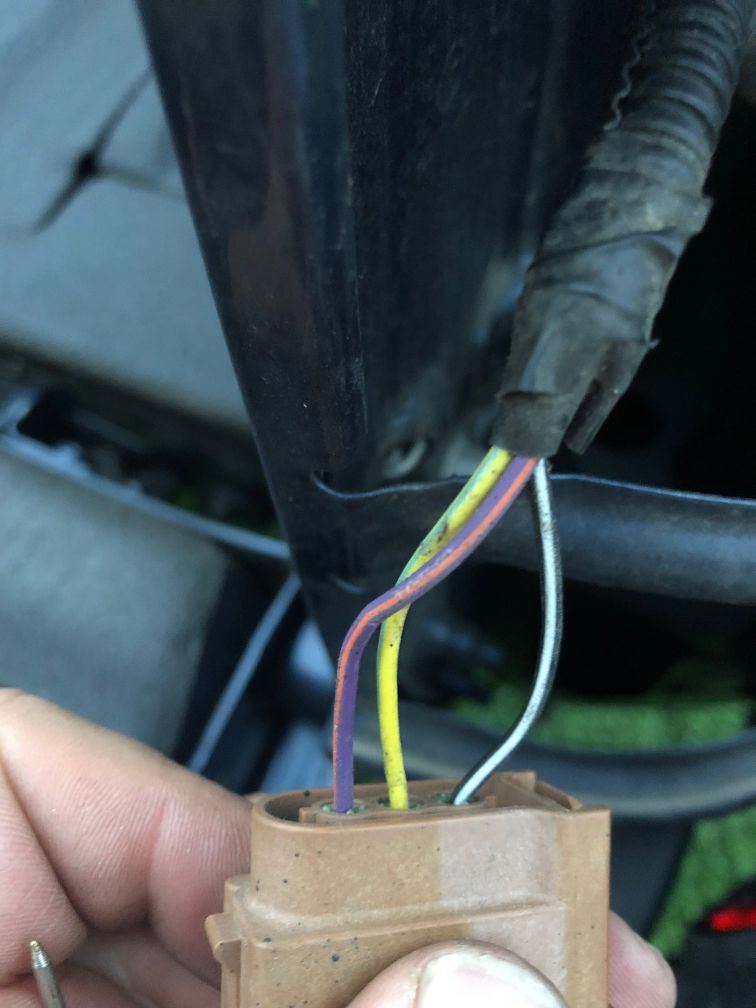
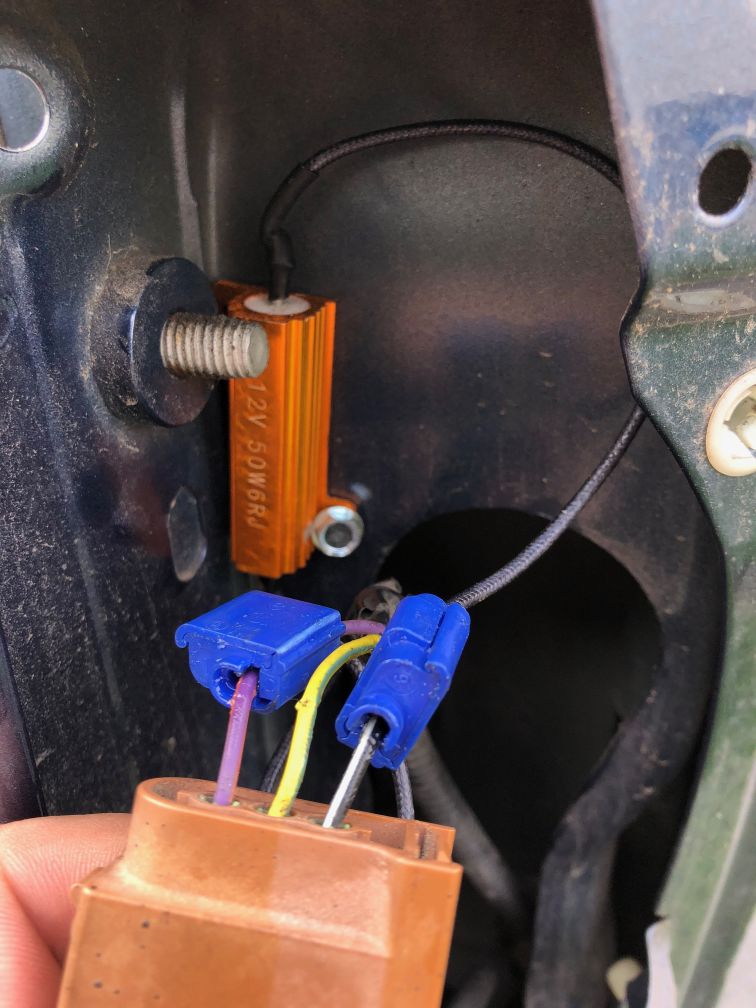
On the driver’s side turn light, the two wires I needed to tap were BLUE/GREEN (positive turn) and BLACK (ground). On the passenger’s side turn light, the wires I needed to tap were YELLOW/VIOLET (positive turn) and BLACK/VIOLET (ground). Again, I mounted the resistors to the metal frame. I slightly cut out a piece of plastic to expose the metal frame on the passenger’s side. On the driver’s side there were no obstructions to mounting on the metal frame. As I mentioned before, I notched out the battery box to make future access to the driver’s side bulbs much easier. See the pictures of front install below.

A few final observations:
- I’m very pleased with how the LED lamps turned out. They are much brighter than the incandescent and adding them to the truck was an easy to moderate task including the modifications needed to make the lights work.
- I noticed that all of the turn lamps on the 2014 F250 used the outside wires for positive/negative resistor connections. At no time was the middle wire used in any of the harnesses (this is/should be the positive park).
- I didn’t have a 2014 F250 wiring diagram but I did have a 2012 F350 wiring diagram. For the purposes of my turn light install the diagram was spot on. You can find the diagram here.
- Verify your voltages with a volt meter. No lights = no voltage (maybe some transient voltage but never over 0.03 volts). When on and flashing, normal voltages I measured should jump between +2 and +9 volts (or +4 after the resistor is installed). You can see a YouTube video of the turn signal on and voltages here: pre-resistor install https://www.youtube.com/watch?v=ig27lZW9PnM and post-resistor install https://www.youtube.com/watch?v=GLxeMjL9cxQ.
i did it with the same wires on my truck. the pass. rear flashes fast. the driver rear was ok for the 1st try then it flashes fast too. what’s next??
What resistor did you use?
Did you place it on the front and rear harnesses?
Very connectivity between the wires. If there is a bad connection or loose connection then this would cause the hyper flash. Verify (again) the correct wires were used.
not sure the brand name but they are the ones used for the lights for hyper flashing. i used them on the passenger side front and rear. driver rear only as i didn’t have time right now to pull the grill off. the resistor on the front pass. took care of the flash. the connections are good. i didn’t test the wires but i saw a video of the same year and model of my truck, and it showed the same colored wires. i bought a set of lights with the resistors built in, i’ll try those when they come in.
I had random hyper-flash and normal flash when I only had one resister on my rears. I ended up installing a pair (one driver, one passenger) in the front of my truck, in addition to the set I had installed in the rear, to correct the hyper flash permanently.