Background
Well it’s been almost 5 years since I wrote the first compiling SharkRF connector on Ubuntu guide and a lot has changed since then. Yesterday, I spent about three hours helping Matt J. setup SharkRF on his Raspberry Pi and after that meeting, I realized that maybe it is time to write a new guide. Coincidentally, I was targeting December of this year to get back into DMR and digital voice.
With that in mind, I stood up a SharRF connector server on Ubuntu 22.04.1 LTS in 48 minutes last night from scratch. I guess a lot of “the old” still applied here but I did run into a unique problem, which I’ll mention below.
This guide is based on steps that work for me on Ubuntu 22.04.1 LTS. Your mileage may vary and I know, without a doubt, that what Matt J. and I worked on yesterday is not what worked for me today. However, I’ll call that difference out below.
Layout
This guide is broken into two “main” sections. The first part includes screenshots with the commands for those, like myself, who are visual learners and I start at the very beginning: actually deploying the Ubuntu server on VMware vCenter 7.0. The second part is command-only for those that need to zip through the guide without pics. Scroll to the bottom of this post for the commands only.
I’ve tried my best to {code} block the commands to eliminate spacing and character issues when copying and pasting. Additionally, I’ll call out deviations from the deployment yesterday compared to today in orange.
Lastly, this is not a point-and-click deployment. It requires some understanding of Linux, Github, Apache2, and importantly, good security principals. I am not going to cover every single aspect of the deployment, but I will provide you a setup to get you up and running. You will need some understanding of networking too as you will be required to forward ports to your server which is not covered in this guide but needed if you want access from the internet. It is imperative that you take some time to learn what you are deploying, especially if you are building a public-facing server, so that it does not become weaponized for cyber attacks. Tread at your own risk!
Section 1 – Part 1 – Installing Ubuntu
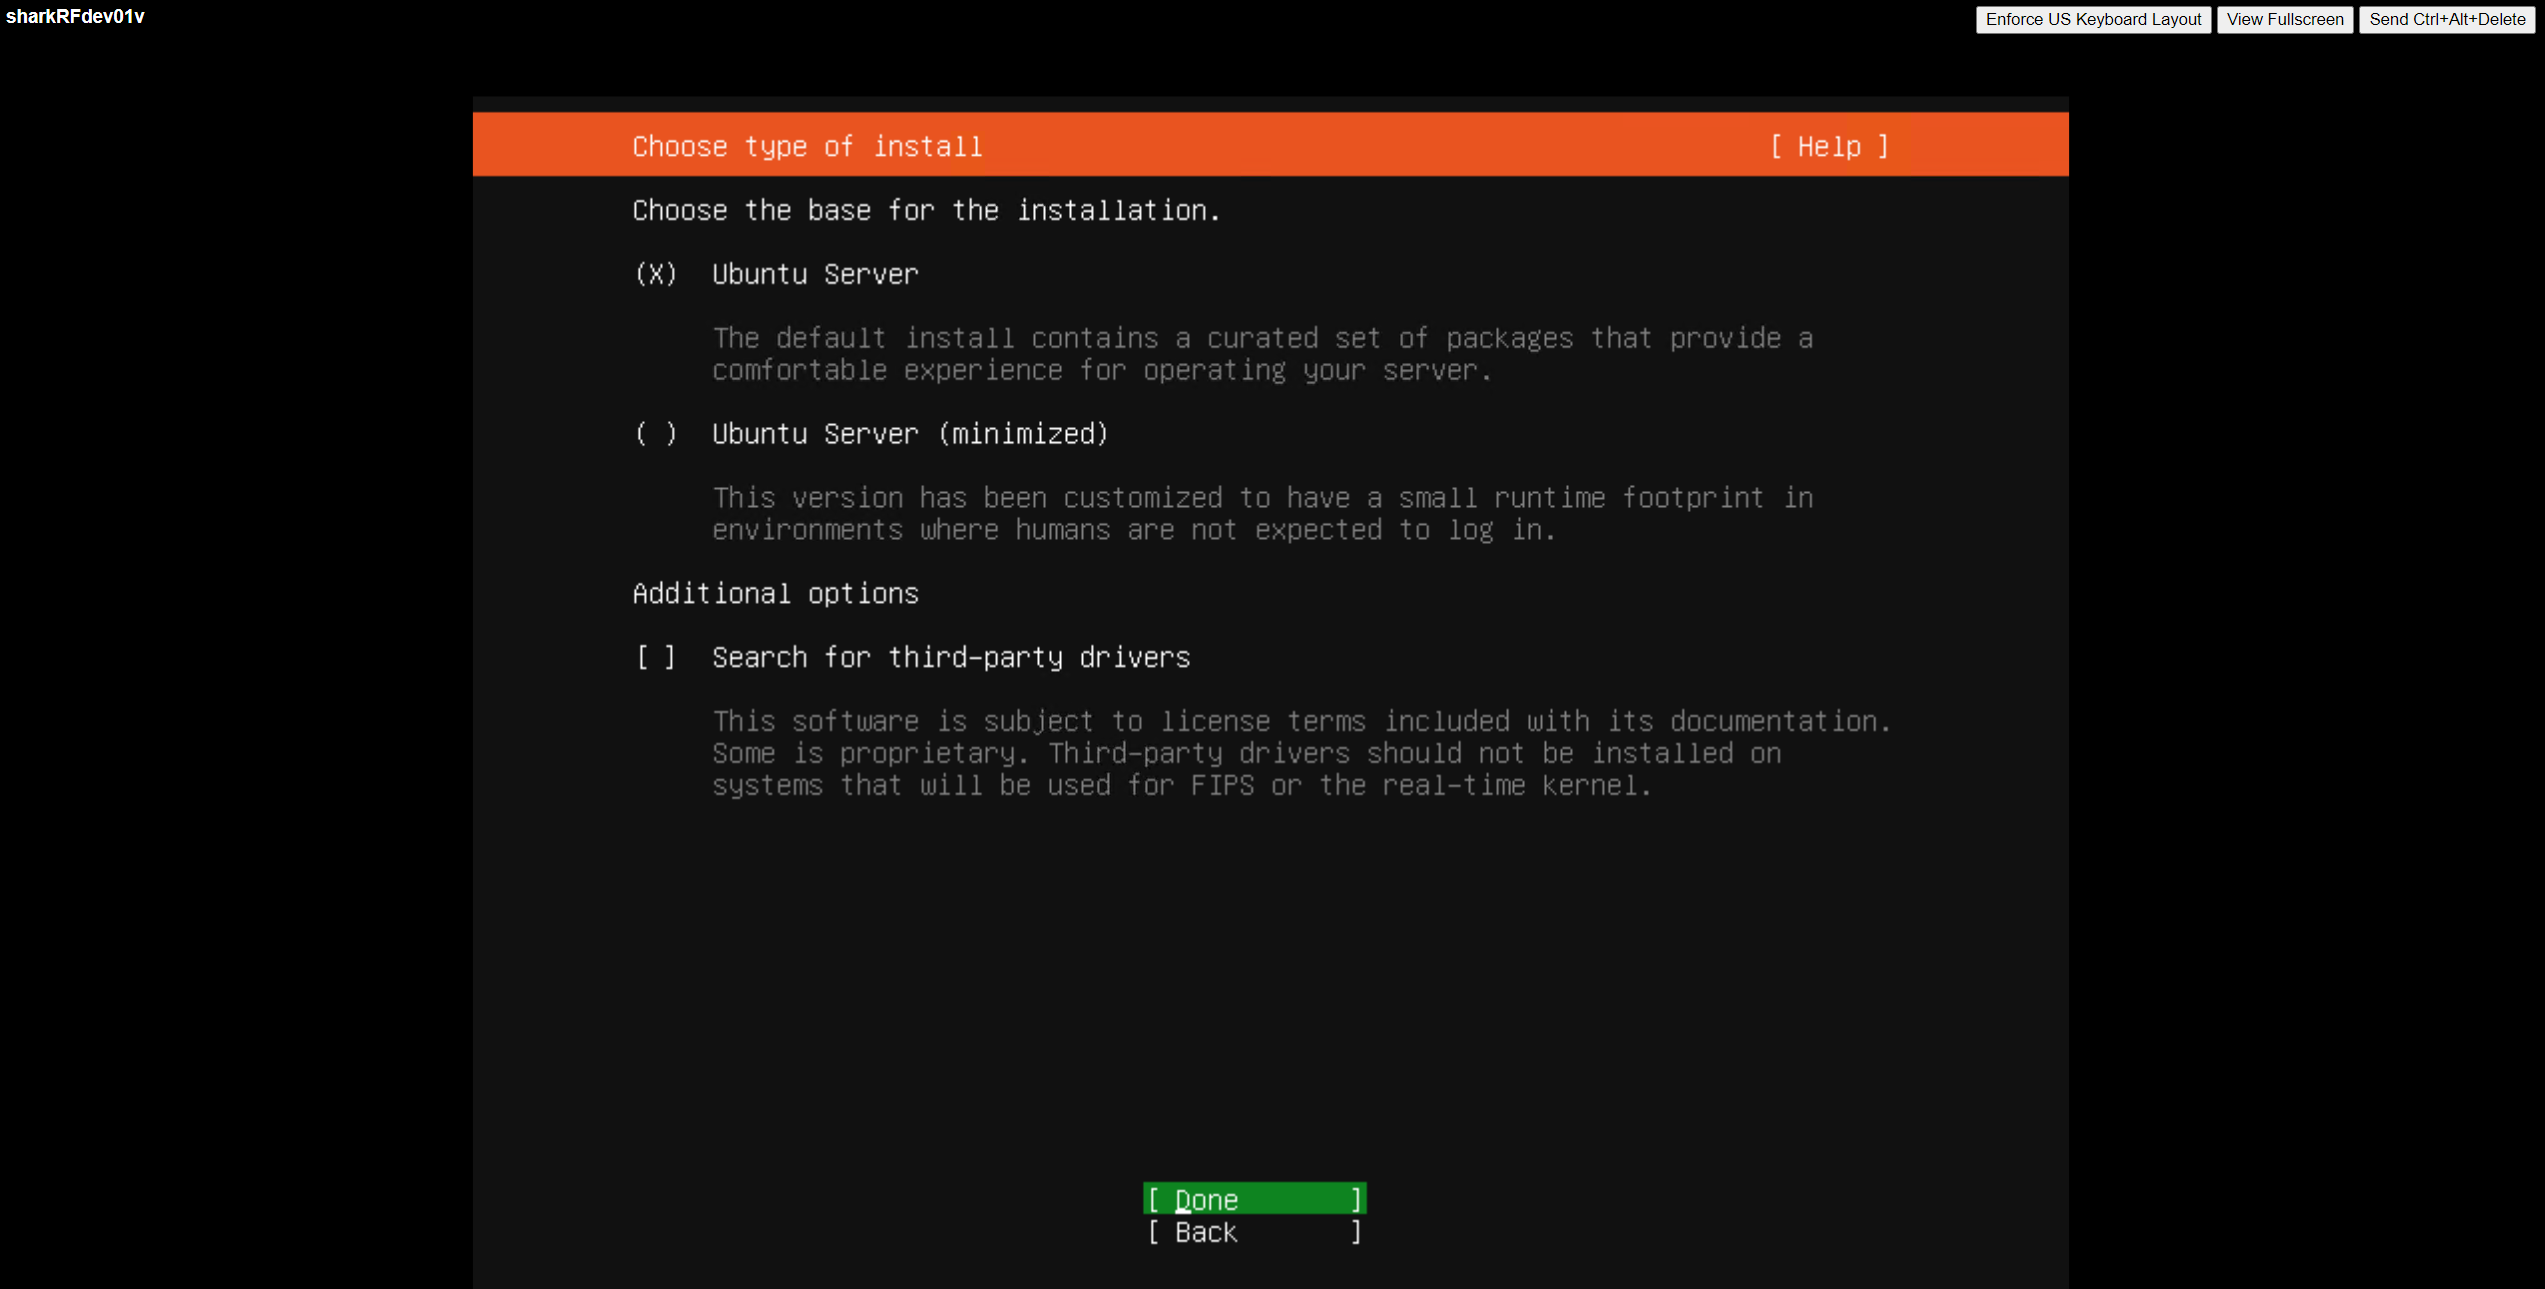
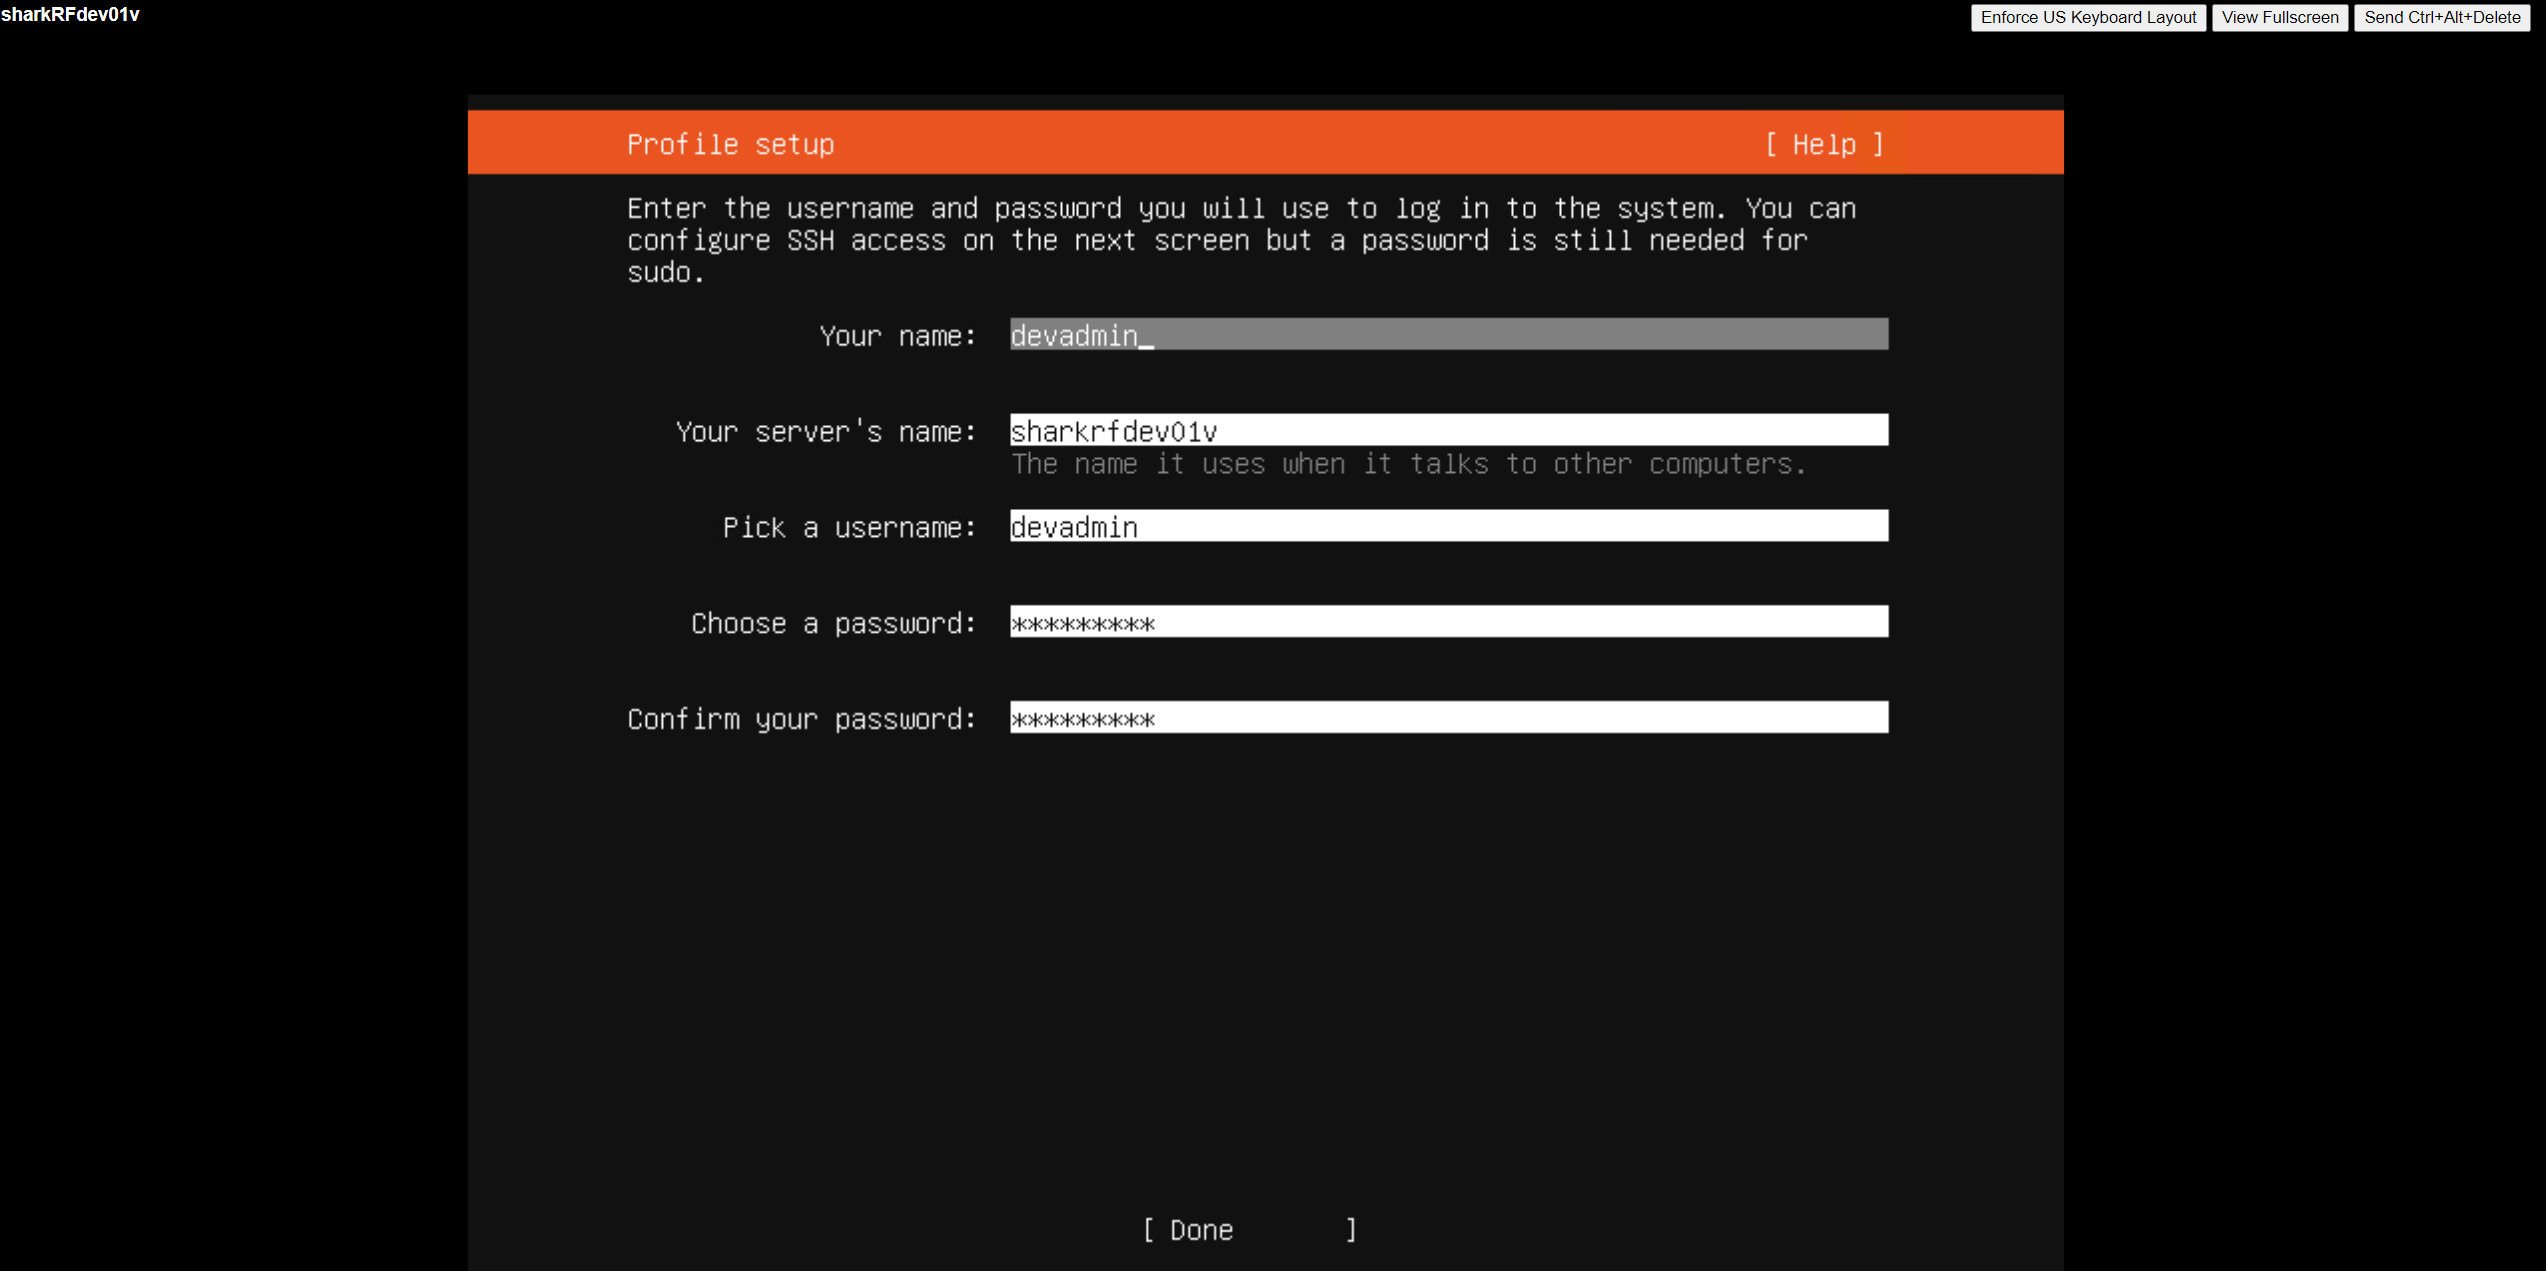
Create your VM like you would normally do in your virtual environment. Whether that is VMware Workstation, ESXi, vCenter, Hyper-V, whatever. I found that 1 CPU, 2 GB of RAM, and a thin disk of 64 GB is enough for my needs. I am using Ubuntu Server 22.04.1 LTS, found here: https://www.releases.ubuntu.com/22.04/

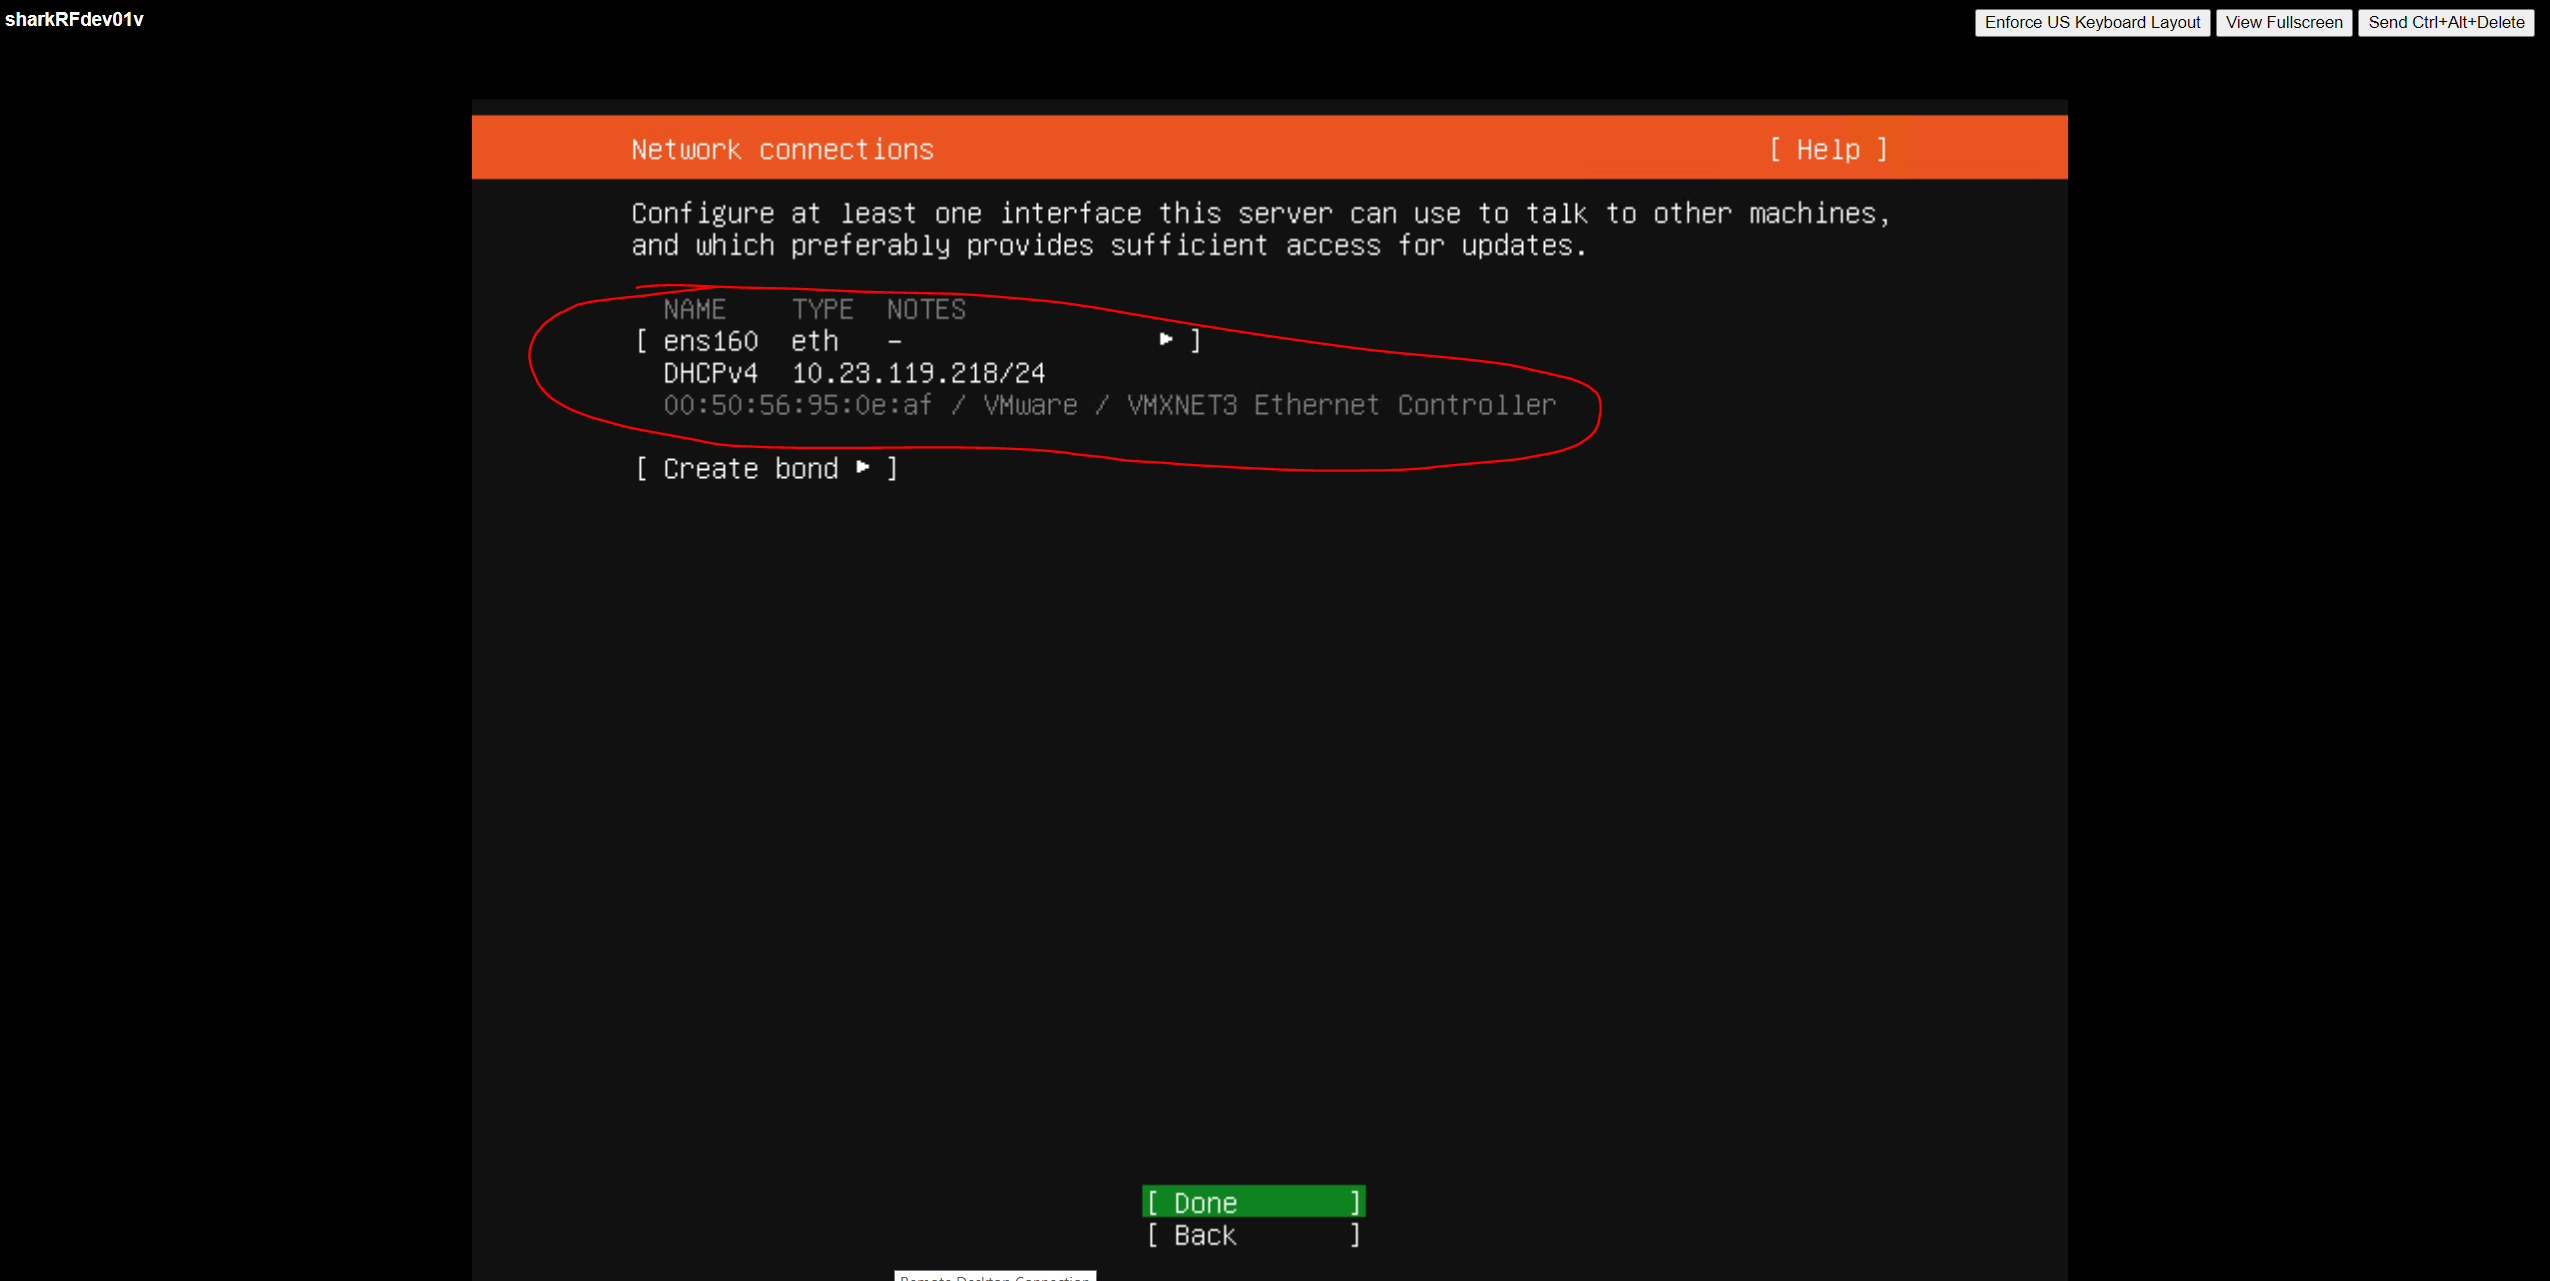
Make note of your VM IP address as everything from this point forward will require that IP address.
I recommend installing the OpenSSH server as it will make remote management much easier if you are doing this for production purposes. Again, don’t expose your SSH access to the internet. Copying and pasting commands is a breeze using SSH and Putty versus the virtual machine console window.
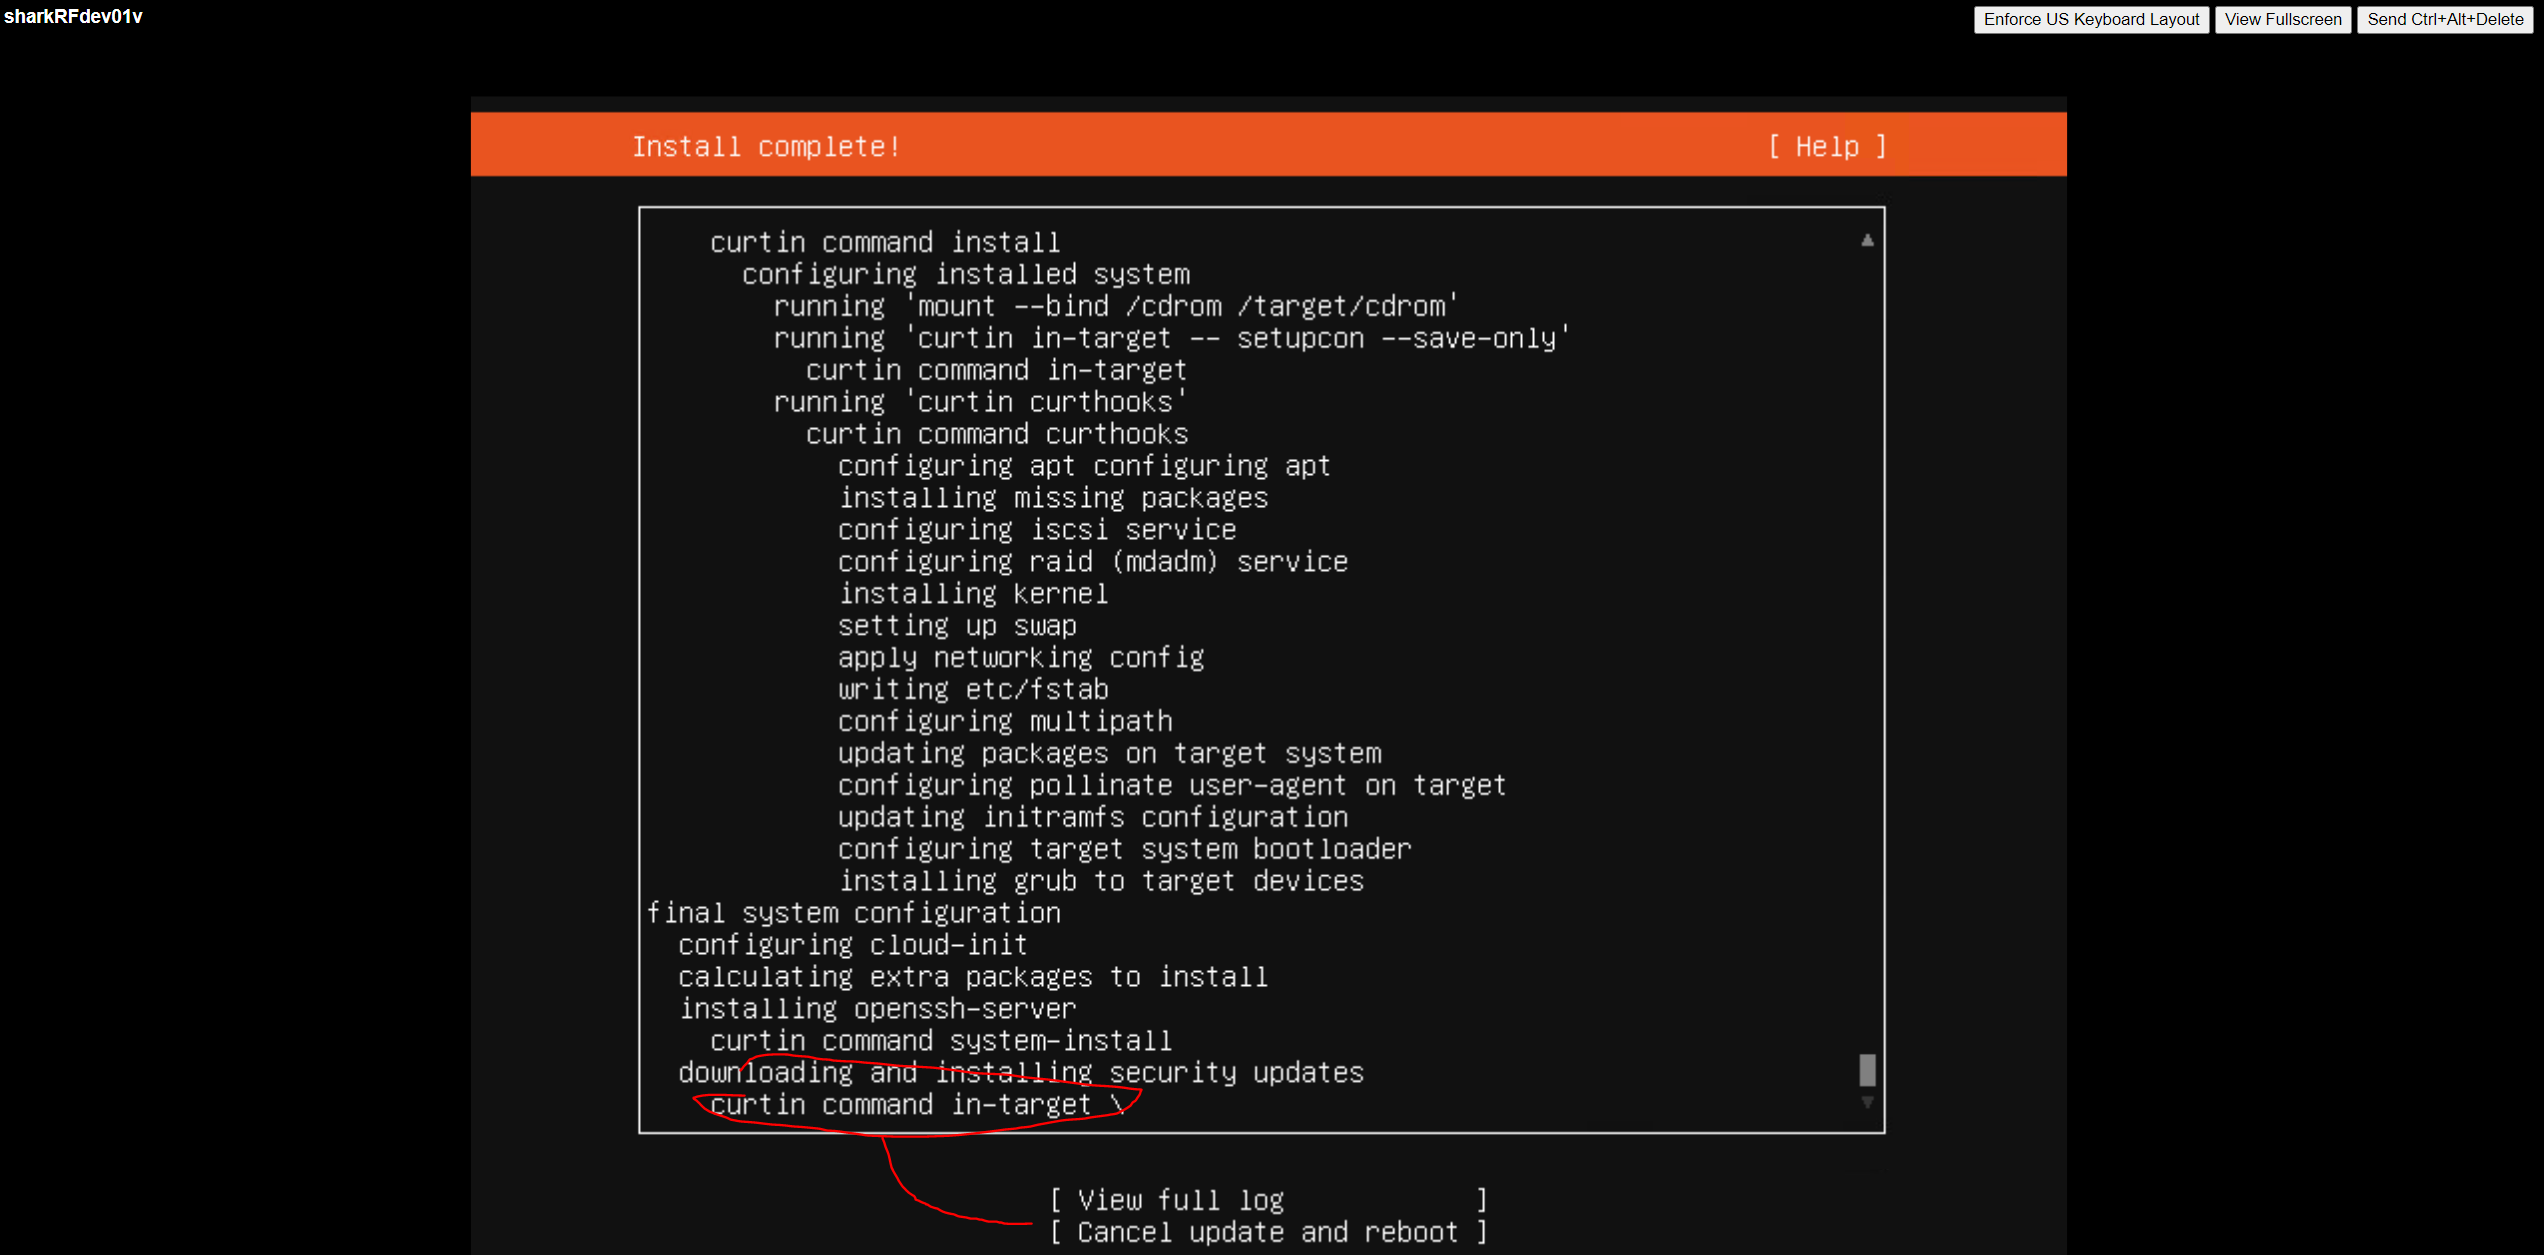

A good number of admins have stated that the curtin command in-target causes the VM to “never finish” if you have a virtual network card attached to the machine. I experienced this firsthand. Simply select “cancel update and reboot” as we’ll run updates as soon as we are in the VM. Don’t forget to unmount your virtual CD/DVD ROM and press enter to reboot.
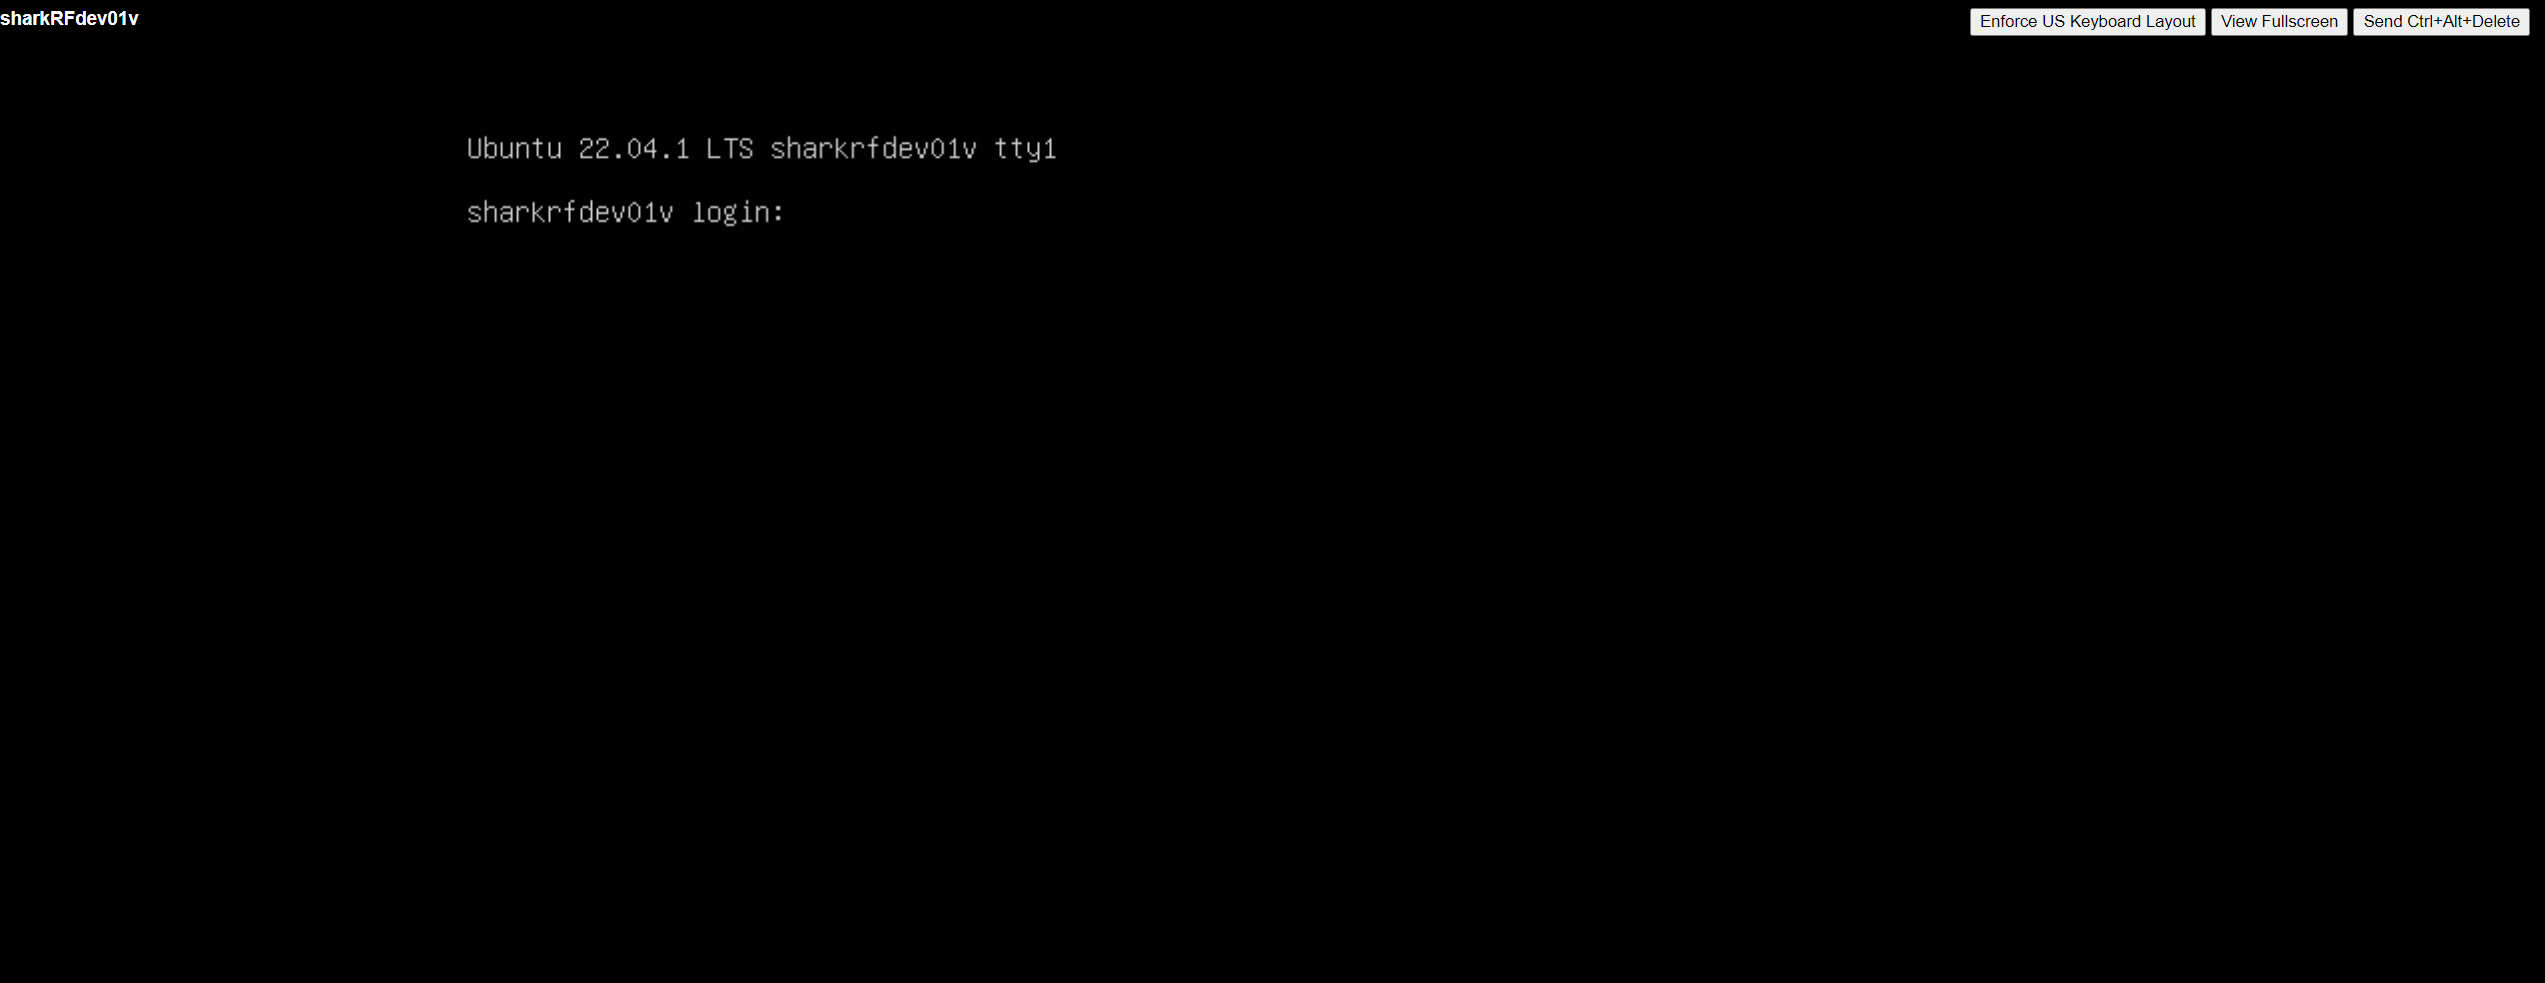
That wraps up part 1. You should be greeted by a nice login screen. For all remaining steps, we’ll be using Putty (linked above) for SSH access to our VM. You are more than welcome to use the VM console window, but there will be a lot of copying and pasting in the following parts.
 Section 1 – Part 2 – Installing Core Services
Launch putty and put your VM IP in the host name or IP address field and click connect. Accept the security alert that pops up the input your username and password and press enter.
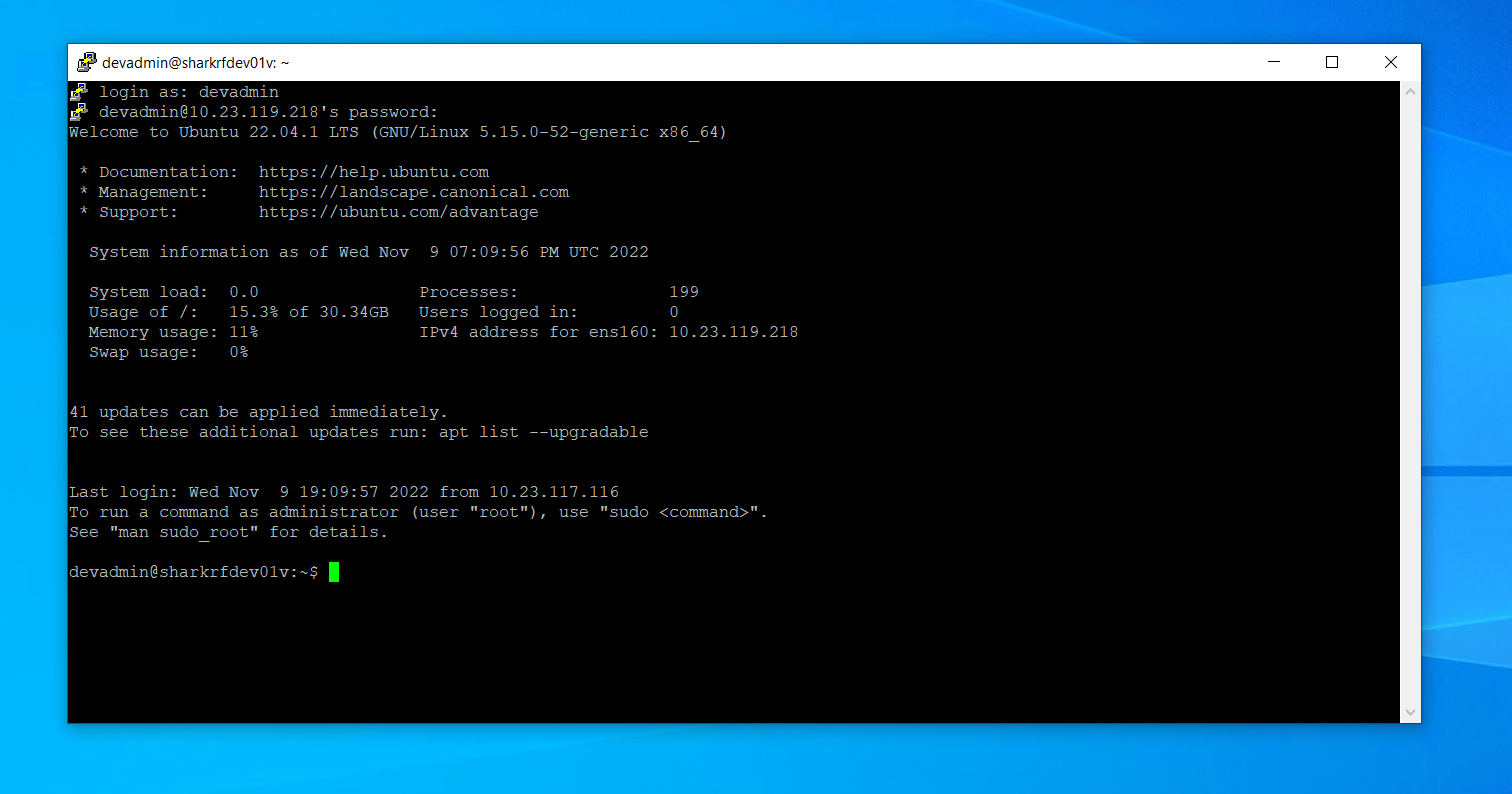

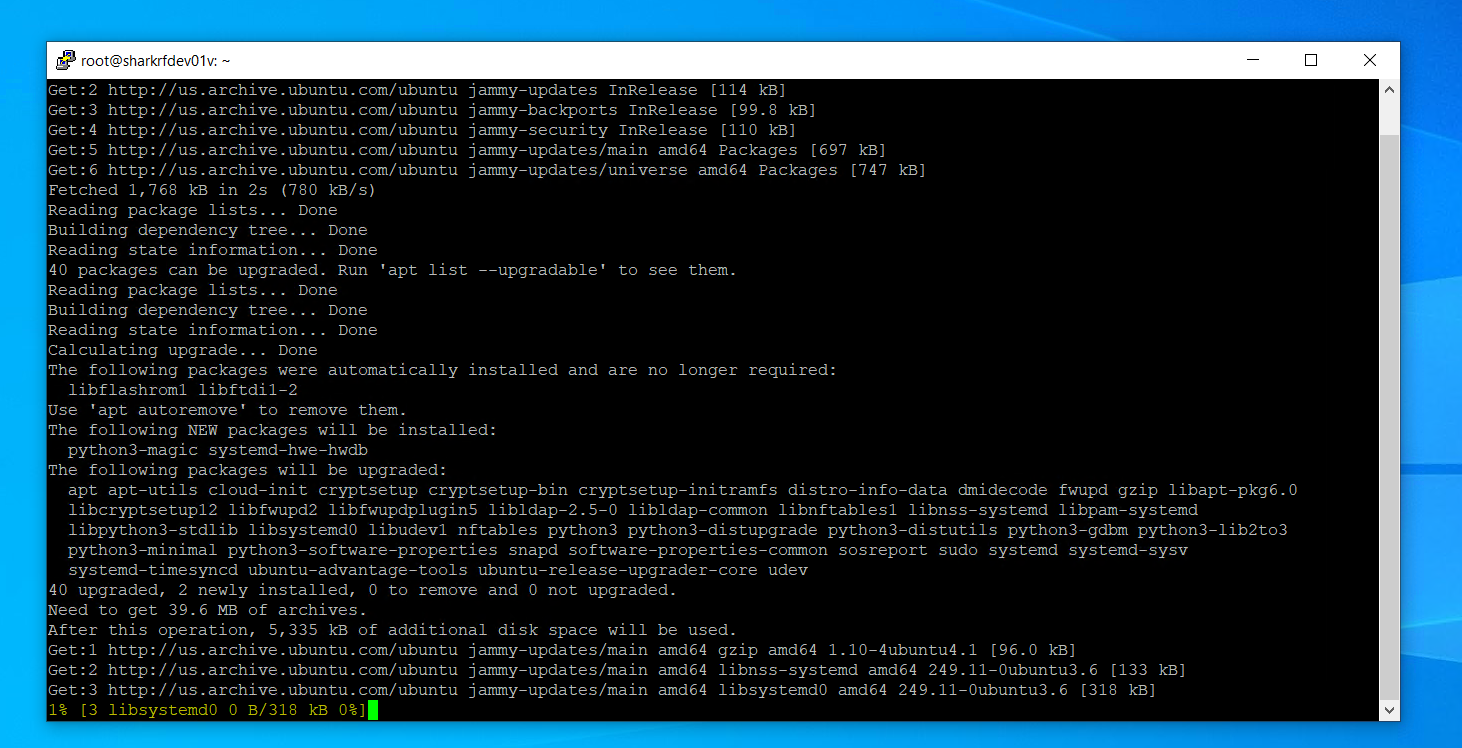
Let’s up-elevate as root using sudo -i (it will make running commands easier). Type that command and press enter. Then run the command below and follow each command with a smash of that “enter” key. This command will get the latest updates, install the latest updates, clean up and straggling files, and reboot the server.
apt update && apt upgrade -y && apt autoclean && apt autoremove -y && shutdown -r now
 With the updates installed and server rebooted, relaunch putty and log back in. Remember to run
 sudo -i for that root interactive session.
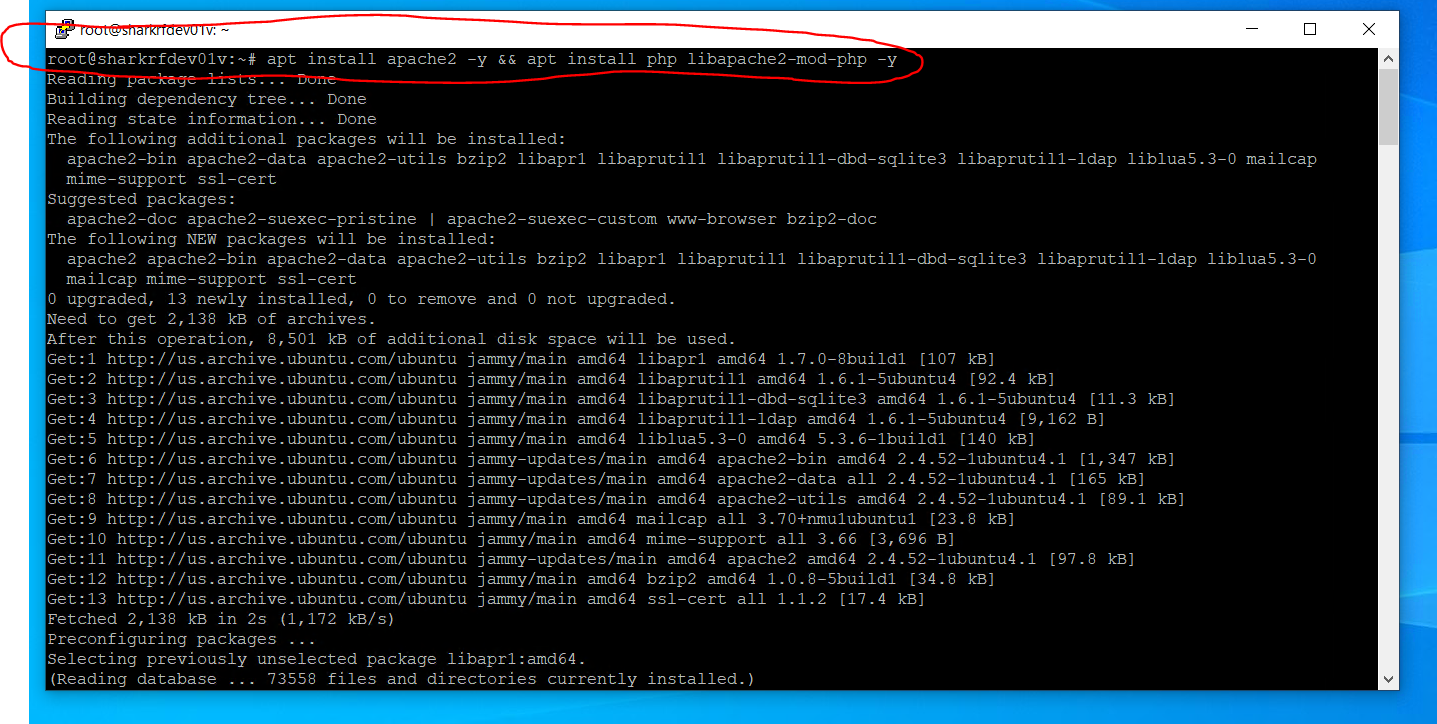
Let’s install Apache2 and PHP. Feel free to use your favorite LAMP stack install guide, just minus the MySQL part.
apt install apache2 -y && apt install php libapache2-mod-php -y
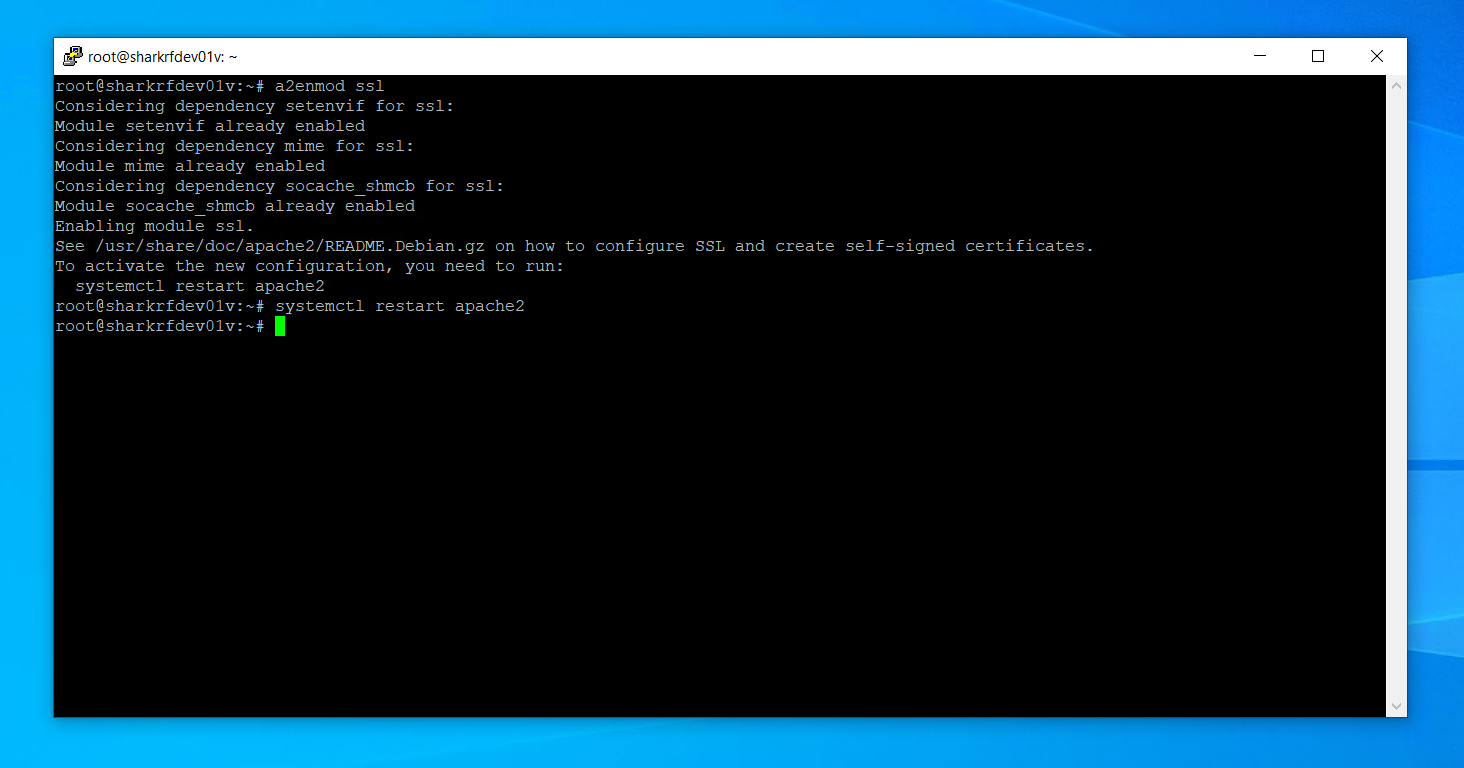
 Enable SSL for Apache2 using the following command. This is for those folks that want to run their SharkRF dashboard behind HTTPS and have it served up via your web server.
a2enmod ssl
systemctl restart apache2
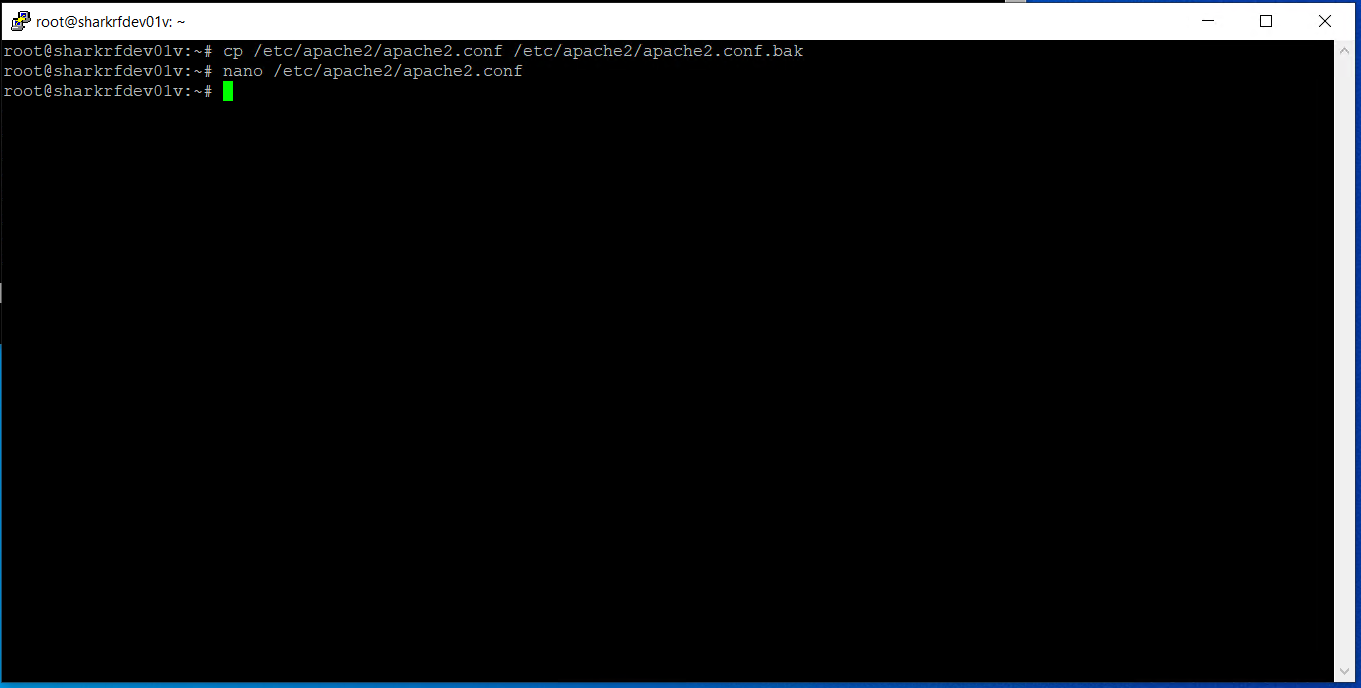
 Just a few more step for configuring core services then we’ll get to what we’ve been waiting for: installing the SharkRF IP Connector Server. We need to edit our Apache2.conf file to allow for traversals in non-standard directories as well as allow for non-standard ports (in my case, 8443) and edit our virtual host file (the file that tells the server ‘hey, let people connect to me using these parameters’). It’s always a good practice to make a backup of the file you’re about to edit, so run the first command below to make a backup then the second command to open the file editor.
cp /etc/apache2/apache2.conf /etc/apache2/apache2.conf.bak
nano /etc/apache2/apache2.conf
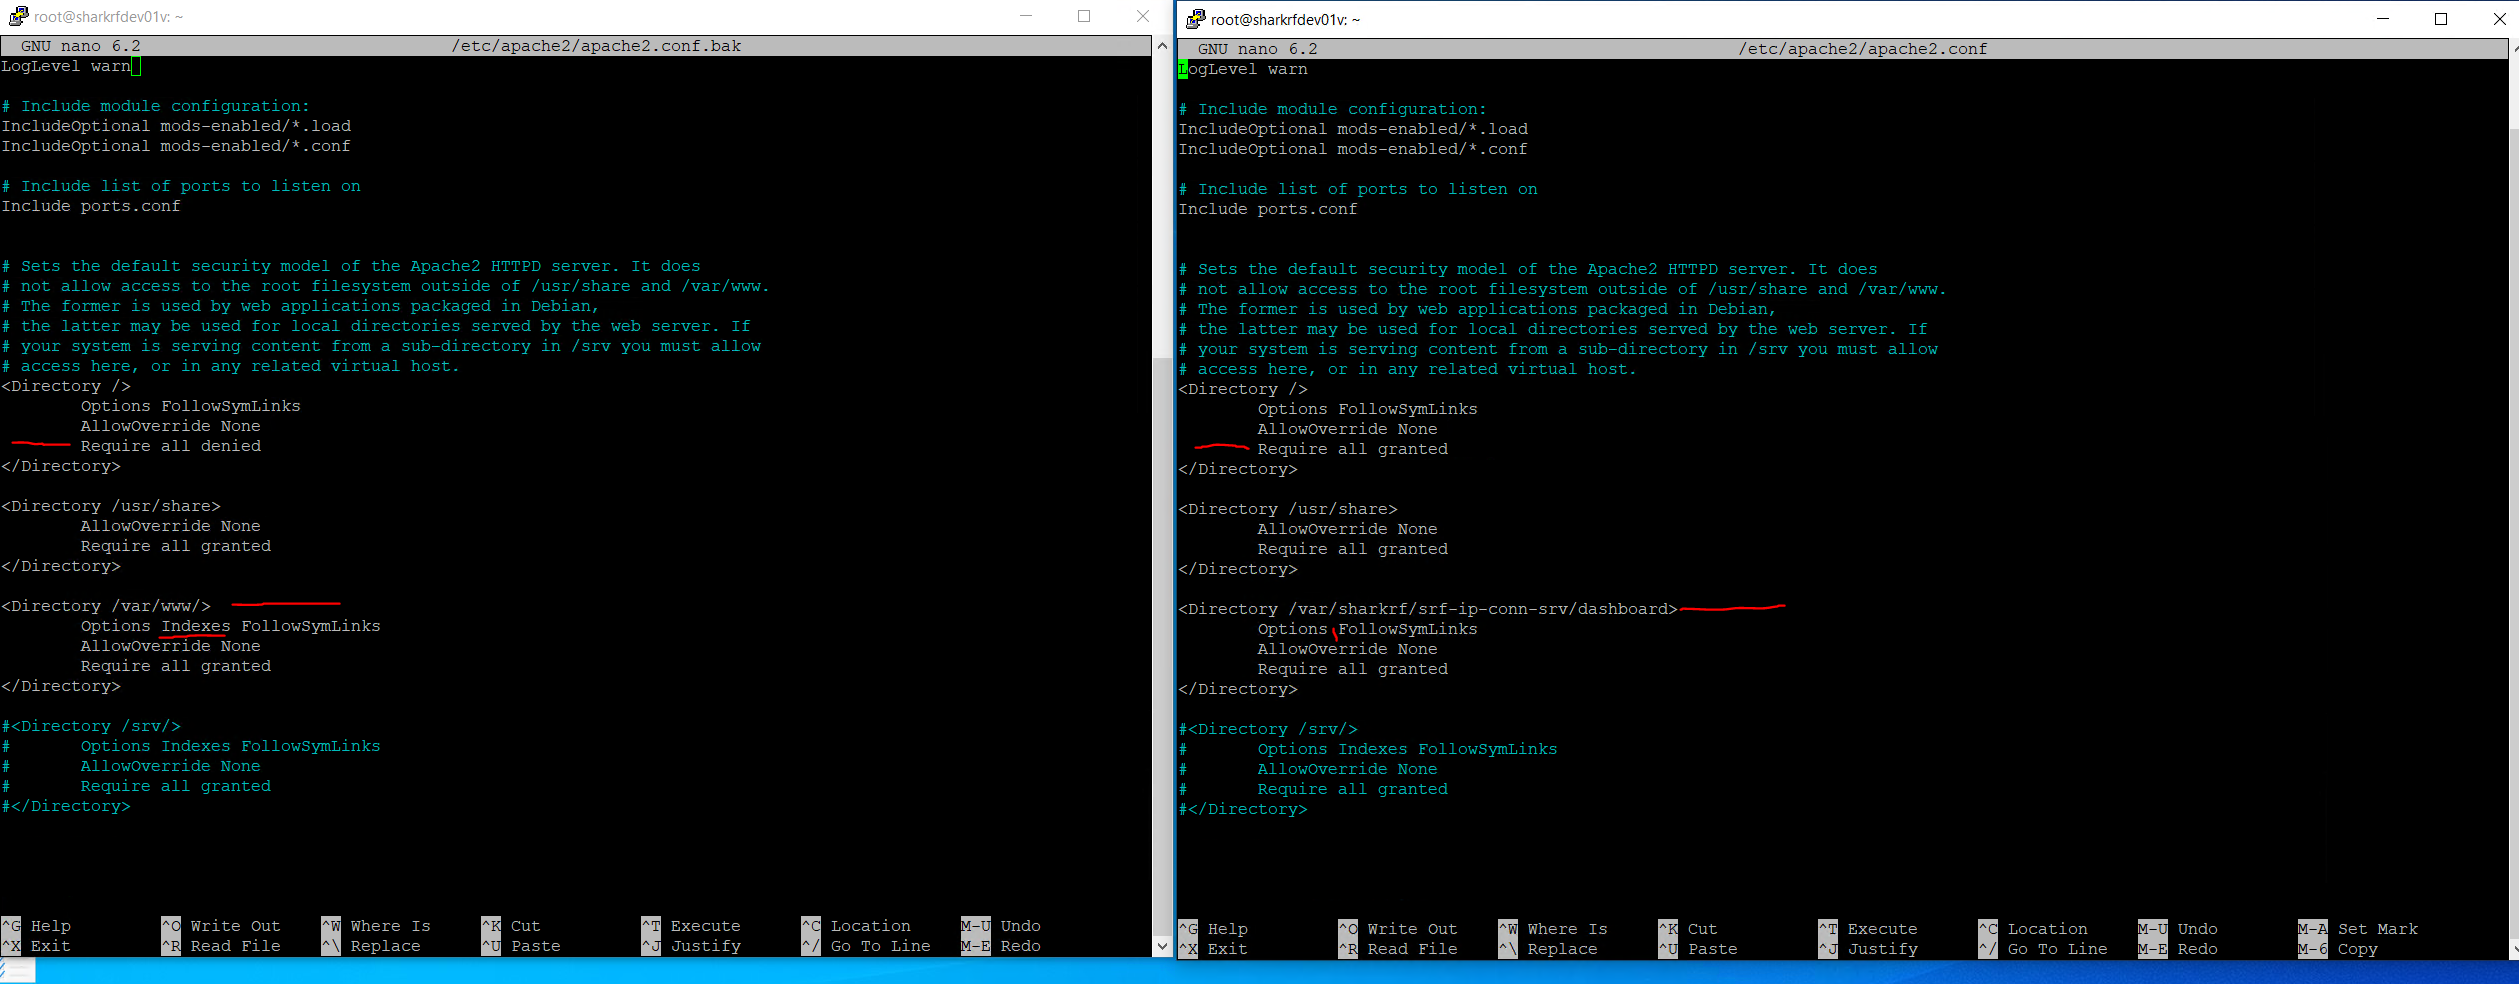
 Once you have the apache2.conf file opened, using the down arrows or page down button until you get to a section that says “<Directory />”. We’ll need to edit this section. The original text is this:
<Directory />

Options FollowSymLinks

AllowOverride None

Require all denied

</Directory>
<Directory /usr/share>

AllowOverride None

Require all granted

</Directory>
<Directory /var/www/>

Options Indexes FollowSymLinks

AllowOverride None

Require all granted

</Directory>
But we are going to change the text to this:
<Directory />

Options FollowSymLinks

AllowOverride None

Require all granted

</Directory>
<Directory /usr/share>

AllowOverride None

Require all granted

</Directory>
<Directory /var/sharkrf/srf-ip-conn-srv/dashboard>

Options FollowSymLinks

AllowOverride None

Require all granted

</Directory>
Note the difference of the text! Once you have edited the text, press “ctrl+o”, press “enter”, then press “ctrl+x”. This is called saving and writing out your file. Note the differences between our backup apache2.conf.bak file and our actual apache2.conf file.
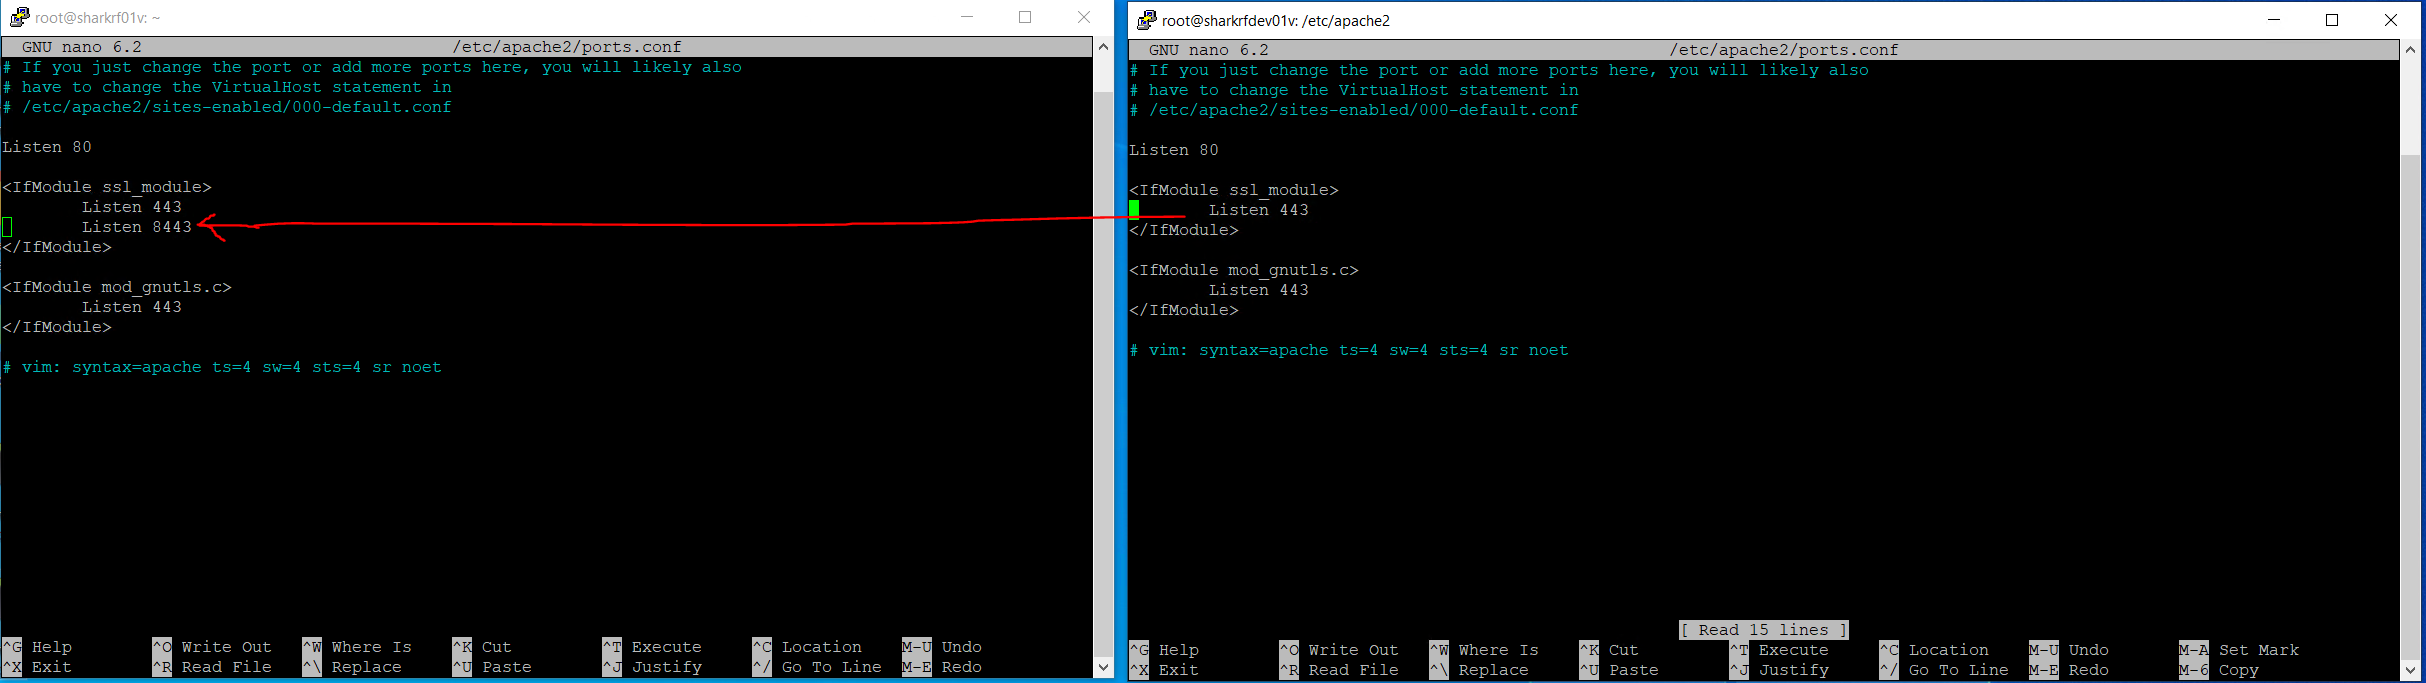
 Let’s add a listener for port 8443 to our Apache configuration. This is optional and sets the stage to allow for HTTPS connections over port 8443 to our SharkRF dashboard. Typically it is port 443, but in my case, I want to make my SSL offloader, gateway, and server all align (I won’t get into the weeds, but it involves port forward and re-writing).
cp /etc/apache2/ports.conf /etc/apache2/ports.conf.bak
nano /etc/apache2/ports.conf
Under the section that says <IfModule ssl_module> add Listen 8443. Save your changes and write out your file.
 Alright, last few steps for configuring Apache before we can move on to the fun stuff: configuring your SharkRF IP connector server! You have two options. Option 1 is configuring your virtual hosts conf file to allow connections to your web server without any fluff. It includes basic parameters. Option 2 is configuring your virtual hosts conf file to allow SSL (well HTTPS) connections to your web server. It is more involved and requires that you have an understanding of how public/private keys work. I will put both options here but PICK ONLY ONE OPTION. My production SharkRF server uses HTTPS and sits behind an SSL offloader which sits behind Cloudflare. I have chosen option 2 for my needs. It’s complicated, but secure, and publicly accessible with minimal risk.
Option 1 – Simple no-fluff configuration
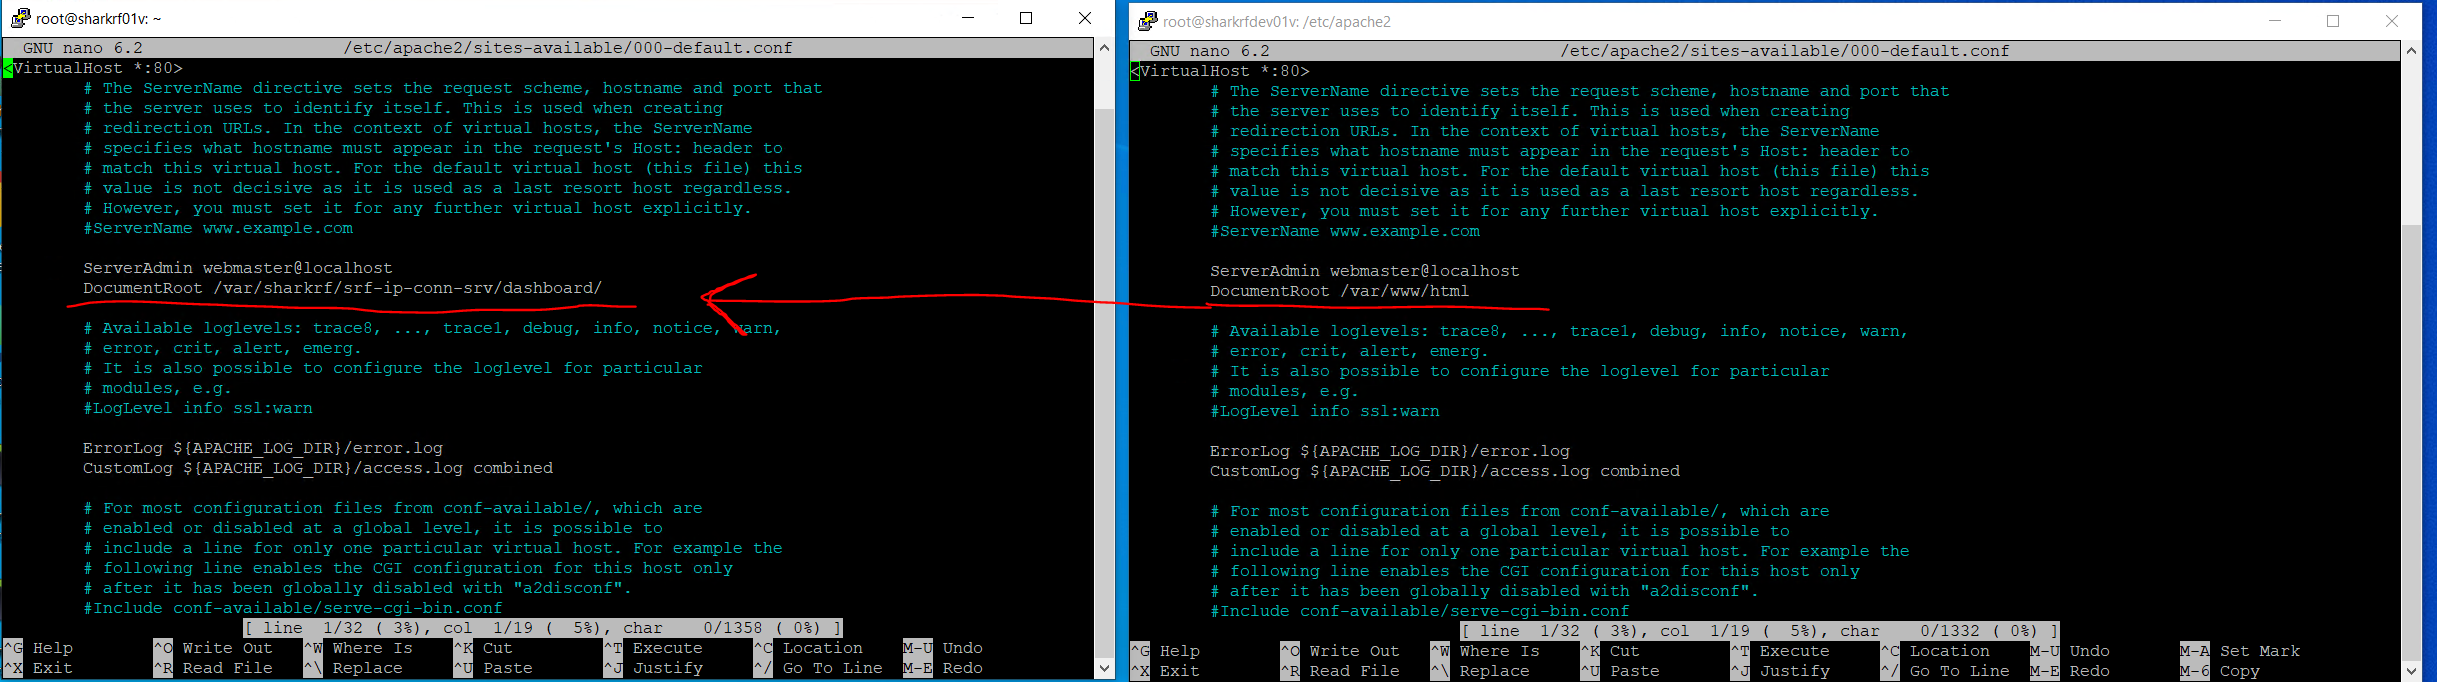
Back up then edit the 000-default.conf file which is… the default .conf file for Apache2.
cp /etc/apache2/sites-available/000-default.conf /etc/apache2/sites-available/000-default.conf.bak
nano /etc/apache2/sites-available/000-default.conf
In this file, we’re changing
ServerAdmin webmaster@localhost

DocumentRoot /var/www/html
to
ServerAdmin webmaster@localhost

DocumentRoot /var/sharkrf/srf-ip-conn-srv/dashboard/
Once the changes are made, save and write out your file.
 The 000-default.conf file should already be enabled, meaning it is ready to work, but just in case, run this command to enable your .conf file and reload apache2.
a2ensite 000-default.conf
service apache2 reload
That should be it for option 1. You’re ready to move to Part 3 below. If you want to do HTTPS or have a more granular configuration, look below.
Option 2 – HTTPS configuration. This command will disable the 000-default.conf file as we are going to create a new .conf file for our server to use.
a2dissite 000-default.conf
systemctl reload apache2
Next we need to create an SSL directory to store our certificates.
mkdir /etc/apache2/ssl
Again, your mileage WILL vary, but I am using Cloudflare for SSL so my conf file below, used in this example, is targeted for a Cloudflare configuration. Modify the needed parts for your setup. You’ll create a new conf file and use mine below as a template. You can comment out sections in the file that are irrelevant using a # in front of the line.
nano /etc/apache2/sites-available/sharkrfdev01v.conf
<VirtualHost *:80>

ServerAdmin yourmail@yourdomain.com

ServerName sharkrfdev01v.yourdomain.com

DirectoryIndex index.php

DocumentRoot /var/sharkrf/srf-ip-conn-srv/dashboard/

</VirtualHost>
<IfModule mod_ssl.c>

<VirtualHost *:8443>

ServerAdmin youremail@yourdomain.com

ServerName sharkrfdev01v.yourdomain.com

DocumentRoot /var/sharkrf/srf-ip-conn-srv/dashboard/

SSLEngine on
SSLCertificateFile /etc/apache2/ssl/sharkrfdev01v.pem

SSLCertificateKeyFile /etc/apache2/ssl/sharkrfdev01v.key

#SSLOpenSSLConfCmd DHParameters "/etc/apache2/ssl/dhparams_4096.pem"

#SSLVerifyClient require

#SSLVerifyDepth 10

#SSLCACertificateFile /etc/apache2/ssl/origin-pull-ca.pem

#SSLHonorCipherOrder on

SSLProtocol all -SSLv2 -SSLv3
</VirtualHost>

</IfModule>
Save and write out your changes.

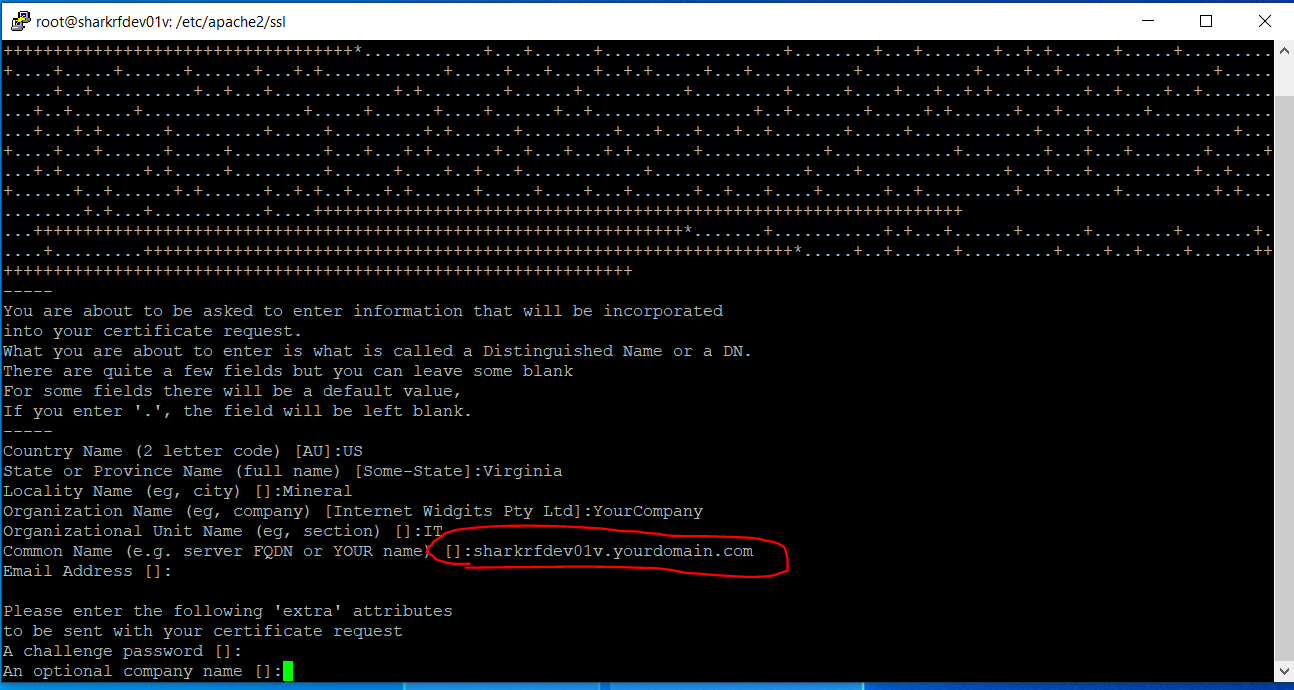
Next, generate a certificate signing request (CSR) and upload it to your favorite SSL provider (Cloudflare, etc.). Save the output as a .pem file. Let’s change our directory (cd) to the /etc/apache2/ssl folder so our CSR and associated files will save there automatically.
cd /etc/apache2/ssl
The run this command and fill in the blanks. The most important line of this CSR is your FQDN or server name. It is the name used for your server. It’s a little easier with Cloudflare and SSL offloading because I can use multiple names and get creative, but it should match exactly the name of your server. Again, creativity abounds when you get to SSL offloading, etc. but you know that already because you chose the advanced path here. 🙂
openssl req -new -newkey rsa:2048 -nodes -keyout sharkrfdev01v.key -out sharkrfdev01v.csr
At this point you can nano /etc/apache2/ssl/sharkdev01v.csr and copy/paste that CSR into your SSL provider or export it however you see fit. You’ll need to take the .pem file that is generated by your provider and add it to your /etc/apache2/ssl folder. The easiest way to do this is to copy the output from your provider and then nano /etc/apache2/ssl/sharkdev01v.pem and paste it then save and write out the file.
Alright, that’s it! You’re server should be serving up an HTTPS connection on TCP port 8443.
Section 1 – Part 3 – Installing SharkRF IP Connector Server
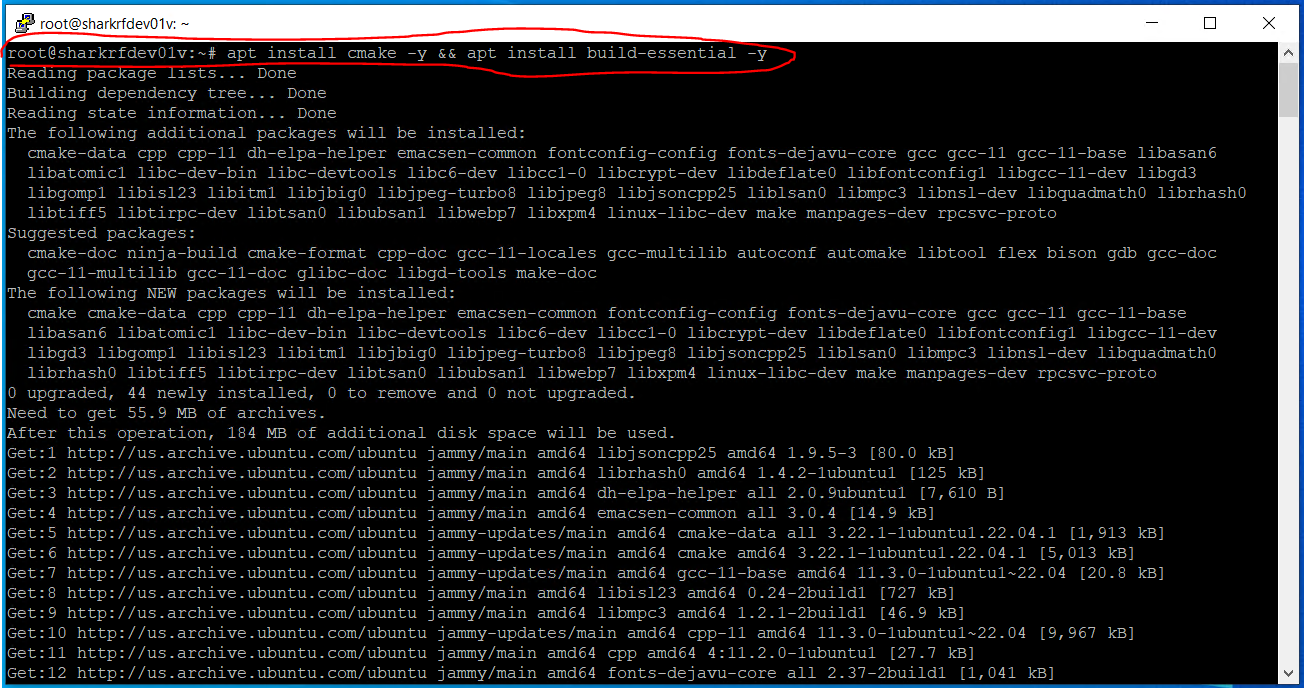
Type cd and press enter. Let’s get back up to the root directory. A portion of the commands below came from this URL (https://github.com/sharkrf/srf-ip-conn-srv) and were adapted for this build. The commands below are going to install the necessary prerequisites for the SharkRF server.
apt install cmake -y && apt install build-essential -y
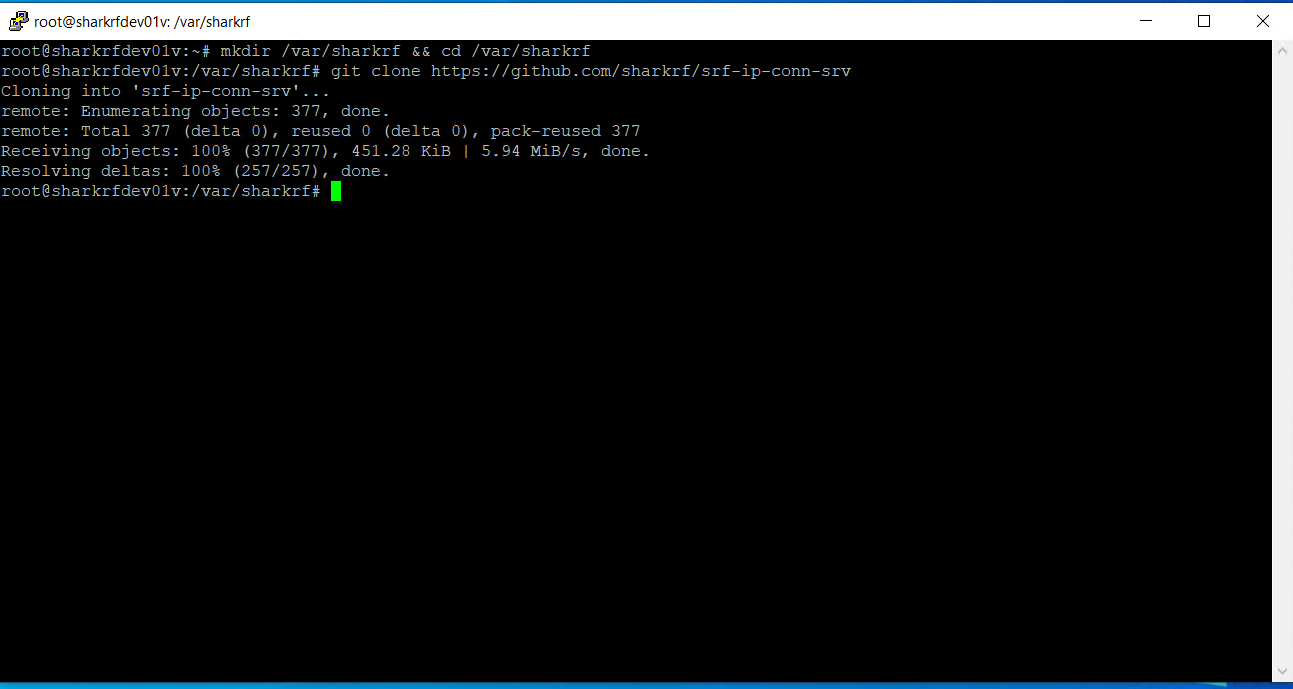
 Let’s make our sharkrf directory and change directory to that folder.
mkdir /var/sharkrf && cd /var/sharkrf
Let’s start cloning the necessary items from Github, change directories to our JSMN folder, and wrap up the items needed for the server install.
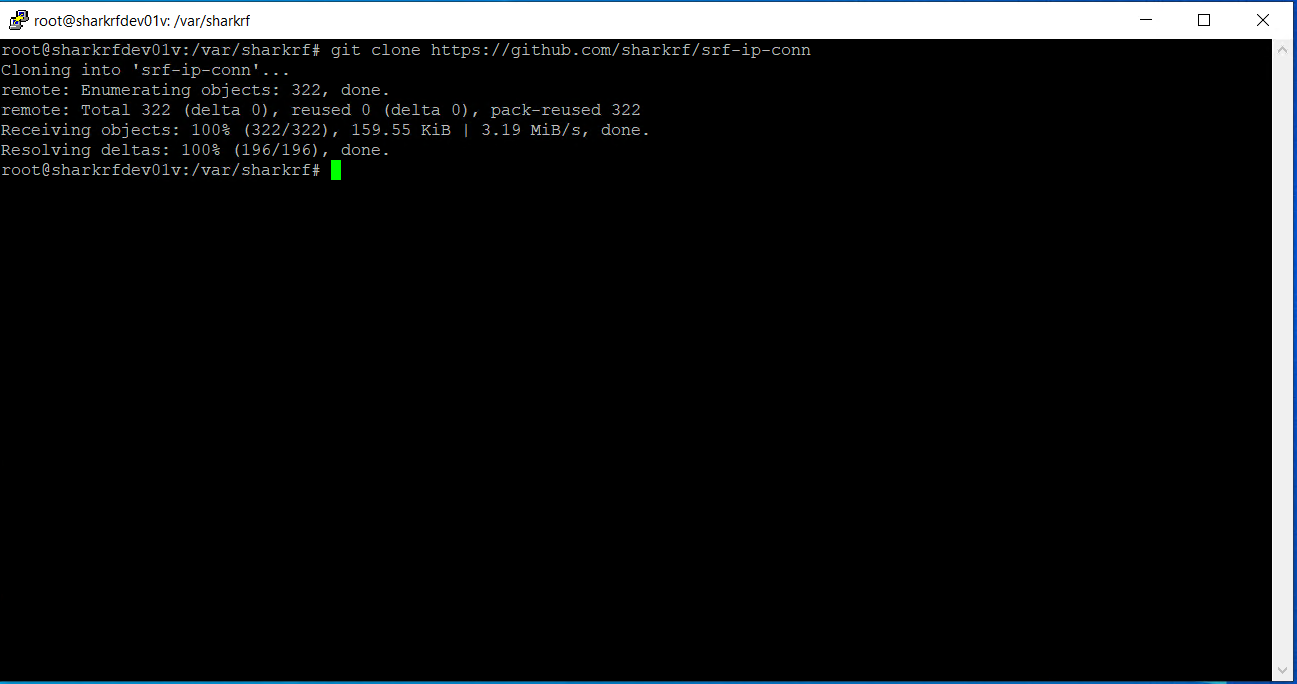
git clone https://github.com/sharkrf/srf-ip-conn-srv
git clone https://github.com/sharkrf/srf-ip-conn
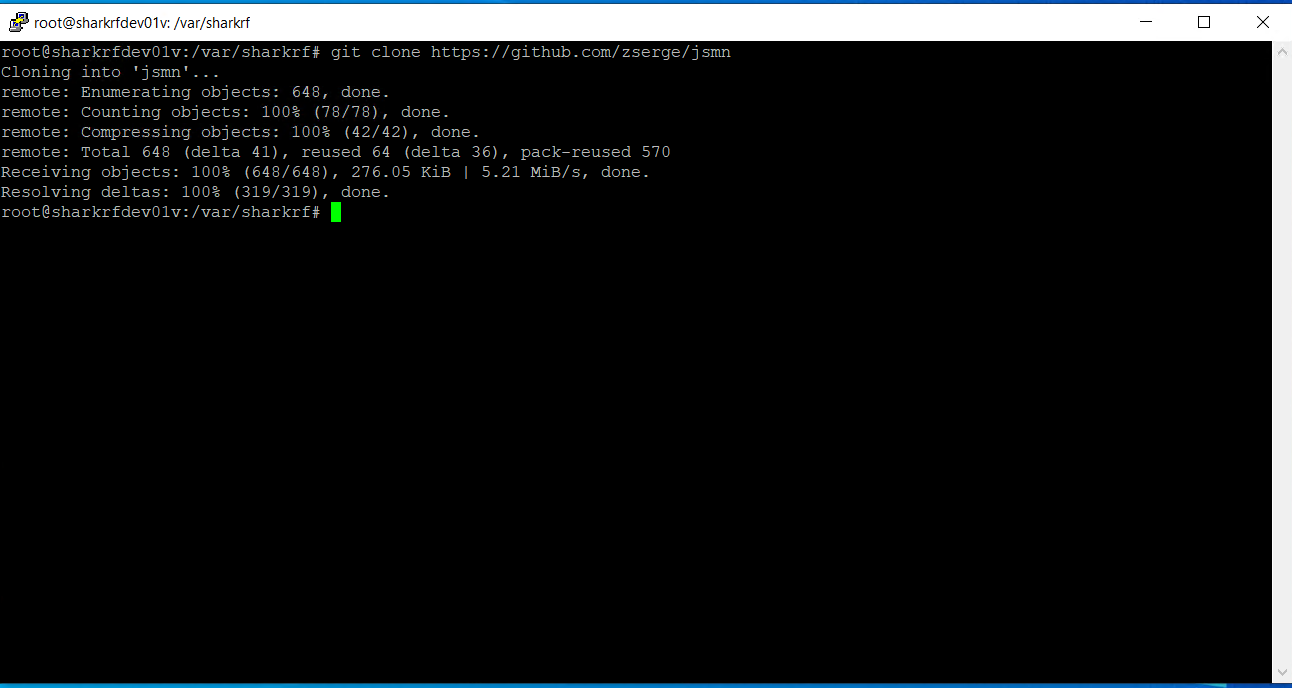
git clone https://github.com/zserge/jsmn
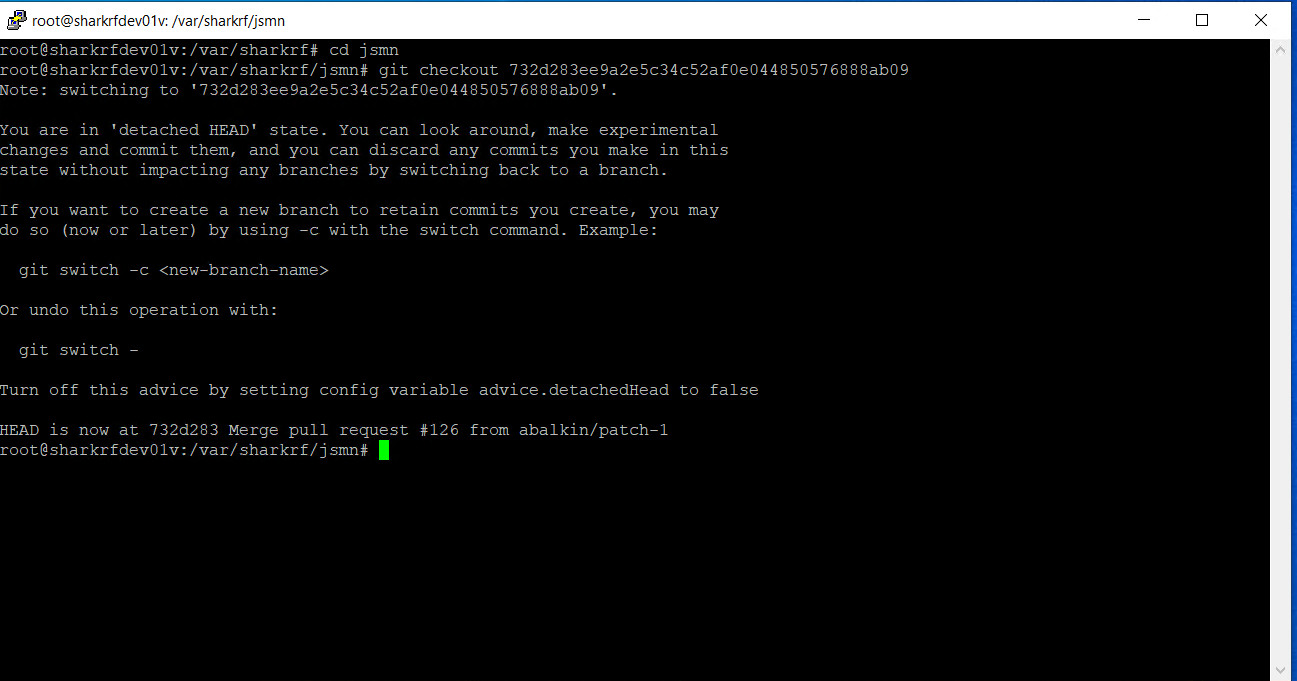
cd jsmn
git checkout 732d283ee9a2e5c34c52af0e044850576888ab09
 That should pull down all the necessary files. Next, let’s start setting up the configuration files for our SharkRF IP Connector Server.
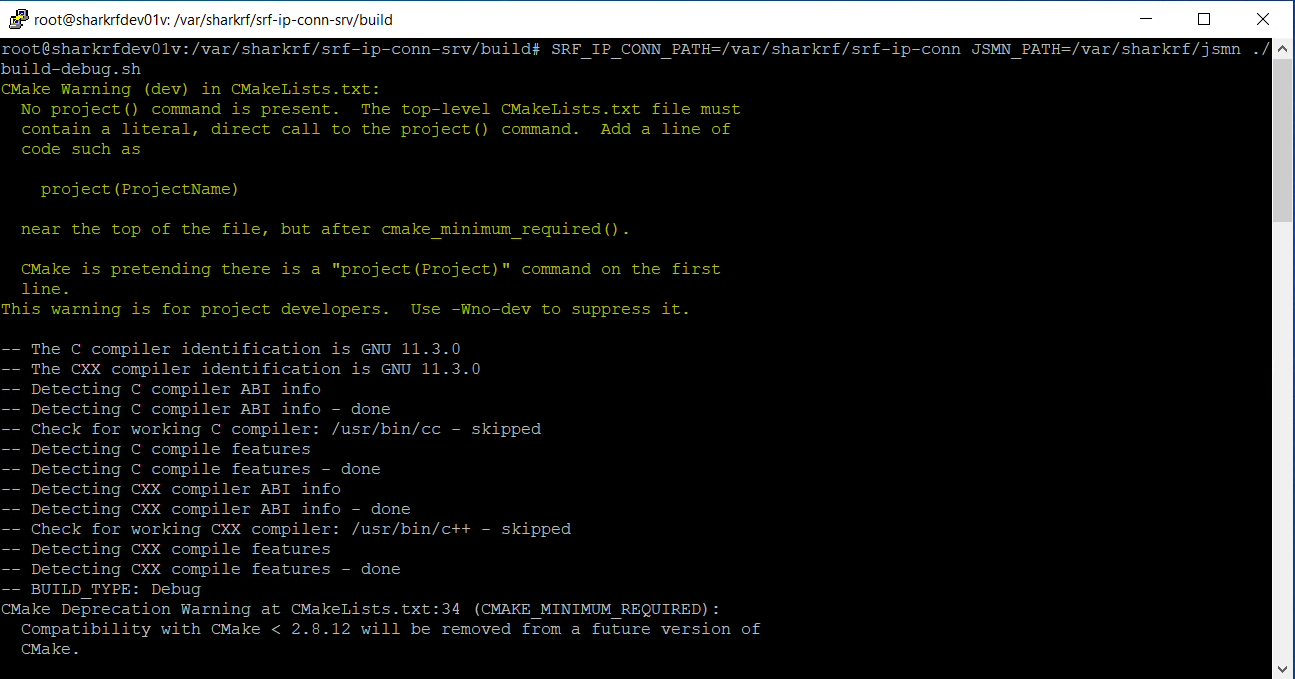
cd /var/sharkrf/srf-ip-conn-srv/build
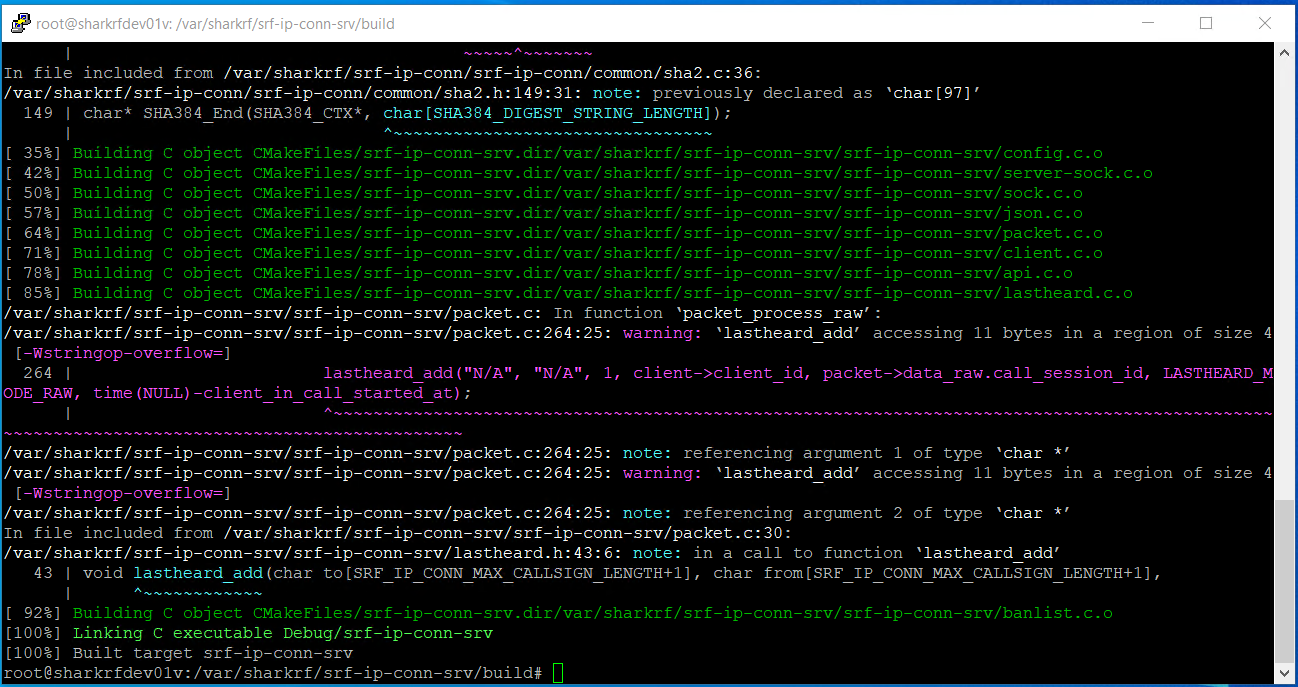
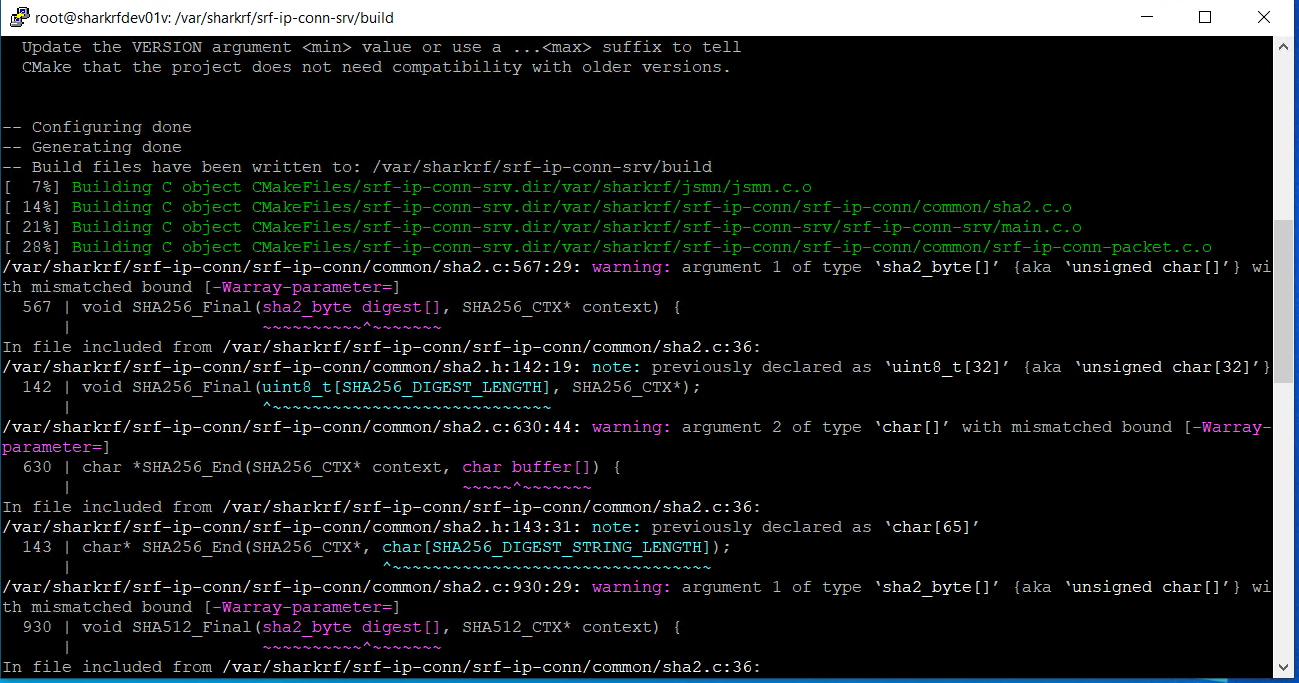
Alright, let’s PAUSE RIGHT HERE. Yesterday (well, yesterday from when I wrote this post), I was working with Matt J. While working with him, I executed the following command (DO NOT RUN IT YET).
SRF_IP_CONN_PATH=/var/sharkrf/srf-ip-conn JSMN_PATH=/var/sharkrf/jsmn ./build-release.sh
And when we finished his server, everything was running fine. He was on Raspberry PI 4 I believe. However, today (well, today from when I wrote this post), I did the exact same thing and could never get my OpenSPOT 2 to connect to my server. I continuously received an authentication error on my OpenSPOT 2 when trying to connect to my SharkRF IP connector server. According to this thread that I opened, there is an issue with the SHA256 calculations.
If you are running on a virtual machine then now would be an excellent time to take a snapshot. If you are not running on a virtual machine, then all of the following commands will be utilizing the “build-debug” version of what GitHub says should be “build-release”. If you run build-debug and it craps out, then delete your /var/sharkrf folder, go back to Section 1 – Part 3, and replace all of my commands referencing “build-debug” with “build-release” as it is written in the SharkRF ip-srv-conn GitHub page.

Run this command to execute the build-debug script.
SRF_IP_CONN_PATH=/var/sharkrf/srf-ip-conn JSMN_PATH=/var/sharkrf/jsmn ./build-debug.sh
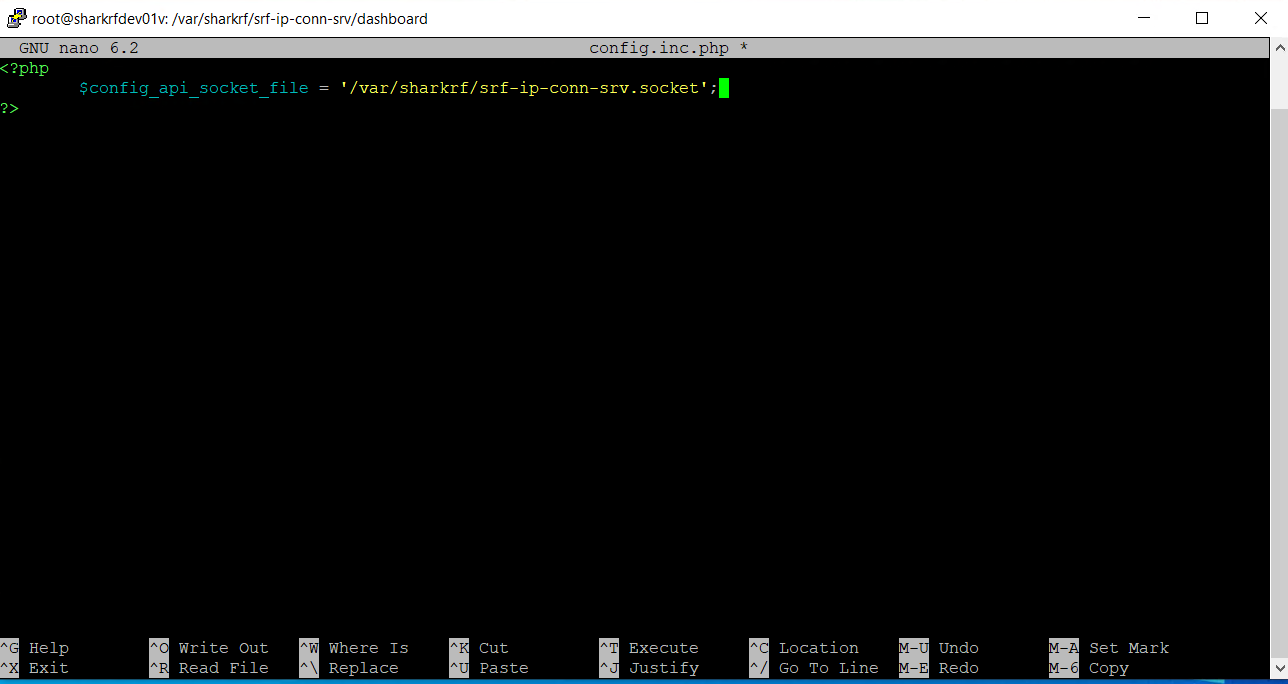
Change directory to the dashboard directory and copy the config example file.
cd /var/sharkrf/srf-ip-conn-srv/dashboard/ && cp config-example.inc.php config.inc.php
No backup needed this time as we can always copy our example file if we screw up. Let’s edit the config.inc.php file.
nano config.inc.php
Here is another deviation. Some forum posts call for leaving the config file as is. Others call for editing the directory where the socket file is run. Both yesterday and today, I had to edit the directory where the socket file runs and, looking back at my nearly five year old post, the comments I left behind mention this same thing. You are going to edit '/tmp/srf-ip-conn-srv.socket' to read '/var/sharkrf/srf-ip-conn-srv.socket'. Save and write out your file.
 Another directory change and file copy. Note that this file is under the Debug folder. I hope you have chosen wisely. 😉
cd /var/sharkrf/srf-ip-conn-srv && cp config-example.json /var/sharkrf/srf-ip-conn-srv/build/Debug/config.json && cd /var/sharkrf/srf-ip-conn-srv/build/Debug/
Change permissions to 755 on the config.json file.
chmod 755 config.json
And then let’s edit the config.json file.
nano config.json
This is where you will provide the parameters for your server. I strongly, strongly suggest making no changes at first except for the one listed below. Let’s get the darn thing running. Once you are running then you can make changes to the config file. See the “configuration” section of this GitHub post to learn what you can change: https://github.com/sharkrf/srf-ip-conn-srv
We need to edit the api-socket-file line from '/tmp/srf-ip-conn-srv.socket' to read '/var/sharkrf/srf-ip-conn-srv.socket'
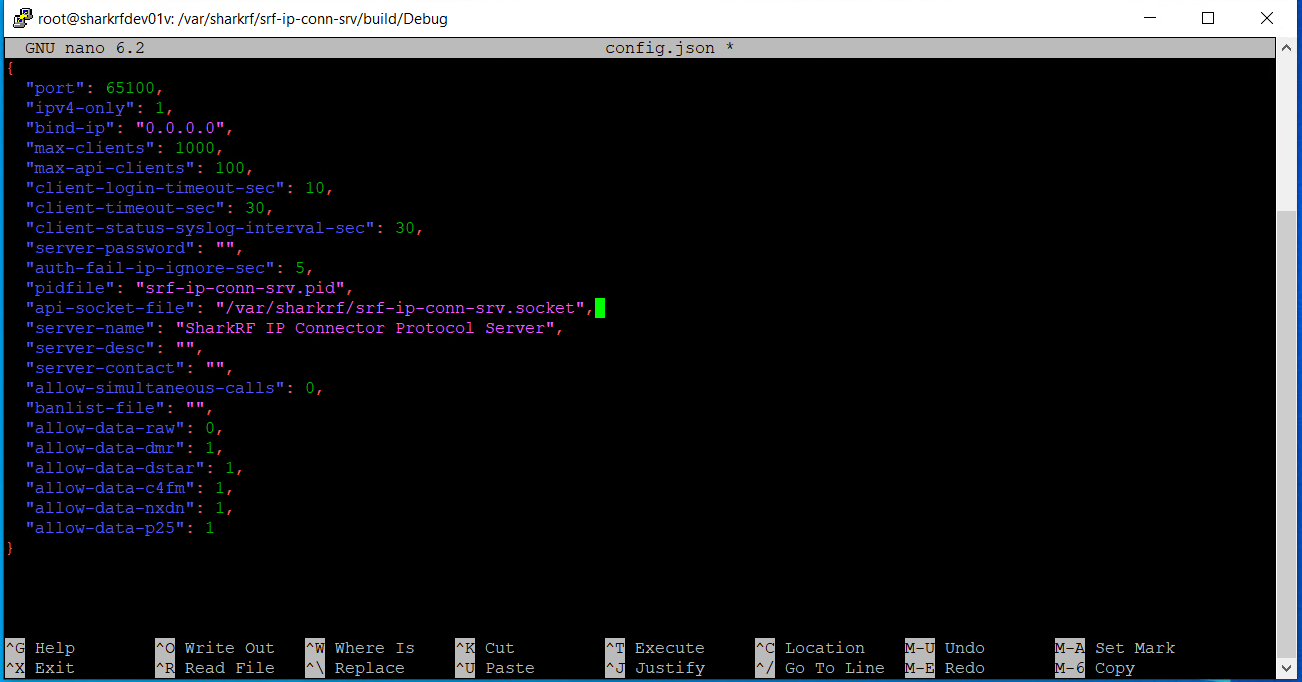 Save and write out your file.
Section 1 – Part 4 – sharkservice and auto-start configuration
Wouldn’t it be nice if we could have our SharkRF IP connector server auto start and run as a user other than root so the likelihood of getting pwned is reduced? Well we can!
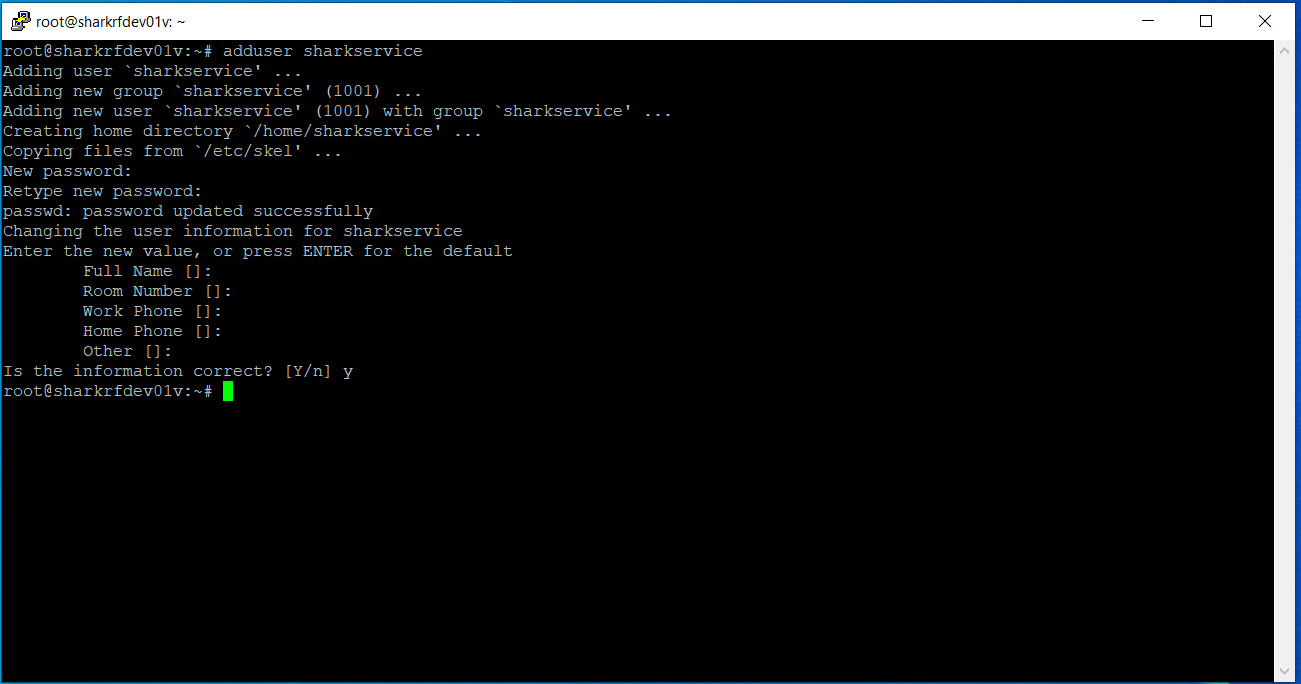
Let’s change directories back to root and add a user to our server called “sharkservice”. sharkservice is just like any other user except it isn’t running as root (admin) so our exploitation footprint is reduced.
cd /var
adduser sharkservice
Add a password and skip the remaining questions. Tell it “y” for yes at the end.
 Let’s set permissions on the sharkrf folder for the sharkservice to own.
chown sharkservice:sharkservice sharkrf -R
Next, let’s change directories and set permissions for the www-data user to owner. We could do it from here, but let’s CD just in case we typo something.
cd /var/sharkrf/srf-ip-conn-srv && chown www-data:www-data dashboard -R
Okay, moment of truth. We’re going to log in as the sharkservice user we created and start the server manually. We’ll configure auto start in a minute.
su sharkservice
Switch to the Debug folder. If you went with build-release, change to that folder. cd /var/sharkrf/srf-ip-conn-srv/build/Debug
Start your server!
./srf-ip-conn-srv -f
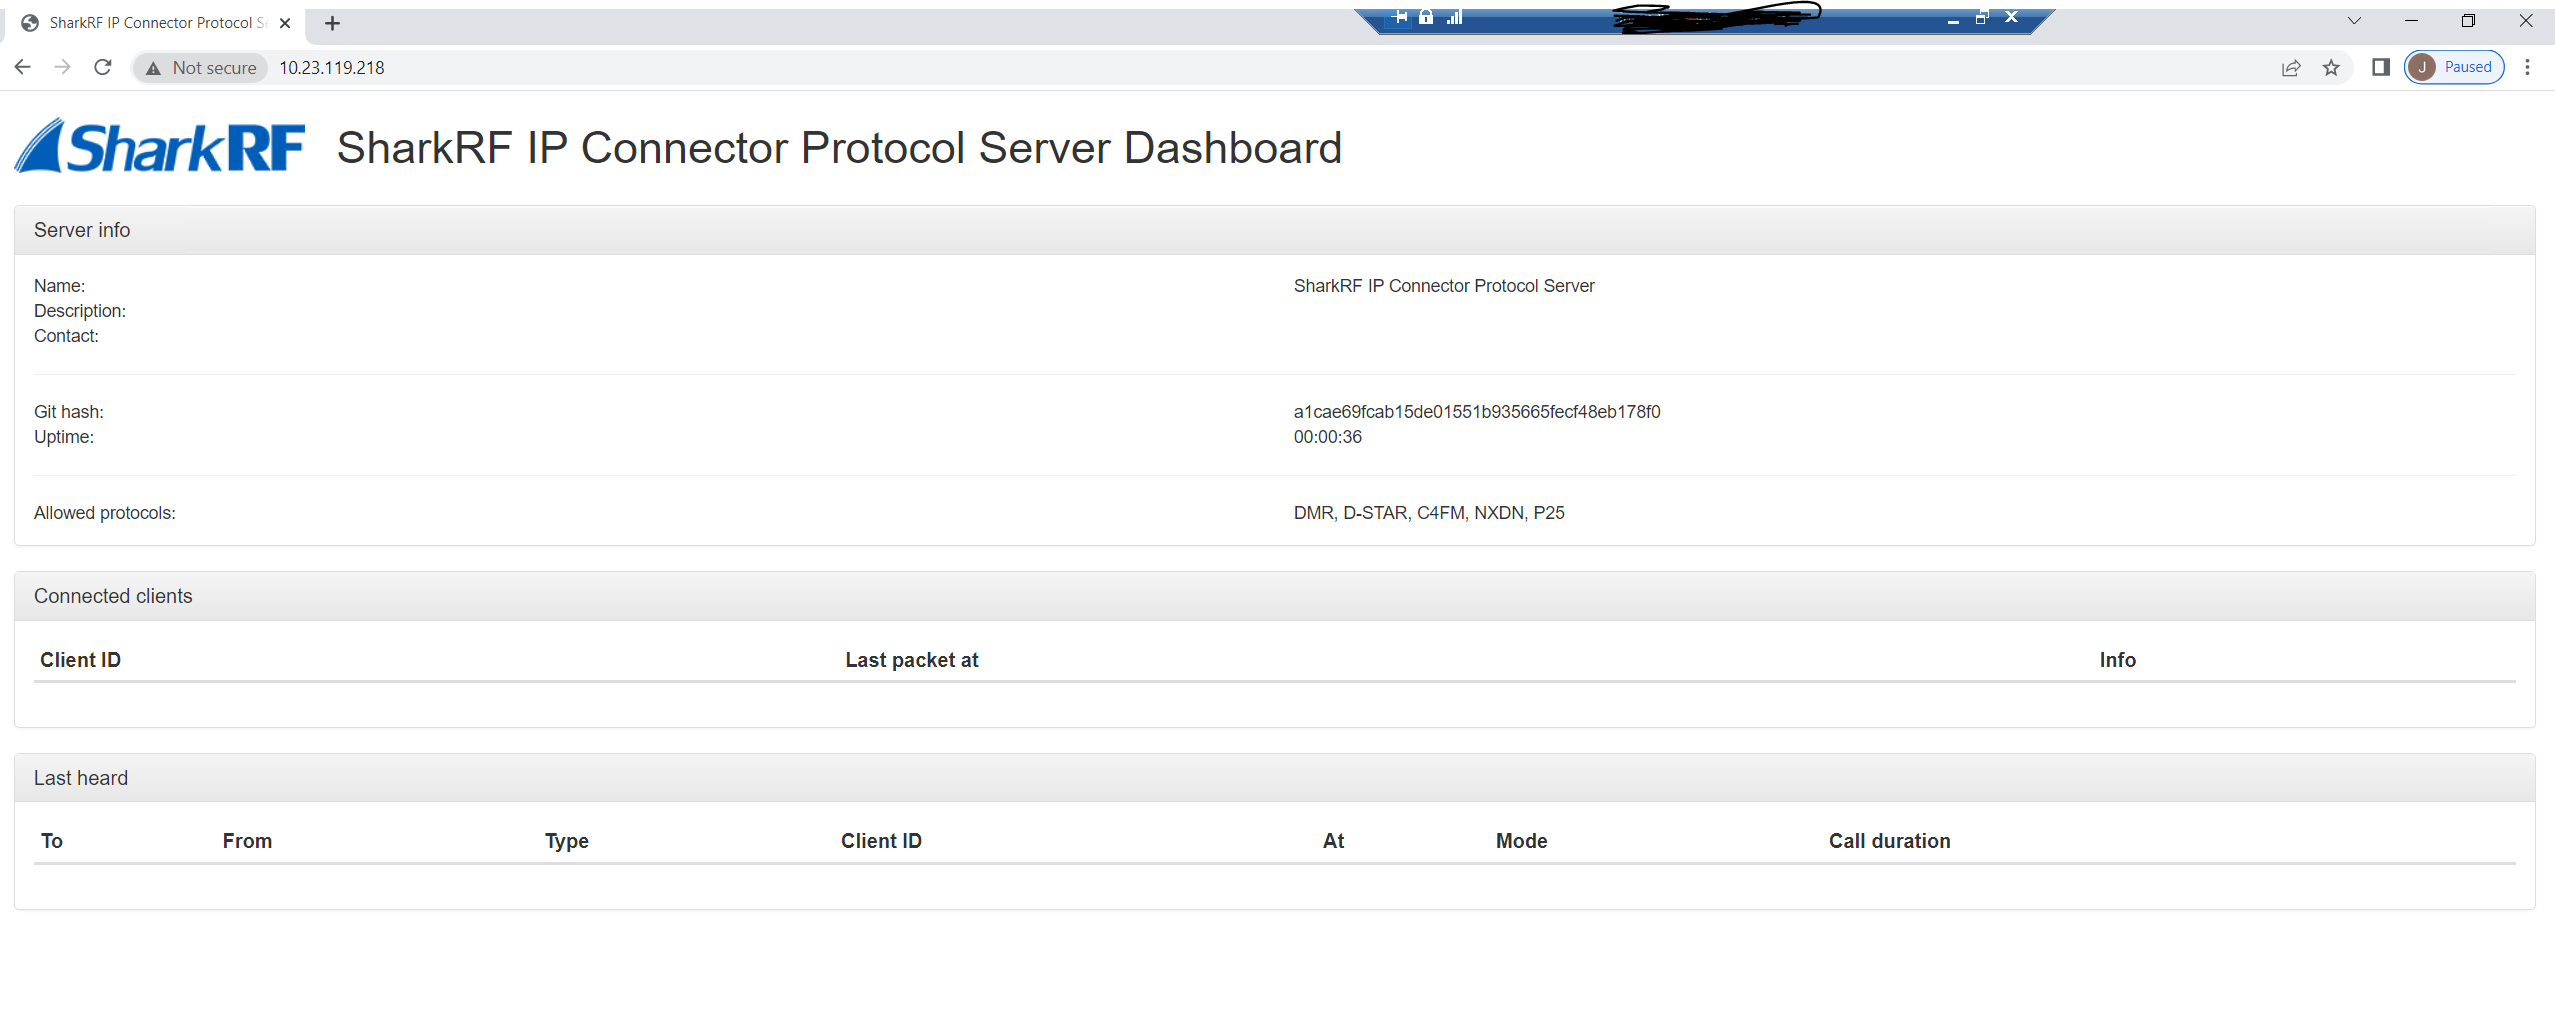
Fire up a web browser of your choice and navigate to http://yourIPaddress (or https://yourIPaddress if you configured SSL).
BAM, WHAM, AND (nearly) DONE!
 Press ctrl+c (control C) to kill the process that is running. Let’s set our server to auto start. If prompted for an editor, press 1.
crontab -e
Add this line to your crontab file then save and write out the crontab. Note the Debug folder. Remember, if you went with “build-release” then you’ll need to change the build-debug to read build-release.
@reboot /var/sharkrf/srf-ip-conn-srv/build/Debug/srf-ip-conn-srv -c /var/sharkrf/srf-ip-conn-srv/build/Debug/config.json
Save and write out your file. Exit out of the sharkuser. Type exit and press enter. Now reboot your server and then check if your SharkRF IP connector server auto starts by visiting the webpage after the server is up and running.
shutdown -r now
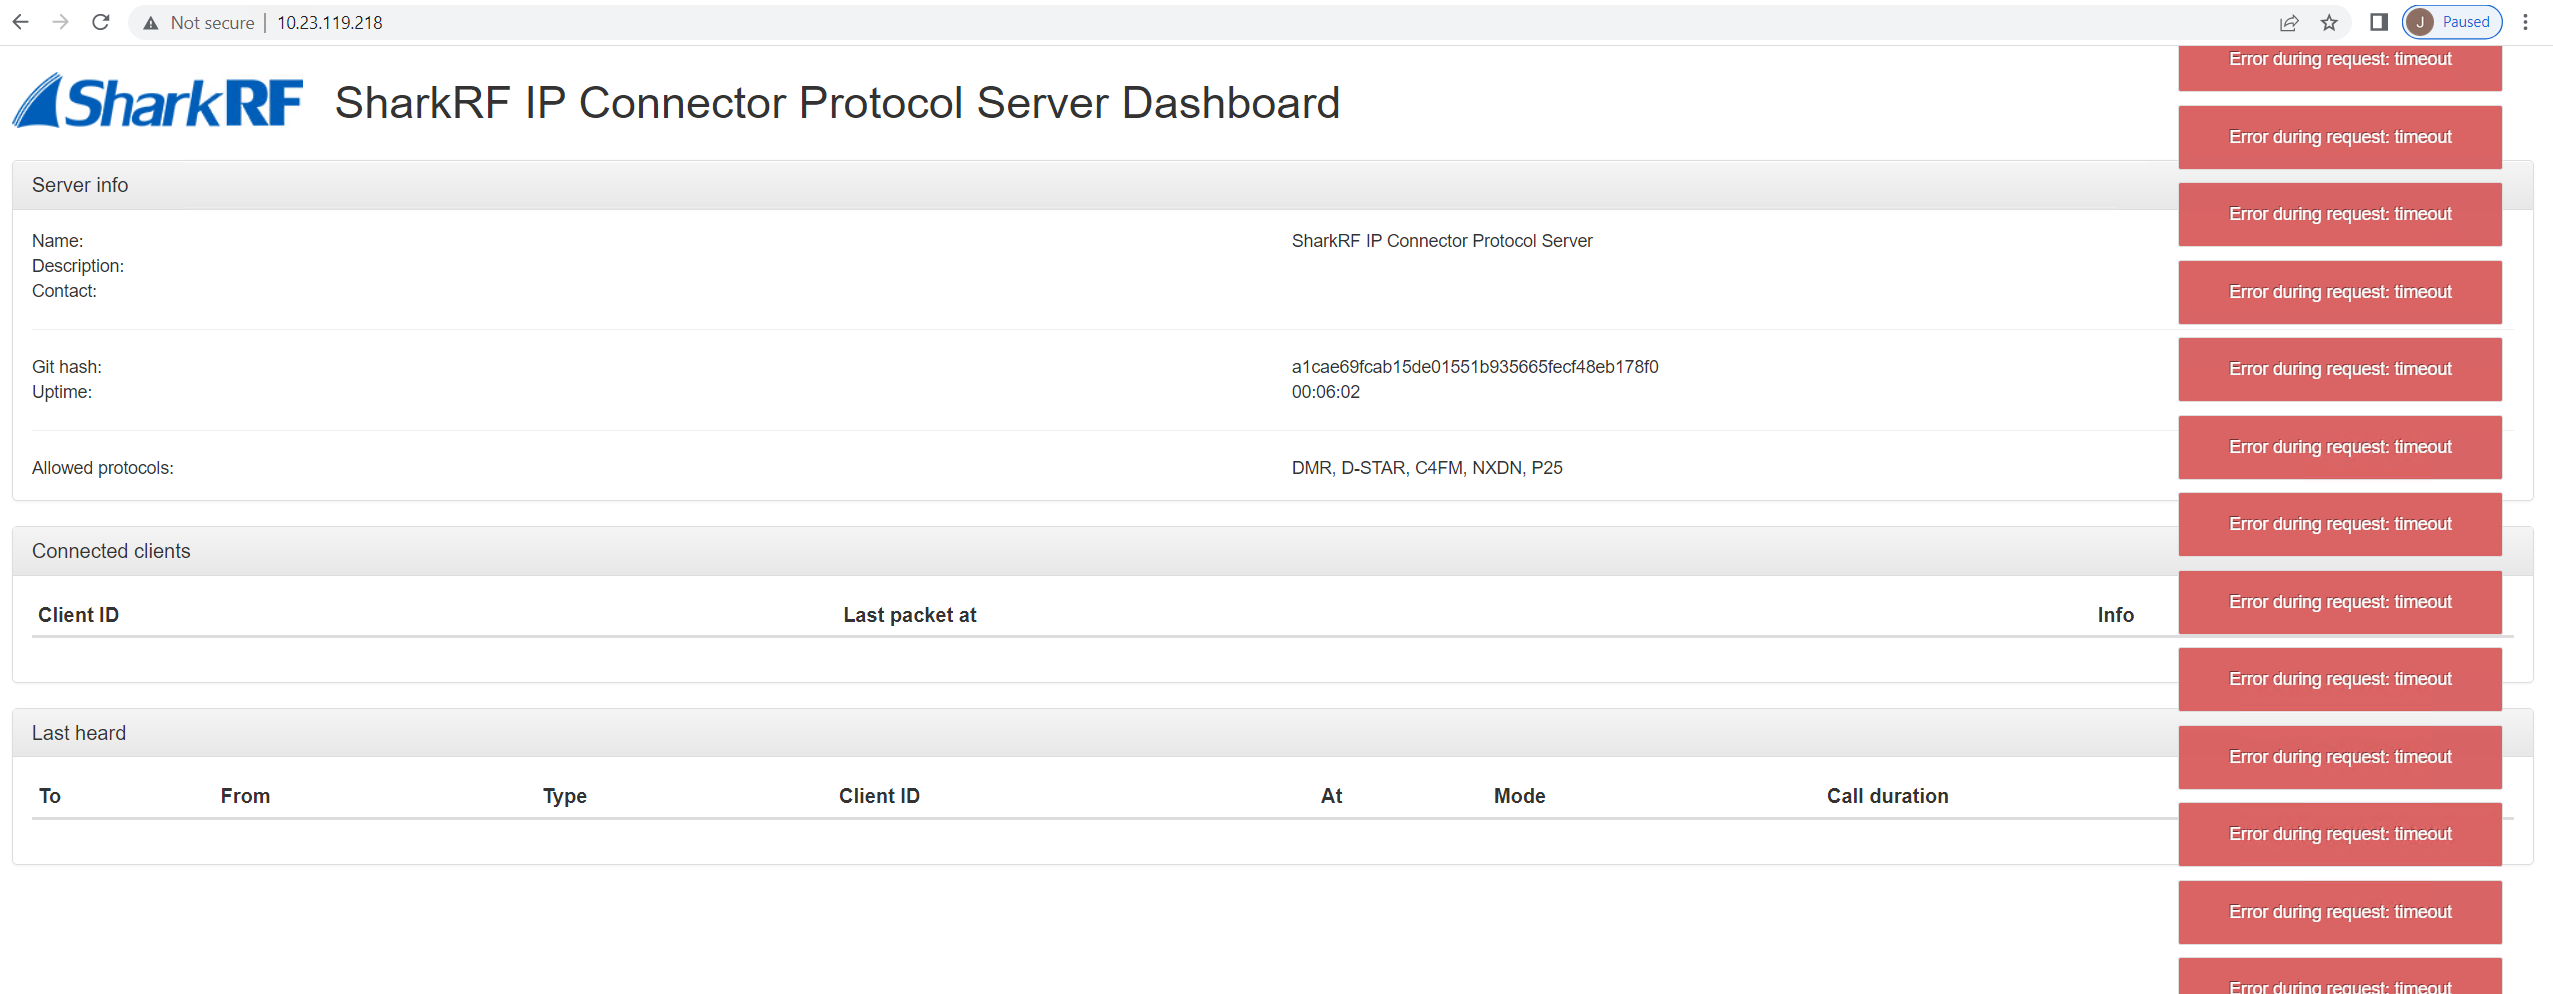
During reboot you’ll get the red boxes of death. Once your server is up, they’ll stop showing.
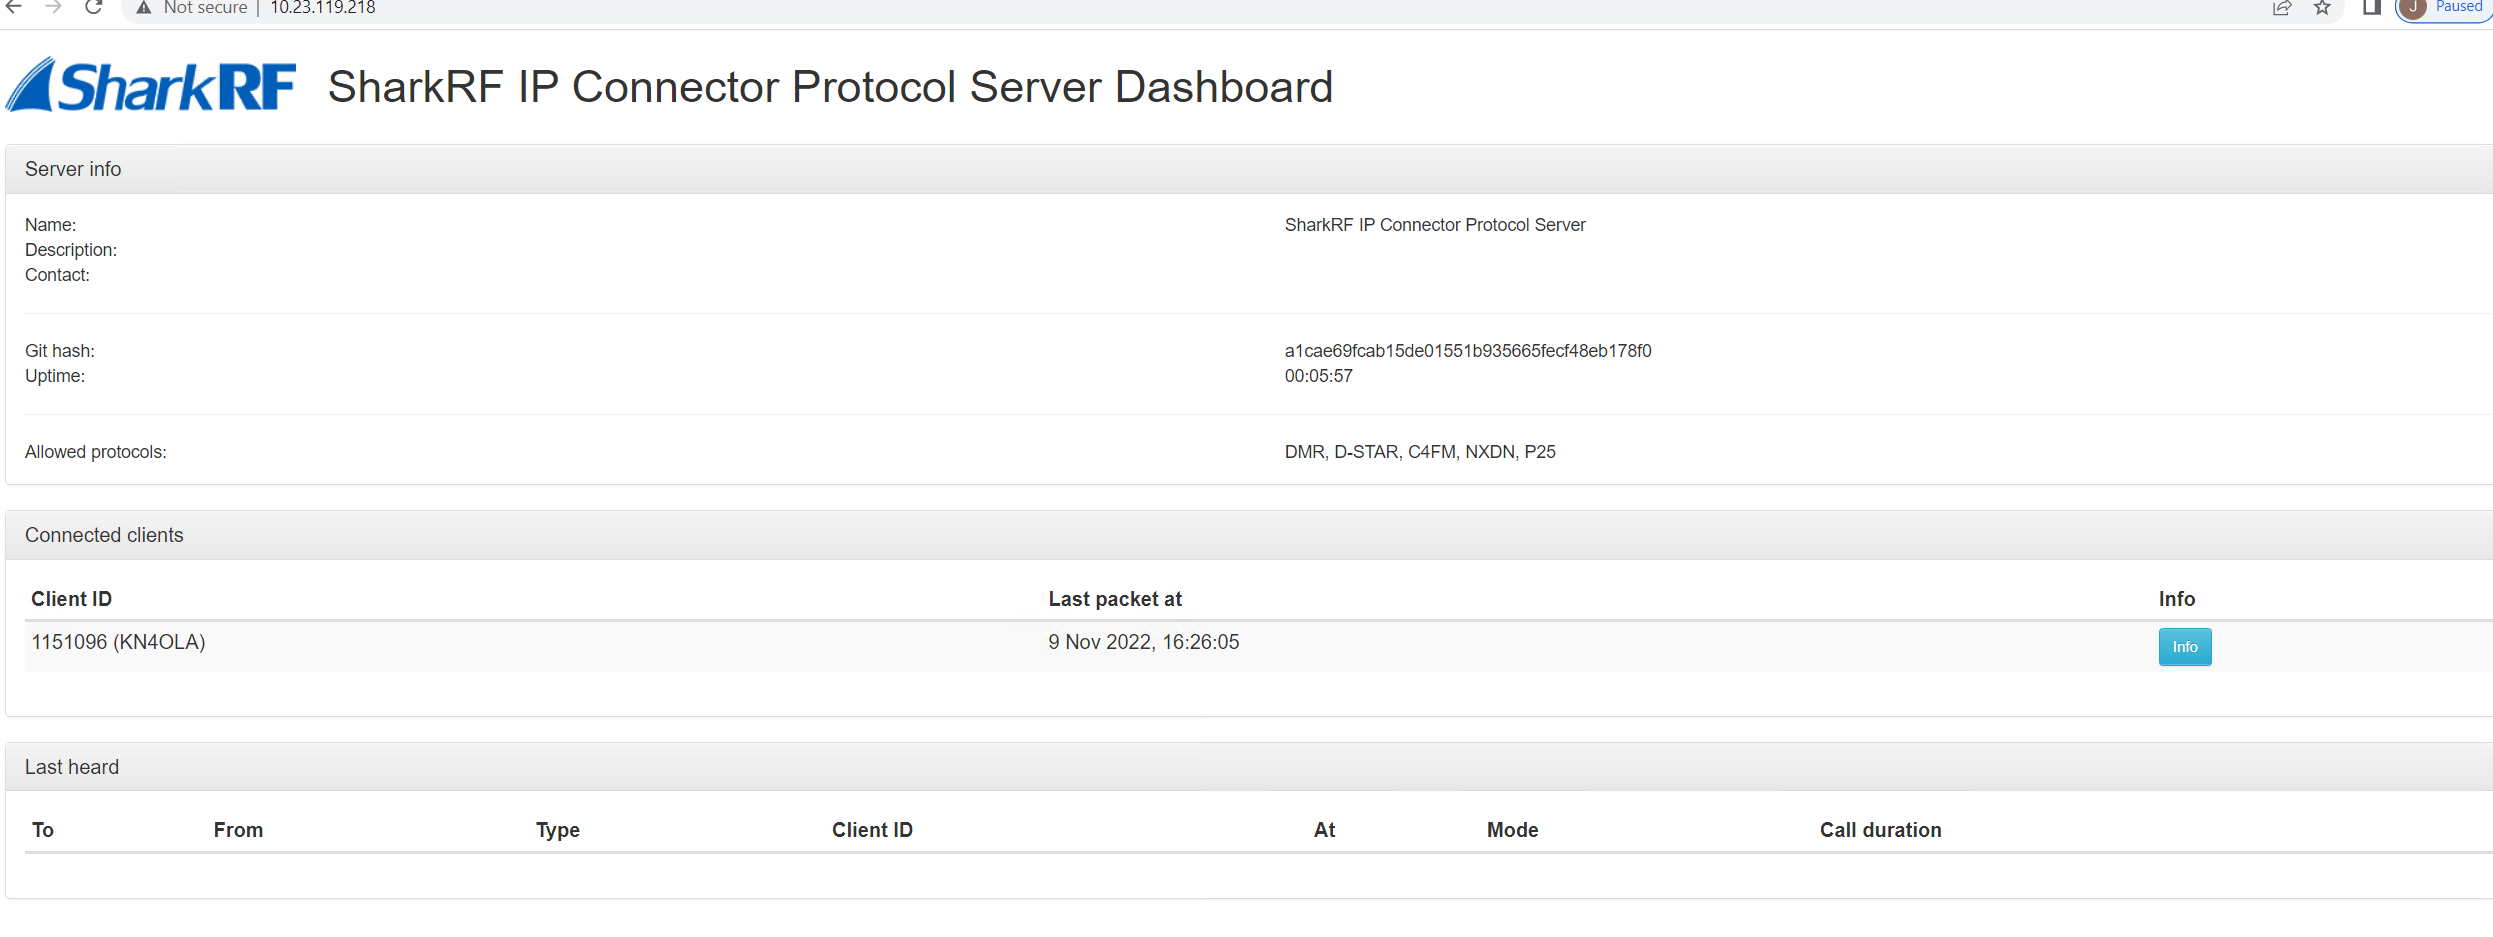
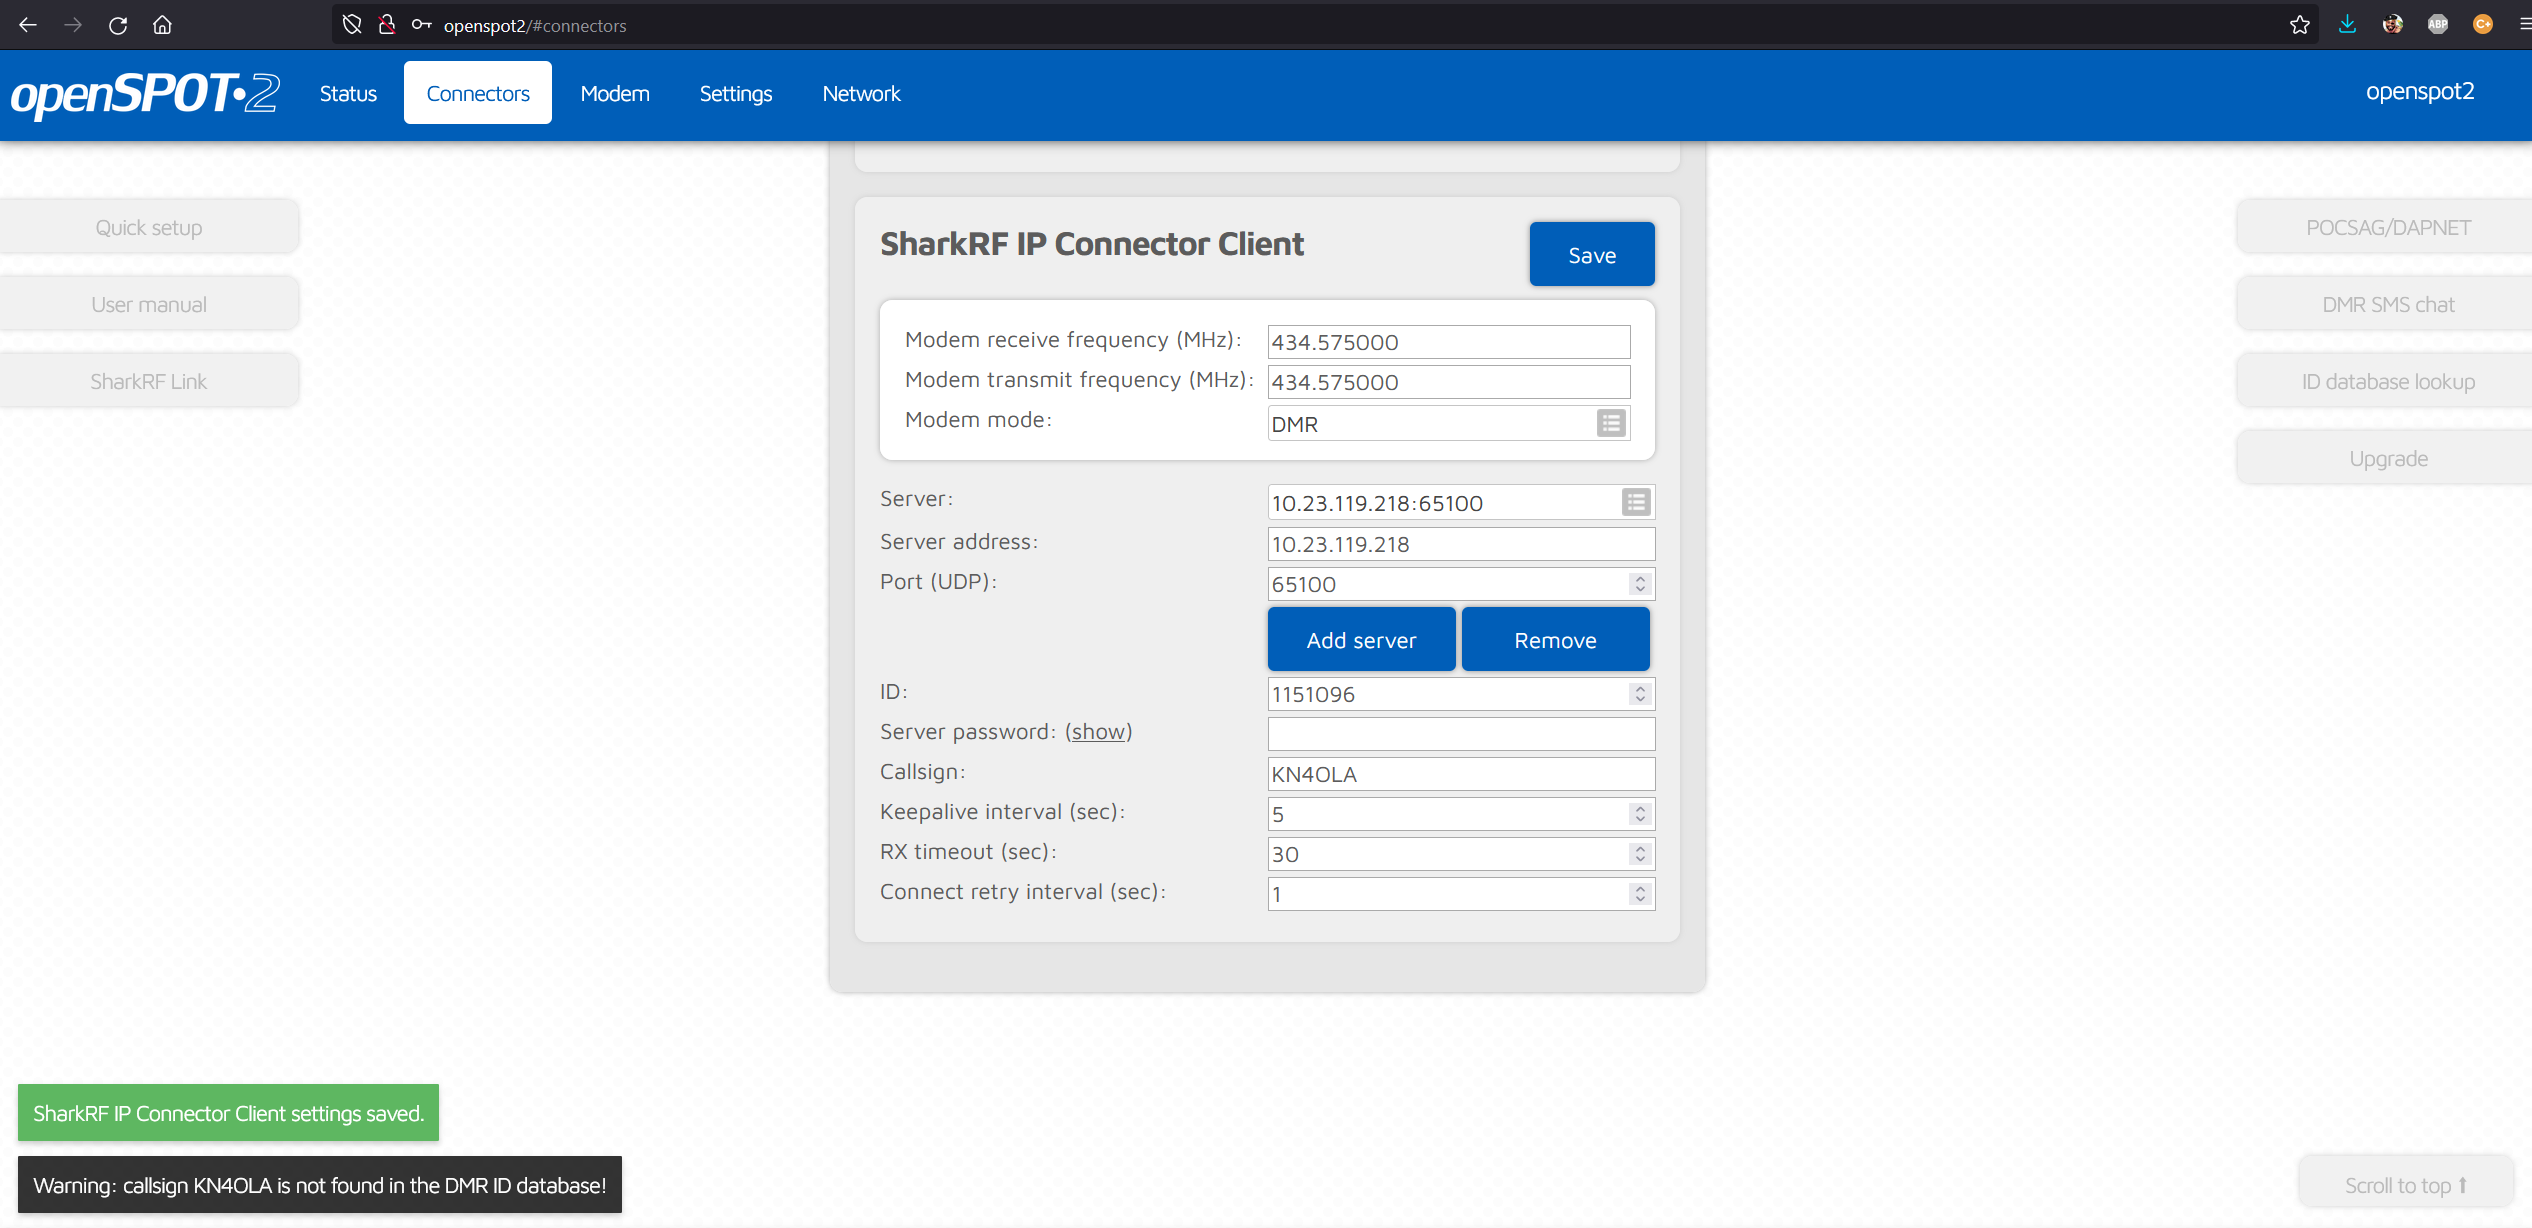
 Lastly, if you have an OpenSPOT, configure your OpenSPOT as a client and point it at your new connector server. It should should show up in the dashboard. If your OpenSPOT throws an authentication error, and you followed this guide using the “build-release” option then, sorry to say but you’ll need to go back and use “build-debug”. If you took a snapshot, revert and pick up where we left off. If you didn’t take a snapshot, delete the /var/sharkrf folder and pick up where we left off using build-debug.
However, if you’re like many of us, you should be connected!
Don’t forget to go an edit your config file with server details, etc. Save and write out then reboot your server to apply changes.
If you’ve made it this far, good work! If you want to test your digital voice radio, send me an email and I’d be happy to open up my SharkRF server for your OpenSPOT to test the digital voice capabilities of your OpenSPOT and I’d be more than happy to point my OpenSPOT at your newly-built SharkRF server. You can find my email on this webpage: https://sharkrf01v.johndball.com:8443/
Finally, If you find this guide to be helpful, please consider a small donation. I do these writeups out of the kindness of my heart (no, seriously, I don’t do this for profit or commercial gain). I could be playing Fortnite or hanging out with the wife or kiddos at the moment, but I took some time out of my day to put this together for you so consider a donation if you so desire. 73!
https://www.paypal.com/donate/?hosted_button_id=LH8J5L439UKDU
Section 2 – “Just the facts, ma’am, just the facts.”
 Here are the commands I used for the server configuration.
- Install Ubuntu 22.04.1 LTS
apt update && apt upgrade -y && apt autoclean && apt autoremove -y && shutdown -r now
- Install Apache2 and PHP
apt install apache2 -y && apt install php libapache2-mod-php -y
- Enable Apache2 SSL (for those that want to run their SharkRF dashboard using HTTPS)
a2enmod ssl
systemctl restart apache2
- Configure Apache2 apache2.conf file
cp /etc/apache2/apache2.conf /etc/apache2/apache2.conf.bak

nano /etc/apache2/apache2.conf

cp /etc/apache2/ports.conf /etc/apache2/ports.conf.bak

nano /etc/apache2/ports.conf
- Option 1 – configure Apache2 web virtual host .conf file for a basic, no frills (no HTTPS) setup:
cp /etc/apache2/sites-available/000-default.conf /etc/apache2/sites-available/000-default.conf.bak

nano /etc/apache2/sites-available/000-default.conf
- Option 2 – configure Apache2 web virtual host. conf file for HTTPS:
a2dissite 000-default.conf

systemctl reload apache2

mkdir /etc/apache2/ssl

nano /etc/apache2/sites-available/sharkrfdev01v.conf

cd /etc/apache2/ssl

openssl req -new -newkey rsa:2048 -nodes -keyout sharkrfdev01v.key out sharkrfdev01v.csr

nano /etc/apache2/ssl/sharkrfdev01v.pem
Do shark stuff here:
apt install cmake -y && apt install build-essential -y

mkdir /var/sharkrf && cd /var/sharkrf

git clone https://github.com/sharkrf/srf-ip-conn

git clone https://github.com/zserge/jsmn

cd jsmn

git checkout 732d283ee9a2e5c34c52af0e044850576888ab09

cd /var/sharkrf/srf-ip-conn-srv/build
My build was all jacked up due to a SHA256 issue. I’m using the build-debug option. SEE: https://forum.sharkrf.com/d/6984-openspot2-on-sharkrf-ip-connector-server-got-nak-unable-to-connect.
SRF_IP_CONN_PATH=/var/sharkrf/srf-ip-conn JSMN_PATH=/var/sharkrf/jsmn ./build-debug.sh

cd /var/sharkrf/srf-ip-conn-srv/dashboard/ && cp config-example.inc.php config.inc.php

nano config.inc.php
edit ‘/tmp/srf-ip-conn-srv.socket’ to ‘/var/sharkrf/srf-ip-conn-srv.socket’
cd /var/sharkrf/srf-ip-conn-srv && cp config-example.json /var/sharkrf/srf-ip-conn-srv/build/Debug/config.json && cd /var/sharkrf/srf-ip-conn-srv/build/Debug/

chmod 755 config.json

nano config.json
edit “api-socket-file”: “/tmp/srf-ip-conn-srv.socket”, to “api-socket-file”: “/var/sharkrf/srf-ip-conn-srv.socket”,
-cd /var
Sharky shark user time. #DontRunAsRoot #DontBeAJerk
adduser sharkservice

chown sharkservice:sharkservice sharkrf -R

cd /var/sharkrf/srf-ip-conn-srv && chown www-data:www-data dashboard -R

su sharkservice

cd /var/sharkrf/srf-ip-conn-srv/build/Debug

./srf-ip-conn-srv -f
ctrl+c to stop the process
crontab -e
@reboot /var/sharkrf/srf-ip-conn-srv/build/Debug/srf-ip-conn-srv -c /var/sharkrf/srf-ip-conn-srv/build/Debug/config.json
shutdown -r now
Connect your OpenSPOT to your server and be done!
If you find this guide to be helpful, please consider a small donation. I do these writeups out of the kindness of my heart (no, seriously, I don’t do this for profit or commercial gain). I could be playing Fortnite or hanging out with the wife or kiddos at the moment, but I took some time out of my day to put this together for you so consider a donation if you so desire. 73!
https://www.paypal.com/donate/?hosted_button_id=LH8J5L439UKDU