Background
My remote control server is an HP EliteDesk connected via USB to my ICOM IC-7300. It is located on the opposite side of my property in a remote building. It is air gapped to my main network for lightning protection purposes. This is a sweet setup because I can run my HF rig from my house or anywhere I have an internet connection.
Switching gears and putting on my “IT admin” hat, I’m in the middle of a Windows 10 Pro to Windows 11 Pro migration. I figured I’d upgrade this server to Windows 11 Pro and it’d be smooth sailing… I was wrong. It took me an hour to figure out the nuances of Windows 11 and ICOM compatibility, but I got it working. Here is what I had to do and I hope this helps you on your HAM journey.
Server setup
- Install and update your Windows 11 build, whatever it is, to the latest supported version. In my setup, I’m running Windows 11 Pro 23H2. Make sure you install any OEM drivers that are required for your build (Intel RST, Intel Chipset, whatever).
- Run
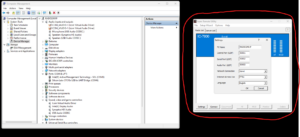
cmd.exeas administrator then runcompmgmt.msc. Expand Device Manager and make sure you aren’t missing any components. Yellow question marks, Unknown Device, and more importantly yellow triangles need to be addressed. Leave this window open as we’ll need it in the next steps.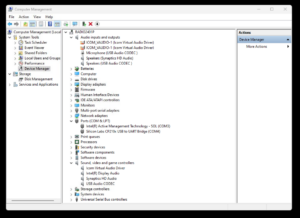
- Run
- Install the Silicon Labs CP210x UART Bridge driver. I am using version 11.3.0: https://www.silabs.com/documents/public/software/CP210x_Universal_Windows_Driver.zip
- Download, extract, and find “silabser.inf”. Right-click on “silabser.inf” and select install.
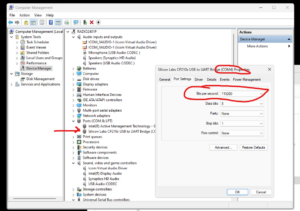
- Find “Silicon Labs CP210x USB to UART Bridge” in your device manager window. Double-left click on it, go to the Port Settings tab, and change your bits per second to 115200.
- Note the COM port number. In my screenshot, mine is COM4.
- Install the ICOM USB Serial Port Driver. I am using version 1.30 from ICOM Japan’s website (not ICOM America.). https://www.icomjapan.com/support/firmware_driver/3871/
- Purchase and install the RS-BA1 controller software and utility then update to version 2.60.
- This is the software used to control the remote features of the IC-7300. It is licensed, so you’ll need to purchase a software license.
- I have yet to find a place to offer a digital download of the license key, so post in the comments below if somebody has a digital download license key option. For now, you’ll get the full software on a CD-ROM and license key printed on the case (shout out to the year 1999). https://www.google.com/search?q=RS-BA1
- Once you have the RSBA1 controller software installed, upgrade to version 2.60. I am using version 2.60 from Icom Japan’s icom.co.jp website (not Icom America and not IcomJapan.com). https://www.icom.co.jp/support/drivers/7598/?setBusiness=2
- This is the software used to control the remote features of the IC-7300. It is licensed, so you’ll need to purchase a software license.
- Once all of that is completed, it’s time to connect the IC-7300 via USB and power on the radio. Go ahead and do that while watching the Computer Management window. Look for any of the errors mentioned in step 1 above.
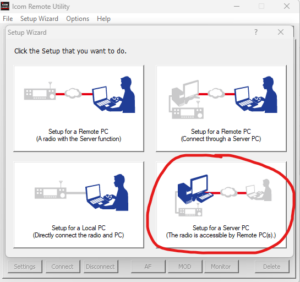
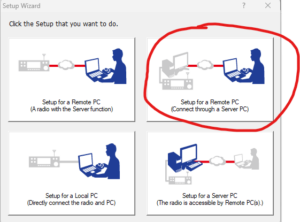
- Launch the ICOM Remote Utility program. You’ll be prompted with a setup wizard (which sucks IMO, I’d rather go through setup manually), but go through that wizard for your particular needs. Mine is option 4 (bottom right) “Setup for a Server PC (The radio is accessible by Remote PC(s))” so the instructions below may not apply to you.
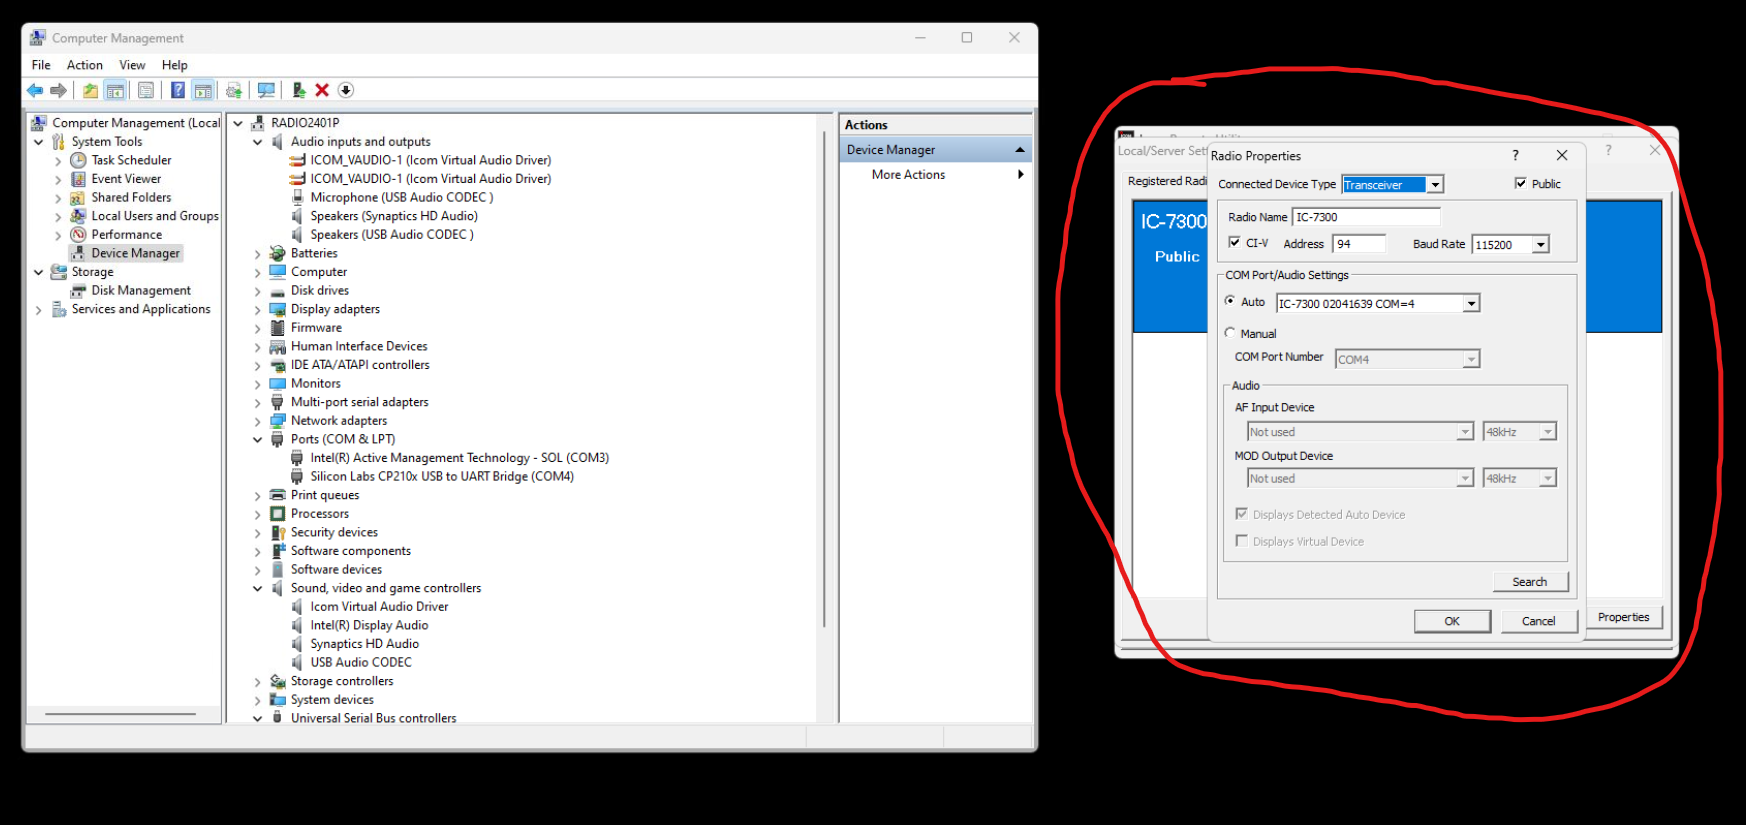
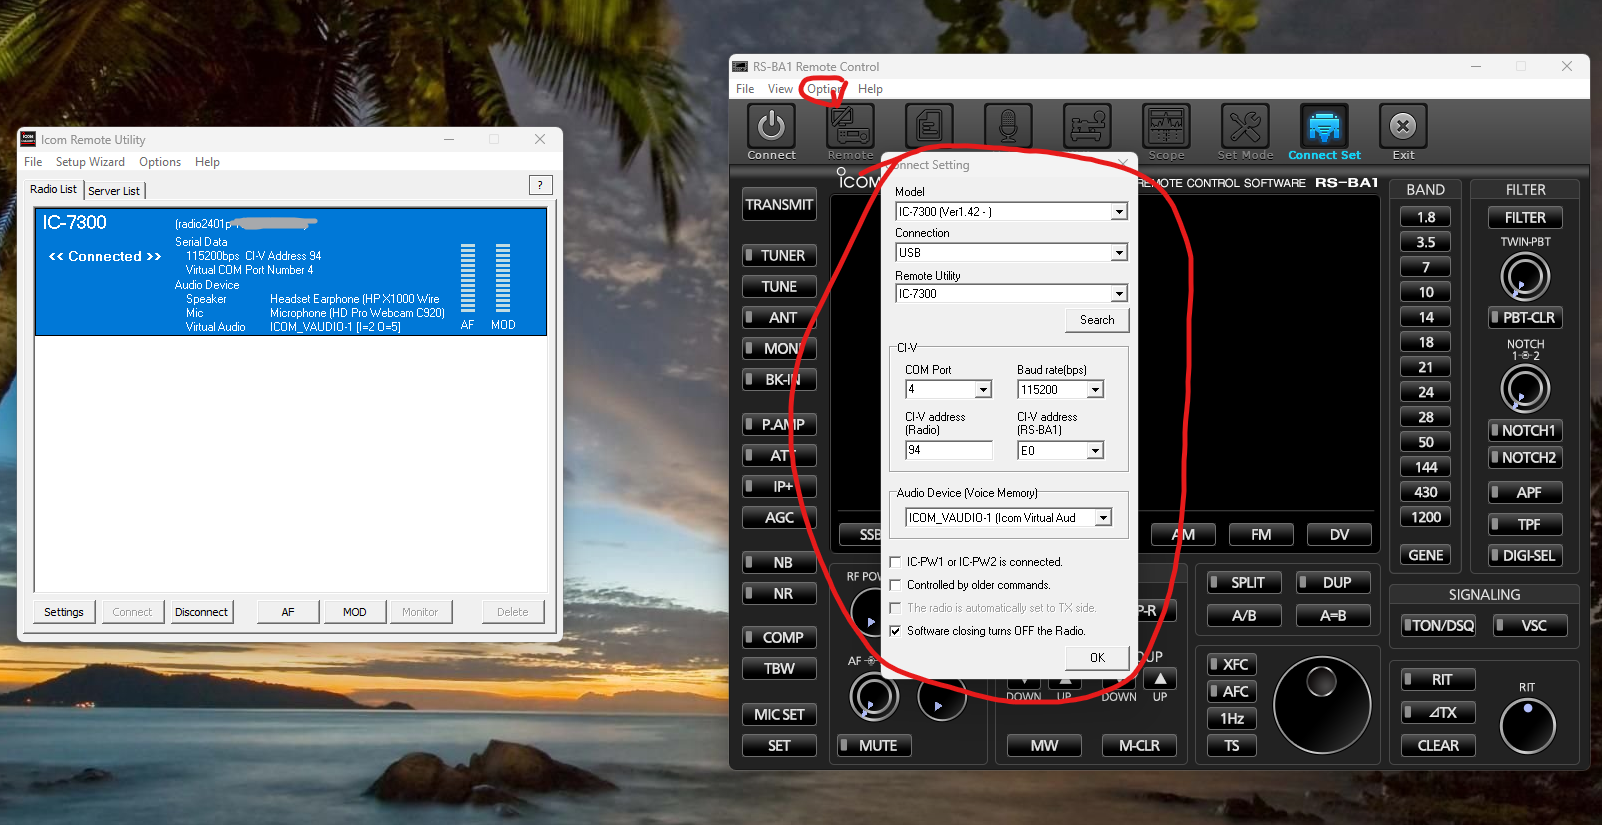
- Once the setup wizard is done, click on “options” then “Local/Server Settings”. If you are using all defaults with your IC-7300, the settings in the screenshot below should work for you. The IC-7300 default CI-V address is “0x94” (or just 94) and the default controller address is “0xE0” (or just E0).
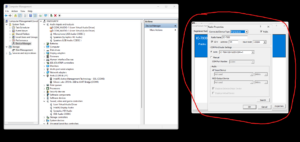
- Once the setup wizard is done, click on “options” then “Local/Server Settings”. If you are using all defaults with your IC-7300, the settings in the screenshot below should work for you. The IC-7300 default CI-V address is “0x94” (or just 94) and the default controller address is “0xE0” (or just E0).
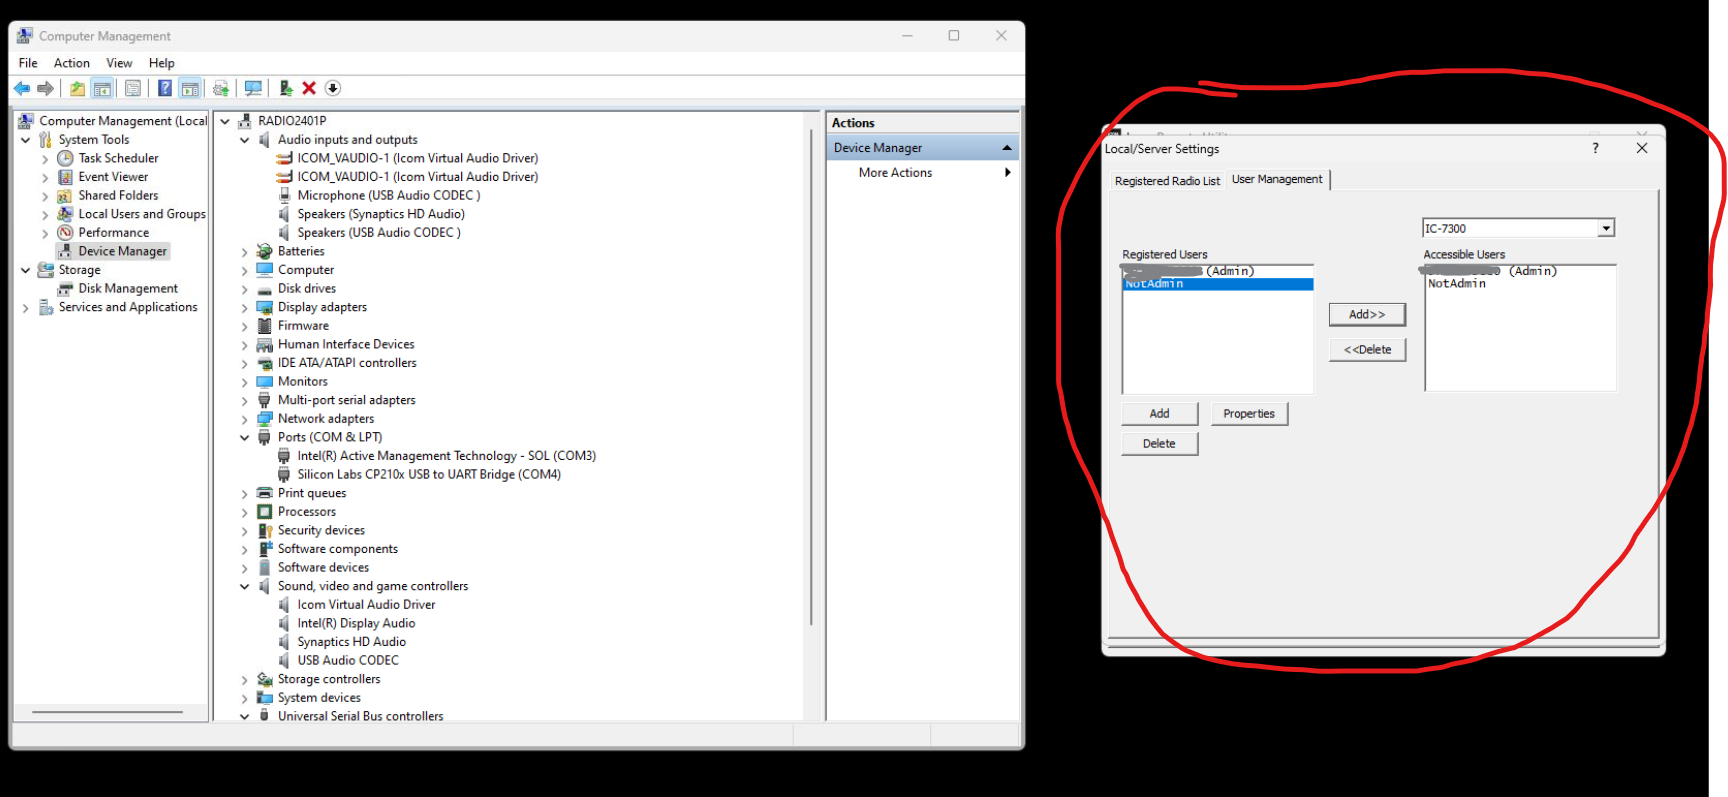
- Make sure you add whatever users you need for your setup. I use two – an admin user for admin functions which I only use locally and a non-admin user that I use for day-to-day radio functions (#leastprivilege).

- Once you are satisfied with those settings, navigate back to your “Radio List” tab. You should see your settings in the window. Then click on “options” and “settings” at the top of the page. Make a note of your UDP ports which should be defaults. However, if you use Teamviewer and some other remote control utilities, you may need to change these ports.


Client setup
- Install the RS-BA1 software on your client computer. You don’t need to purchase a second license, just use the license from your initial purchase.
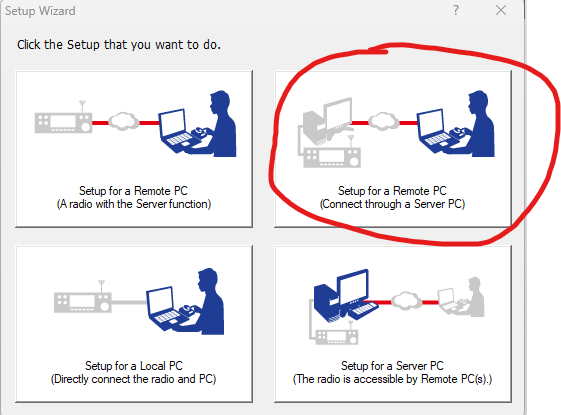
- Launch the remote utility software and run through your setup. Select option 2 (top right) “Setup for a Remote PC (Connect through a Server PC)”. Again, I’m remote so the instructions below may not apply to you.
- Follow the prompts and enter your host name or server IP address and the control port from the server setup. Click next and enter your user ID and password. Click next, add a description, then click finish.
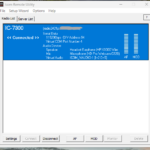
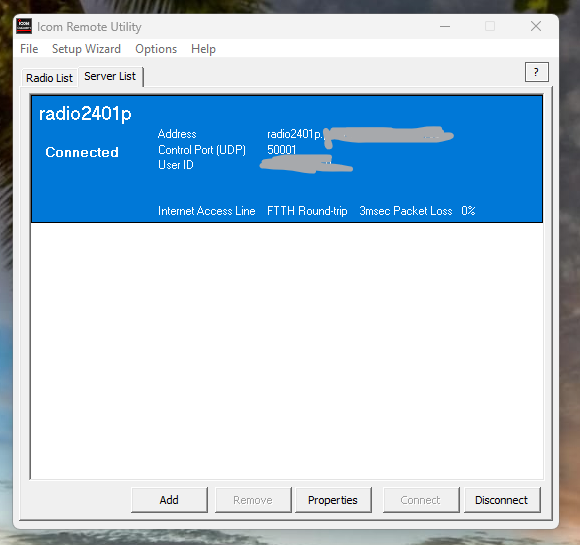
- Click on “Server List” and you should see your server in the list.

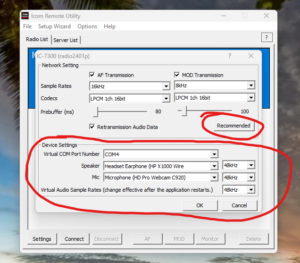
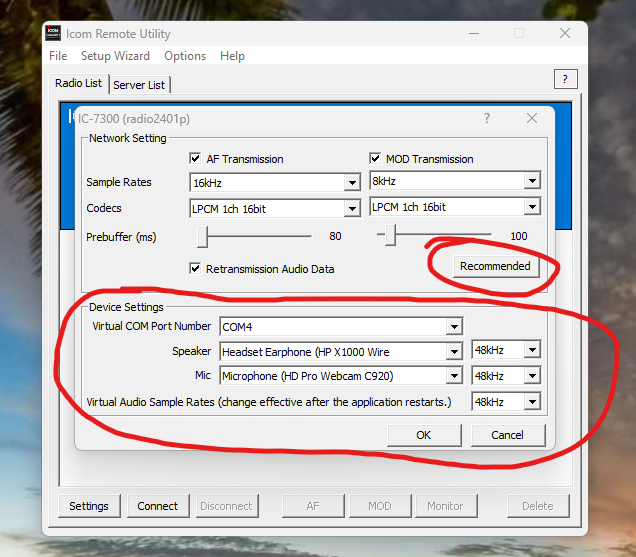
- Click on “Radio List” and you should see your radio in the list. Select the radio then click on “Settings” at the bottom of the window. Hit the “recommended” button then select your device settings. The device settings COM Port Number should match what you are using on your remote server (in my case COM4). Your Speaker and Mic settings should match what you are using locally. In my case, that is my X1000 headset and my HD Pro webcam.
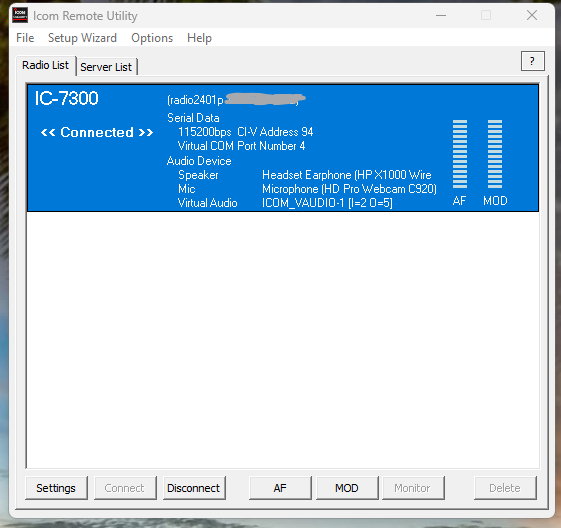
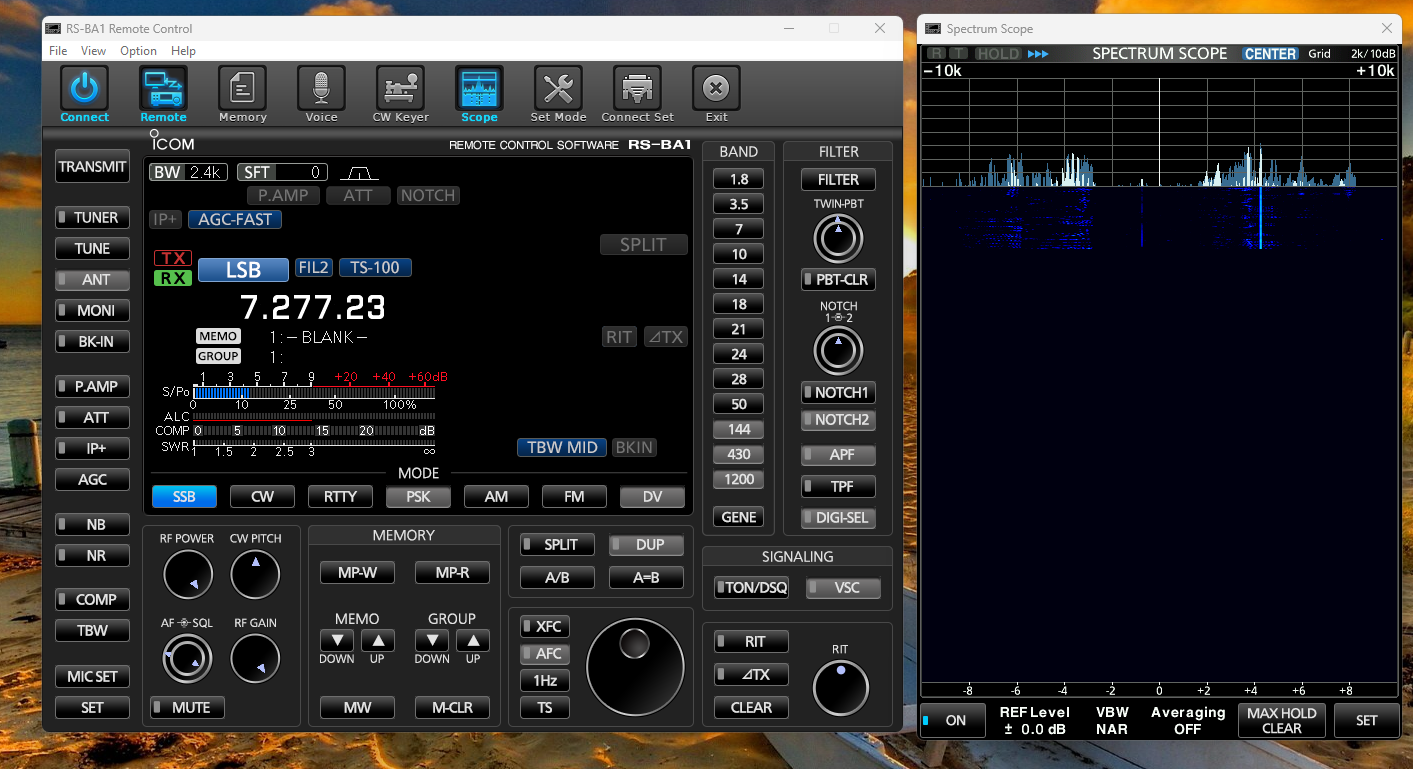
- Once you are satisfied with those settings, click on “OK” then click on “Connect”. You should see two things: 1) you are << Connected >> on your client machine and you should Busy on your server PC with the name of the client in the Utility window.
Client connected to server 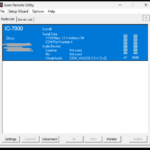
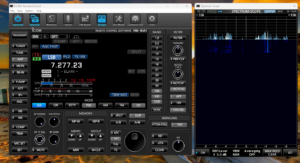
Server showing active client - Launch the Remote Control software, click on “Option” then “Connect Setting”. Your connect settings should match those in the screenshot, but modify your COM port for your needs and edit your CI-V address specific to your IC-7300. Since I’m not physically located at the IC-7300, I also selected the “Software closing turns OFF the radio” option.

- Click OK then click on “Connect”. You should connect to your radio! If you are also watching server side, you can ignore the “USB device not recognized” error if you get that message. I have yet to figure out what on Windows 11 is causing this as I was not getting the error on Windows 10. I think it is something to do with my radio booting. Regardless, the USB device not recognized message will disappear after a few seconds, the device manager will automatically clear, and the radio should work like normal.
Final thoughts and credit

As clunky as obtaining and installing the software is, I really like the ICOM RS-BA1 remote control software. I even bought an ICOM RC-28 USB remote control dial which integrates into the software without issue. This gives me a physical knob to turn “remotely”.
My only wish is that ICOM would make the install process a little more streamlined and modern but, just like my “Toyota tech”, it’s lagging behind many years. I am thankful for ICOM keeping the drivers and installers updated to work with Windows 11, so beggars can’t be choosers. :-p
I also want to give credit to two YouTube videos that helped me with my initial install over a year ago on Windows 10. Give these two videos a watch as my post above is not as comprehensive (or fun) as these two videos.
- The first video is from ICOM UK. He even has a pint during the making of the tutorial which gives me a good laugh. https://www.youtube.com/watch?v=TOpiSDzW3-g
- The second video is from DX Engineering, one of my favorite places to buy HAM radio gear. https://www.youtube.com/watch?v=ueMxd3NuBG0
73’s! ~KN4OLA