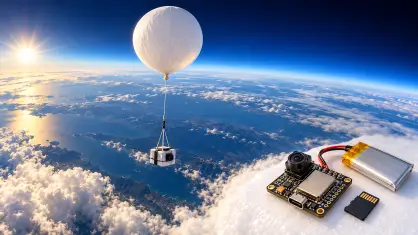
For our upcoming Jamboree on the Air high-altitude balloon project, I wanted a small camera payload that could take photographs without a phone, an internet connection, or someone standing beside it pressing buttons. The hardware needed to be lightweight. The software needed to survive the sort of problems that are easy to fix on a workbench and considerably harder to fix several miles overhead.
The result is an ESP32 balloon camera built around the Seeed Studio XIAO ESP32S3 Sense, a SanDisk Ultra 32GB microSD card, and a rechargeable lithium-polymer battery. It captures JPEG photographs on a nominal two-second schedule, logs its activity, and announces its preflight status through a Wi-Fi network name.
As of October 6, 2026, this is a bench-tested project being prepared for flight. The testing described here is ground testing, not a claim that the electronics have already survived the stratosphere. That part of the story is still ahead of us. I’ll follow up post JOTA, and hopefully a successful recovery, with high altitude images.
Download the public firmware
The public sketch is ESP32_Balloon_Camera_v0.4.2.ino. It uses generic balloon filenames and includes editable recovery-contact fields so you can make the build your own. I’ll eventually move this to GitHub. For now you get Google Drive.
Download the ESP32 Balloon Camera firmware
This sketch targets the XIAO ESP32S3 Sense with its camera and microSD expansion module. Other ESP32 camera boards require different pin assignments and potentially other changes. The public edition retains the v0.4.2 flight-candidate logic; compile and test it on your own hardware before deployment.
What the camera does
- Captures 1600 × 1200 JPEG photographs on a nominal two-second schedule. Capture and write delays can extend that interval.
- Saves sequentially numbered files and resumes after the highest existing image or quarantined image number following a restart.
- Checks PSRAM, mounts the microSD, initializes the camera, and writes and reopens a real photograph before declaring preflight success.
- Broadcasts GO FOR LAUNCH for two minutes, then switches Wi-Fi off while photography continues.
- Retries recoverable startup and capture/write faults using timed deep sleep.
- Records firmware version, boot number, uptime, events, filenames, and byte counts in
MISSION.CSV. - Contains startup checks for an interrupted CSV tail and an incomplete newest JPEG.
- Stops photographing and enters indefinite deep sleep when the filesystem reaches its storage safety threshold.
The Wi-Fi name is a local status indicator. There is no live video stream, photo-download website, GPS tracking, or altitude measurement in this firmware. Finding the balloon requires a separate tracking and recovery plan.
Hardware and supplies
| Item | What I used or needed |
|---|---|
| Camera board | Seeed Studio XIAO ESP32S3 Sense, including its Sense camera/microSD module. |
| Storage | SanDisk Ultra 32GB microSD, formatted FAT32. |
| Battery | AKZYTUE/YDL 505573 rechargeable single-cell 3.7 V, 2500 mAh LiPo battery with a JST-PH 2.0 mm two-pin connector. This is the battery selected for our build; actual endurance still needs testing. |
| Battery leads | JST-PH 2.0 mm male/female connector pigtails, sold as a 10-piece set with 22 AWG silicone wire and approximately 80 mm leads. I soldered the mating board-side pigtail to the battery pads, allowing the battery to be unplugged. Check polarity with a meter before connection. |
| USB cable | USB-C data cable for programming, Serial Monitor, and USB power. |
| Wi-Fi antenna | The compatible antenna supplied with the board, attached for the preflight status beacon. |
| Card reader | USB microSD reader or SD adapter for formatting and retrieving photographs. |
| Soldering supplies | Fine-tip soldering iron, electronics solder, flux, small cutters/strippers, and a stable board holder. |
| Inspection and insulation | Multimeter, magnification, and suitable insulation for exposed connections. |
| Strain relief | My build used double-knotted nonconductive sewing thread to secure the battery leads. |
| Flight packaging | A lightweight insulated payload enclosure, secure camera mounting, clear lens opening, and a secure tether attachment. Final packaging and total payload weight must be checked separately. |
The camera and card slot connect through the Sense module. I did not solder GPIO headers for this build. The electrical soldering was limited to the two battery-pad connections.
Assembling the hardware
- Disconnect USB and the battery. Keep the battery disconnected throughout soldering and inspection.
- Align the Sense module with the main board’s board-to-board connector and seat it evenly. Check the camera ribbon and connector without forcing them.
- Prepare the battery pigtail, tin the wire ends, and solder red to BAT+ and black to BAT−. On this XIAO, the negative battery pad is nearest the USB-C connector and the positive pad is farther away. Confirm against Seeed’s diagram and your board revision.
- Inspect for solder bridges, loose strands, and shorts. Verify battery-lead polarity with a meter before plugging the battery in. Do not use the GPIO pads as battery inputs or solder directly to the pouch cell.
- Insulate exposed connections and add strain relief so the wire cannot pull on the small solder pads. Our sewing-thread solution kept the assembly light; keep knots and wires clear of the lens, connectors, and components.
- Attach the compatible Wi-Fi antenna, prepare the card as described below, and perform initial programming and testing on the bench.
Use a suitable rechargeable single-cell battery with appropriate protection. Prevent shorts, punctures, and crushing. Charge under supervision and within the battery manufacturer’s temperature limits; a cold flight battery needs to return to a permitted charging temperature before charging.
Prepare the microSD card
Back up anything on the card before formatting. Using your computer and card reader, format the 32GB card as FAT32, then eject it properly. Install it in the Sense module with both USB and battery power disconnected.
The firmware creates its own mission directory and files. You do not need to create them manually. For a normal run, make sure the card root does not contain TEST_MODE.TXT, which deliberately enables fault simulations.
The card is read through its socket; this sketch does not expose it as a USB storage drive. To retrieve photographs, power down fully and move the card to a reader.
Install Arduino IDE and ESP32 support
- Download Arduino IDE 2 for your operating system from Arduino’s official software page and install it.
- Open Arduino IDE. On Windows, open File → Preferences. On macOS, use the application’s Settings/Preferences menu.
- Add the following stable ESP32 package URL to Additional Boards Manager URLs. Keep any URLs already present.
https://espressif.github.io/arduino-esp32/package_esp32_index.json- Open Boards Manager, search for
esp32, and install esp32 by Espressif Systems. Our development uploads used package 3.3.12; that records the toolchain used for this build, not a promise about future releases. - Restart the IDE if needed, connect the XIAO with a USB data cable, and select its serial port. Windows will normally show a COM port.
- Select the XIAO_ESP32S3 board from the installed ESP32 package.
The sketch uses the camera, SD, SPI, Wi-Fi, Preferences, and sleep support provided with the ESP32 platform. You should not need a separate generic SD library for this build.
Open, configure, and upload the sketch
Download ESP32_Balloon_Camera_v0.4.2.ino from the linked folder and open it in Arduino IDE. If Arduino asks to move the sketch into a matching folder, accept. Keep the folder and main sketch basename identical:
ESP32_Balloon_Camera_v0.4.2/ESP32_Balloon_Camera_v0.4.2.inoNear the top, fill in the recovery details you want written to the card:
static const char *RECOVERY_CONTACT_NAME = "Your name";
static const char *RECOVERY_CONTACT_EMAIL = "[email protected]";
static const char *RECOVERY_CONTACT_PHONE = "";
static const char *RECOVERY_CONTACT_ADDRESS = "";
static const char *LAUNCH_DATE = "";
Blank fields are omitted. Choose information you are comfortable placing on a recoverable payload. For a different mission directory, change MISSION_DIR and MISSION_LOG together.
| Setting | Value used |
|---|---|
| Board | XIAO_ESP32S3 |
| PSRAM | OPI PSRAM |
| Flash Size | 8MB |
| USB CDC On Boot | Enabled |
| Port | The connected XIAO’s serial port |
| Serial Monitor baud rate | 115200 |
OPI PSRAM matters. Our early “NO-GO CAMERA ERROR” was actually the firmware reporting that PSRAM was not detected. Enabling the correct setting and uploading again cleared that problem.
Click Verify to compile, then Upload to program the board. After upload, open Serial Monitor at 115200 baud. Press Reset once if necessary to see a fresh startup. If the port is missing or upload cannot connect, try a known data cable; the manufacturer’s bootloader procedure is to hold BOOT while connecting USB, release BOOT, select the resulting port, and retry.
What GO FOR LAUNCH means
A successful startup reports PSRAM, mounts the card, initializes the camera, and performs an actual JPEG write-and-reopen check. It then starts the status beacon:
Status beacon: GO FOR LAUNCH (started)

GO FOR LAUNCH
Camera + microSD + JPEG write verified.
Wi-Fi beacon will remain visible for 120 seconds.
Look at your phone’s Wi-Fi network list. You only need to see GO FOR LAUNCH; joining the network is unnecessary. After two minutes, the network disappears and Serial Monitor reports that Wi-Fi is off. Photograph saving continues.
This is a camera preflight result. It does not certify battery endurance, insulation, tracking, the balloon assembly, or the overall launch.
Files on the card
| Path | Purpose |
|---|---|
/balloon/balloon_000001.JPG |
Sequential photographs, including the preflight photograph. |
/balloon/MISSION.CSV |
Mission activity log, readable in Excel or another spreadsheet tool. |
/RECOVERY.txt |
Recovery information, firmware version, build timestamp, and changelog. |
/balloon_RESERVE.BIN |
A 1 MiB emergency space reserve. Leave it in place. |
/balloon/balloon_000123.BAD |
An incomplete newest JPEG quarantined during startup, if detected. |
The CSV records firmware_version, boot_number, uptime_ms, event, image_number, filename, bytes. Its time field is uptime since that boot, not a GPS or calendar timestamp. Each successful capture normally produces a CAPTURE_OK row; the preflight image is recorded as PREFLIGHT_OK.
Recovery when something goes wrong
A failed card mount gets three attempts. On the first recoverable no-go, the camera broadcasts the appropriate error network for two minutes, turns Wi-Fi off, and sleeps for 60 seconds. It wakes and retries. Subsequent failures in that recovery sequence keep Wi-Fi off. If the hardware responds again, preflight runs and photography resumes automatically.
Three consecutive camera-capture failures also trigger recovery. A JPEG-write failure follows recoverable error handling unless the capacity check identifies a full filesystem.
Our latest bench test started with no card installed. After the three failed mount attempts, the firmware went through its error cooldown and timed sleep. On the next recovery cycle it mounted the now-available card, completed preflight, announced GO FOR LAUNCH, and started saving photographs. That directly demonstrated recovery from a missing-card startup condition.
I also learned that pulling the microSD during live operation can make the filesystem or board stop responding. Do not copy that test. Change the card only with USB and battery disconnected. Recovery logic cannot guarantee recovery from every driver hang, electrical failure, or damaged filesystem.
Power loss and a full card
After writing a JPEG, the firmware flushes and closes it, reopens it to verify its size, then appends, flushes, and closes the CSV record. Files are not deliberately left open throughout the flight.
On startup, v0.4.2 checks whether the CSV ends in a newline. If it does not, the firmware terminates the interrupted tail and logs CSV_TAIL_RECOVERED. The partial row is preserved and may need filtering when analyzing the spreadsheet. It also checks the newest JPEG’s start and end markers and quarantines an incomplete file as .BAD. Those markers are a basic boundary check, not a complete JPEG decode.
These measures reduce the fallout from interrupted writes. They do not make FAT32 immune to sudden power loss; the card’s internal buffering and filesystem updates remain outside the sketch’s control.
Storage exhaustion takes a different path. The firmware holds a 1 MiB reserve and stops at a 3 MiB free-space floor. It releases the reserve, attempts a final CARD_FULL log entry, shuts down the camera, unmounts the card, and enters indefinite deep sleep. A legitimately full card needs human intervention.
For scale, a hypothetical average of 150,000 bytes per image at two-second intervals is about 270 MB per hour, before filesystem overhead and logging. A 32GB card provides substantial headroom for an hours-long flight, but scene detail changes JPEG size. Battery endurance and cold-temperature behavior need actual testing.
Battery operation, charging, and shutdown
With a charged battery connected, unplugging USB lets the camera continue on battery power. Verify that handoff and run the assembled payload for the expected mission duration plus a margin; open photographs from throughout the run afterward.
The XIAO supports charging through USB. Active photography consumes power, so a plugged-in camera is not automatically charging efficiently. For the current firmware’s lower-power charging workflow, fully disconnect power, remove the card, then reconnect the battery and USB. The missing-card condition produces its initial error beacon and then periodic recovery attempts separated by timed sleep. This is not a dedicated charge mode, and the complete Sense assembly still draws power.
Before reinstalling the card, disconnect both power sources. To stop a normal run, disconnect USB if present, then disconnect the battery. If watching Serial Monitor, do so shortly after a saved-image message and allow a brief moment for the log append. That improves timing but cannot guarantee a perfectly clean power cut. Remove the card only after power is fully off.
Checks before closing the payload
- Verify the firmware version and successful preflight on a fresh boot.
- Confirm GO FOR LAUNCH disappears after two minutes while photographs continue.
- Run a battery-only endurance test and inspect the resulting images and CSV.
- Check image orientation. This build uses horizontal mirror correction and no vertical flip for our USB-C-down mounting; adjust the sensor settings if your mounting differs.
- Confirm your recovery information appears in
RECOVERY.txt. - Remove
TEST_MODE.TXTbefore normal operation. - Secure battery wiring, protect the battery, keep the lens unobstructed, and check the complete payload’s weight and tethering.
- Evaluate insulation and temperature performance separately. A room-temperature recovery test does not establish cold-weather reliability.
For controlled fault tests, the firmware recognizes SD, CAMERA, WRITE, or FULL in a root-level TEST_MODE.TXT file. Create or remove that file using a card reader while the camera is fully powered down. FULL exercises the terminal storage-shutdown path, so remove the test file and restart afterward.
From the bench to the balloon
The interesting part of this build turned out to be the behavior around the photographs: proving a write before announcing success, retrying temporary faults, preserving evidence after interrupted writes, and keeping useful diagnostics available without leaving Wi-Fi running throughout the mission.
The next chapter is packaging, endurance testing, and seeing what the camera brings home. Ideally, clouds and the horizon. Realistically, probably some Virginia grass too. The camera has no artistic standards.
If you build your own, start with the public v0.4.2 sketch, add your recovery details, and test the complete assembly before sending it somewhere you cannot reach the Reset button.